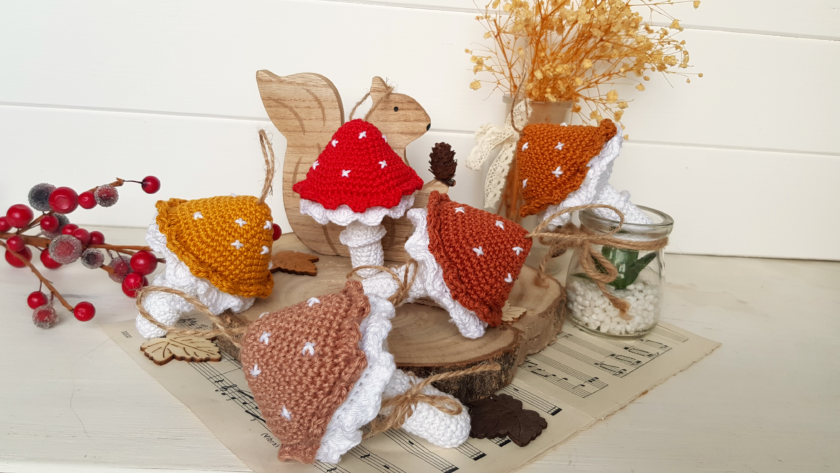
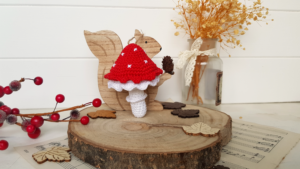
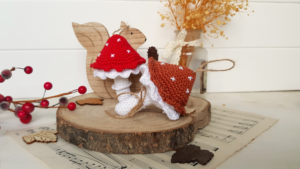
This mushroom decoration is very quick and easy to make and looks absolutely stunning. The best part is that you can use any colour to make it to match the different season or themes you are using.
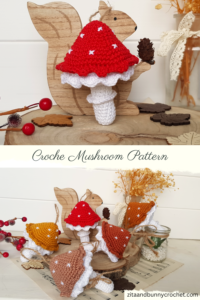
Pin it now, make it later!
Crochet mushrooms are very popular these days. They are good to decorate your house, use them as rattles for babies, put them on with your keys as a key ring and so on. The ideas are endless. I came up with this pattern, because I wanted something new as a decoration on my craft shelf. I made the red one, very old fashioned, but I enjoyed it a lot so I quickly had to make more. As I love autumn colours I grabbed everything from my yarn stash to make a few.
I hope you will love to make it as much as I did.
Caution!
Please be very cautious when you make toys for babies or children under the age of 3. If you sew parts on it, make sure they are secure and safe.
I recommend, to embroider the eyes, as the plastic safety eyes can be dangerous. My tutorial for embroidery eyes can be found here.
|
All Zita and Bunny designs are original. Sales of the finished items are encouraged, provided they are handmade by yourself in a limited number, but please give credit to the designer. No mass production. Copyright © 2021 by Zita Renata Elek (Zita and Bunny).All rights reserved. This pattern is for personal use only. No part of it may be reproduced, resold, translated, published, altered, shared or posted in any way. |
**This blog contains affiliate links for products I use, believe in, or recommend. This means I will earn a small commission if you make a purchase from one of their links, and of course it is at no extra cost for you. It helps me to keep Zita and Bunny going and to keep publishing free patterns for you. You can check my full disclosure here. **
You can watch my video here:
Level: Beginner friendly
Size of the finished toy if using the same yarn and hook size: 10cm
Please keep in mind, that I am using the yarn under technique. With this, the stitches are smaller and tighter, making the finished product smaller in size. If you yarn over, your finished product will be bigger. If you would like to achieve the same size as me and you yarn over, consider using a size smaller hook.
Abbreviations:
sc – single crochet
inc – increase
dec – decrease
hdc – half double crochet
dc – double crochet
ch – chain
st – stitch
sl st – slip stitch
MR – magic ring
FLO – front loop only
BLO – back loop only
sts – stitches
(…) – Repeat instructions for the amount of times given
Materials you need for this mushroom:
Affiliate links for the US:
1. Cotton yarn,
I used:
A – Schachenmayr Catania – 426 Fuchs
– Schachenmayr Catania – 115 Red
– Schachenmayr Catania – 383 Zimt
– Schachenmayr Catania – 249 Gold
– Schachenmayr Catania – 437 Sunkissed
B– Scheepjes Catona – 106 Snow White
4. Scissors
6. Pins
7. Stuffing
8. Jute String
9. If you are making a rattle, you will need a wooden ring and a rattle inserter
Affiliate links for the UK:
1. CottonYarn:
A – Schachenmayr Catania – 426 Fucha
– Schachenmayr Catania – 115 Red
– Schachenmayr Catania – 383 Zimt
– Schachenmayr Catania – 249 Gold
– Schachenmayr Catania – 437 Sunkissed
B – Scheepjes Catona – 106 Snow White
3. Tapestry Needle
4. Scissors
6. Pins
7. Stuffing
8. Jute String
9. If you want to make it a rattle, you will need a wooden ring and a rattle inserter

Stem:
Use colour B
Rnd 1: 6sc in a MR [6]
Rnd 2: (inc) x6 [12]
Rnd 3-10: sc in every st around [12]
Rnd 11: Using BLO sc in every st around [12]
Rnd 12-14: sc in every st around [12]
Rnd 15: Using FLO (sc, inc) x6 [18]
Rnd 16: (2sc, inc) x6 [24]
Rnd 17: (3sc, inc) x6 [30]
Rnd 18: (4sc, inc) x6 [36]
Rnd 19: (5sc, inc) x6 [42]
Rnd 20: (6sc, inc) x6 [48]
Rnd 21: using BLO (7sc, inc) x6 [54]
Fasten off yarn, stuff the stem
Bottom skirt:
Use colour A
Holding mushroom upside down, connect yarn in last FLO made in round 21.
(Sc in first stitch, 2 hdc in next st, 2 dc in next st, 2 hdc in next st) 12 times
Sl st to first sc
Fasten off yarn

Ring:
Holding stem upside down, connect yarn in last FLO made in round 11, ch1 and put 2sc in every st. sl st to first stitch. [24]
Fasten off yarn, weave in the ends.
If you decide to use the jute string:
With the tapestry needle pull the string through the first stitch, from the top of the stitch towards the bottom. Leave enough tail to tie it up later. Pull the string through all FLO stitches from the top towards the bottom. When you get to the end, tie the two tails up in a nice bow.
Cap:
Use colour B
Rnd 1: 6sc in a MR [6]
Rnd 2: (inc) x6 [12]
Rnd 3: (sc, inc) x6 [18]
Rnd 4: sc in every st [18]
Rnd 5: (2sc, inc) x6 [24]
Rnd 6: sc in every st around [24]
At this point you need to connect the string or the keychain to the top.
Rnd 7: (3sc, inc) x6 [30]
Rnd 8: sc in every st [30]
Rnd 9: (4sc, inc) x6 [36]
Rnd 10: (5sc, inc) x6 [42]
Rnd 11: (6sc, inc) x6 [48]
Rnd 12: (7sc, inc) x6 [54]
Remove your hook, but do not fasten off yarn yet. Using white yarn embroider crosses on the cap like you were doing cross stitches. You can put as many as you like.
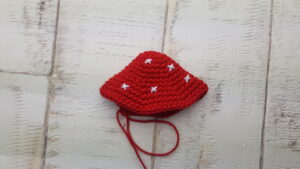
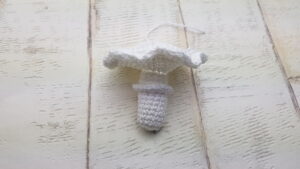
Top Skirt:
Continue with colour B
Tip: Stuff as you go and if you are making a rattle, insert the rattle inserter before you close the cap.
Insert your hook back and continue from the last stitch of the cap. Place the cap on the stem and hold the two pieces together, Working through both sides and matching stitches
(sc in next st, 2hdc in next st, 2 dc in next, 2 hdc in next st) 13 times, put 2 hdc in last two sts, sl st to first sc
Fasten off yarn, weave in the ends.
Congratulation, you finished the mushroom!
I would love to see your finished crochet mushroom décor. Please share it with me on Instagram. You can find me as @zitaandbunny or click on this icon. ![]()

Check out some of my other patterns:
Nashi The Pear Decoration
Donguri The Acorn decoration