
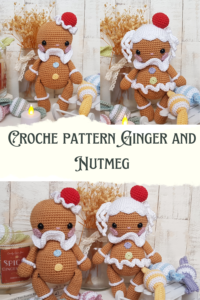
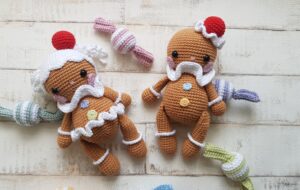
Are you looking for an easy crochet gingerbread pattern? Then look no further as I have a great pattern that is not only easy, but quick and free too. You can create two different dolls with the same pattern.
Pin it now, make it later!

I always get emotional during the festive season. When I was young, every Christmas my grandparents came for dinner and they always slept over. Usually they never did that, as they lived in the same town as us, but at Christmas they did. It was so fun and full of laughter.
I try to create the same joy for my children. As I am not a big baker, really I don’t bake at all, but around Christmas we do bake gingerbread cookies. Sometimes we just do it for the smell but it is always full of excitement. My daughter is the main baker, I am the assistant and my son is the one who walks in and out of the kitchen, telling us what to do, does the quality checks and eats all the cookies. You know how it works.

The story of Ginger and Nutmeg, the gingerbread siblings:
There is a little town where all the Zita and Bunny creations live in peace and harmony. This town is called Granny Square. In Granny Square everyone liked and baked pies at least once a day, but preferably more. The whole town smelt like a big delicious pie. On one special Christmas day, Ginger and Nutmeg, the little gingerbread twins were born. For a change the town smelt like gingerbread and everyone liked it. All the residents payed a visit to the Biscuit family to celebrate their joy, hoping to get a welcome gingerbread biscuit with a cup of hot chocolate.
Despite being twins, Ginger and Nutmeg couldn’t be any different. Ginger was calm, she loved to read and play quietly. Nutmeg was loud, always jumped up and down and played with noisy toys. The twins loved each other a lot and sometimes fell asleep holding hands. Their mother, Mrs Biscuit was the happiest cookie ever.

Caution!
Please be very cautious when you make toys for babies or children under the age of 3. If you sew parts on it, make sure they are secure and safe.
I recommend, to embroider the eyes, as the plastic safety eyes can be dangerous. My tutorial for embroidery eyes can be found here
|
All Zita and Bunny designs are original. Sales of the finished items are encouraged, provided they are handmade by yourself in a limited number, but please give credit to the designer. No mass production. Copyright © 2021 by Zita Renata Elek (Zita and Bunny). All rights reserved. This pattern is for personal use only. No part of it may be reproduced, resold, translated, published, altered, shared or posted in any way. |
**This blog contains affiliate links for products I use, believe in, or recommend. This means I will earn a small commission if you make a purchase from one of their links, and of course it is at no extra cost for you. It helps me to keep Zita and Bunny going and to keep publishing free patterns for you. You can check my full disclosure here. **


Level: easy
Size if the finished toy if using the same yarn and hook size: approximately 22cm
Abbreviations:
MR – magic ring
sc – single crochet: Insert hook into stitch, yarn over, pull up a loop (2 loops on hook). Yarn over, pull through both loops on hook. 1 single crochet completed.
inc – increase: put two stitches into the same stitch
dec – decrease: : Insert your hook into the front loop only of the next stitch (2 loops on your hook). Insert your hook into the front loop only of the following stitch (3 loops on your hook). Yarn over, pull through all 3 loops.
hdc – half double crochet: Yarn over, insert hook into next space, yarn over, pull up a loop (3 loops on hook). Yarn over pull through all 3 loops
hdc-inc: half double crochey increase: put two hdc in same stitch
BLO – Back loop only: use only the back loop of the stitch
FLO – Front loop only: use only the front loop of the stitch
ch – chain
st – stitch
sl st – slip stitch: insert hook into stitch, yarn over, pull up a loop, you will have 2 loops on your hook. Pull the first loop through the second loop
(…) – Repeat instructions for the amount of times given
Special Stitch:
Standing sc – standing single crochet
1: Start with a slip knot already on your hook.
2: Insert your hook into whichever stitch you wish to start in.
3: Yarn over, and pull up a loop.
4: Yarn over again and pull through both loops on your hook.

Materials you need for this crochet llama:
Affiliate links for the US:
1. Cotton yarn,
I used:
A – Schachenmayr Catania – 179 Camel
B – Scheepjes Catona – 106 Snow White
C – Scheepjes Catona – 115 Hot Red
D – Schachenmayr Catania – 423 Vintage
For the buttons I used
E – Scheepjes Catona – 392 Lime Juice, 399 Lilac Mist, 173 Bluebell,
Safran – 10 Vanilla Cream
For the candies I used
F – Scheepjes Catona – 173 Bluebell, 392 Lime Juice, 299 Lilac Mist, 402 Silver Green
Safran – 10 Vanilla Cream
Schachenmayr Catania – 423 Vintage
3. Safety eyes, 10mm
5. Scissors
7. Pins
8. Stuffing
9. Thread and needle to sew the button on
10: Button – 15mm
Affiliate links for the UK:
1. CottonYarn:
A – Schachenmayr Catania – 179 Camel
B – Scheepjes Catona – 106 Snow White
C – Scheepjes Catona – 115 Hot Red
D – Schachenmayr Catania – 423 Vintage
For the buttons I used
E – Scheepjes Catona – 392 Lime Juice, 399 Lilac Mist, 173 Bluebell,
Safran – 10 Vanilla Cream
For the candies I used
F – Scheepjes Catona – 173 Bluebell, 392 Lime Juice, 299 Lilac Mist, 402 Silver Green
Safran – 10 Vanilla Cream
Schachenmayr Catania – 423 Vintage
5. Scissors
7. Pins
8. Stuffing
9. Thread and needle to sew the button on
10. Button – 15mm


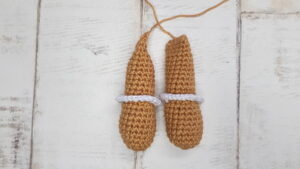
Arms: (make 2)
Use colour A
Tip: always change colour in the last stitch of previous round
Rnd 1: 5sc in a MR (5)
Rnd 2: inc in every st (10)
Rnd 3: (sc in next st, inc in next) 5 times (15)
Rnd 4-7: sc in every st around (15) (4 rounds)
Rnd 8: (sc in next st, dec) 5 times (10)
Stuff the arms up to this point, do not stuff the rest
Rnd 9: using BLO, sc in every st (10)
Rnd 10-19: sc in every st (10) (10 rounds)
Press both layers of arms together so that they lay flat on top of each other, aligning the stitches side by side. Sc together the opposite stitches. I put 4sc. Fasten off yarn on both arms, leaving a long tail to sew.
Details on Arms:
Use with colour B
Holding arms upside down, connect yarn with a standing sc in last FLO made in round 9 and sc in same st. inc in next 9 sts, sl st to first stitch (20)
Fasten off yarn, weave in the ends.
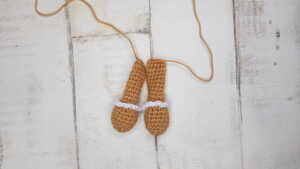

Legs: (make 2)
Use colour A
Rnd 1: 6sc in a MR (6)
Rnd 2: inc in each st (12)
Rnd 3: (sc in next st, inc in next st) 6 times (18)
Rnd 4-10: sc in every st around (18) (7 rounds)
Rnd 11: sc in next 3 sts, dec, sc in next 2 sts, (dec) 2 times, sc in next 2 sts, dec, sc in last 3 sts (14)
Rnd 12: using BLO, sc in every st around (14)
Rnd 13-19: sc in every st around (14) (7 rounds)
Stuff the legs up to this point, do not stuff the rest
Rnd 20-21: sc in every st (14)
Rnd 22: (sc in next 5 sts, dec) 2 times (12)
Rnd 23: sc in every st around (12)
Rnd 24: sc in next 3 sts, to make sure the 2dec we did
in round 7 will be the front of the leg. If you need to make more sts, do so.
Press both layers of legs together so that they lay flat on top of each other, aligning the stitches side by side. Sc together the opposite stitches. I put 5sc, but you can put as many as you wish, as it does not make any difference. Fasten off yarn on both legs and leave a long tail to sew.
Details on Legs:
Use colour B
Holding legs upside down, connect yarn with a standing sc in last FLO made in round 12 and sc in same st. inc in next 13 sts, sl st to first st (28)
Fasten off yarn, weave in the ends.

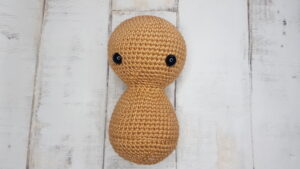
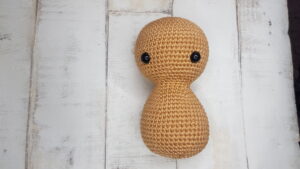
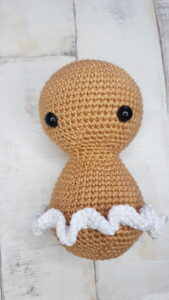
Head and Body:
Use colour A
For both:
Rnd 1: 8sc in a MR (8)
Rnd 2: inc in every st (16)
Rnd 3: (sc in next st, inc in next) 8 times (24)
Rnd 4: (sc in next 3 sts, inc in next) 6 times (30)
Rnd 5: (sc in next 4 sts, inc in next) 6 times (36)
Rnd 6: (sc in next 5 sts, inc in next) 6 times (42)
Rnd 7: (sc in next 6 sts, inc in next) 6 times (48)
Rnd 8: (sc in next 7 sts, inc in next) 6 times (54)
Rnd 9-18: sc in every st around (54) (10 rounds)
Rnd 19: (sc in next 7 sts, dec) 6 times (48)
Rnd 20: (sc in next 4 sts, dec) 8 times (40)
Rnd 21: (sc in next 3 sts, dec) 8 times (32)
Rnd 22: (sc in next 2 sts, dec) 8 times (24)
Place safety eyes between round 16 – 17, leaving 12 stitches between them. Stuff the head firm.
Rnd 23: (sc in next 4 sts, dec) 4 times (20)
Rnd 24: sc in every st around (20)
Rnd 25: (sc in next 4 sts, inc in next) 4 times (24)
Rnd 26: (sc in next 3 sts, inc in next) 6 times (30)
Rnd 27: (sc in next 4 sts, inc in next) 6 times (36)
Rnd 28: (sc in next 5 sts, inc in next) 6 times (42)
Rnd 29: (sc in next 20 sts, inc in next) 2 times (44)
Rnd 30-31: sc in every st (44) (2 rounds)
Rnd 32: (sc in next 10 sts, inc in next) 4 times (48)
The next 8 rounds will be different for both dolls, but after it will be the same again.
For Nutmeg:
Rnd 33-40: sc in every st around (48) (8 rounds)
For Gingie:
Rnd 33-37: sc in every st around (48) (5 rounds)
Rnd 38: using BLO sc in every st around (48)
Rnd 39-40: sc in every around (48) (2 rounds)
For both:
Rnd 41: (sc in next 6 sts, dec) 6 times (42)
Rnd 42: (sc in next 5 sts, dec) 6 times (36)
Rnd 43: (sc in next 4 sts, dec) 6 times (30)
Rnd 44: (sc in next 3 sts, dec) 6 times (24)
Stuff the body firm
Rnd 45: (sc in next 2 sts, dec) 6 times (18)
Rnd 46: (sc in next st, dec) 6 times (12)
Rnd 47: (dec) 6 times (6)
Fasten off yarn, close the hole.

Cheeks: (make 2)
Use colour D
Rnd 1: 6sc in a MR (6)
Rnd 2: inc in every st, sl st to first st (12)
Fasten off yarn, leaving a long tail to sew them to the head
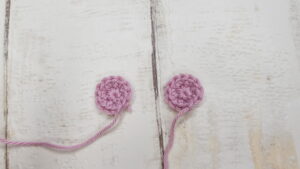

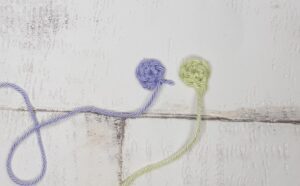
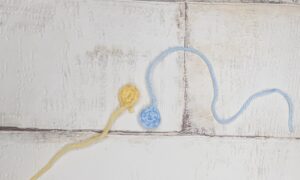
Buttons: (make 2)
Use colour E
Rnd 1: 6sc in a MR, sl st to first sc (6)
Fasten off yarn, leaving a long tail to sew them to the body.


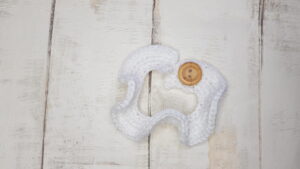
Scarves:
Use colour B
Rnd 1: ch 37, starting from eighth chain from hook,sc in all 30 sts (30)
The hook we created will be the button hole
Rnd 2: ch1 turn, hdc-inc in every st, sl st to first st (60)
Rnd 3: ch1 turn, (hdc in next st, hdc-inc in next) 30 times (90)
Fasten off yarn, weave in the ends. Sew a button on the scarf.

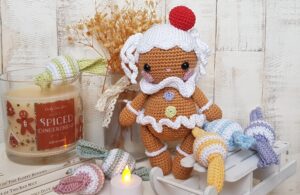
FOR GINGIE:
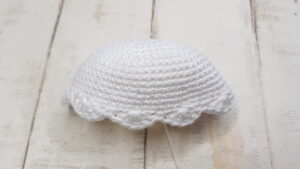
Skirt:
Use colour B
Rnd 1: Holding body upside down, connect yarn with a standing sc in the last FLO made in round 38 on the body. Sc in next 47 sts (48)
Rnd 2: inc in every st (96)
Rnd 3: (sc in next st, inc in next) 48 times (144)
Fasten off yarn, weave in the ends.

Hair:
Use colour B
Rnd 1: 8sc in a MR (8)
Rnd 2: inc in every st (16)
Rnd 3: (sc in next st, inc in next) 8 times (24)
Rnd 4: (sc in next 3 sts, inc in next) 6 times (30)
Rnd 5: (sc in next 4 sts, inc in next) 6 times (36)
Rnd 6: (sc in next 5 sts, inc in next) 6 times (42)
Rnd 7: (sc in next 6 sts, inc in next) 6 times (48)
Rnd 8: (sc in next 7 sts, inc in next) 6 times (54)
Rnd 9-16: sc in every st around (54) (8 rounds)
Rnd 17: (sc in next st, skip 2 sts, 5dc in next stitch, skip next 2 sts) 9 times
Fasten off yarn, leaving a long tail to sew it to the head.

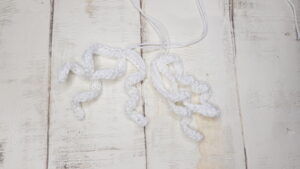
Pony Tail:
Use colour B
Tip: Before you make the MR make sure you leave a long tail as you will need it to sew the pony tail to the hair.
Only close the MR after the last hair piece is made.
Start with a MR, (chain 25, starting from 2nd chain from hook, sc in next 24 sts, sl st to MR) 3 times
Close the ring, fasten off yarn, leaving a long tail to sew it to the hair
Twist the hair pieces so they become curly.

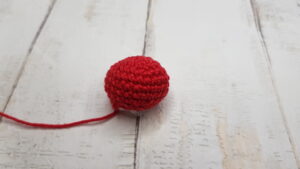
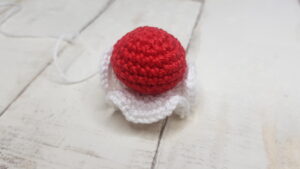
Cherry:
Use colour C
Rnd 1: 6sc in a MR (6)
Rnd 2: inc in every st (12)
Rnd 3: (sc in next st, inc in next) 6 times (18)
Rnd 4: (sc in next 2 sts, inc in next) 6 times (24)
Rnd 5-7: sc in every st around (24) (3 rounds)
Rnd 8: (sc in next 2 sts, dec) 6 times (18)
Rnd 9: (sc in next st, dec) 6 times (12)
Fasten off yarn, leaving a long tail to sew it to the head

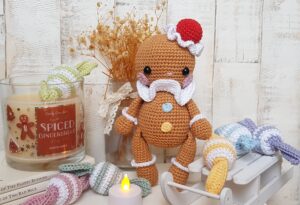
FOR NUTMEG:
Cherry:
Start with colour C
Rnd 1: 6sc in a MR (6)
Rnd 2: inc in every st (12)
Rnd 3: (sc in next st, inc in next) 6 times (18)
Rnd 4: (sc in next 2 sts, inc in next) 6 times (24)
Rnd 5-7: sc in every st around (24) (3 rounds)
Rnd 8: ( sc in next 2 sts, dec) 6 times (18)
Rnd 9: (sc in next st, dec) 6 times, in last st change to colour B (12)
Rnd 10: Using FLO inc in every st (24)
Rnd 11: inc in every st (48)
Rnd 12: (sc in next st, inc in next) 24 times (72)
Sl st to first sc, fasten off yarn, leaving a long tail to sew it to the head.
FOR BOTH:
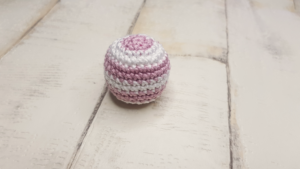
Candy:
Start with colour F
Rnd 1: 6 sc in a MR (6)
Rnd 2: inc in every st, in last st change to colour B (12)
Rnd 3: (sc in next st, inc in next) x6 (18)
Rnd 4: (sc in next 2 sts, inc in next) x6, in last st change to colour F (24)
Rnd 5-6: sc in every st, in last st change to colour B (24) 2 rounds
Rnd 7-8: sc in every st, in last st change to colour F (24) 2 rounds
Rnd 9-10: sc in every st, in last st change to colour B (24) 2 rounds
Rnd 11: sc in every st (24)
Rnd 12: (sc in next 2 sts, dec) x6, in last st change to colour F (18)
Rnd 13: (sc in next st, dec) x6 (12)
Rnd 14: (dec) x6 (6)
Fasten off yarn, close the hole.

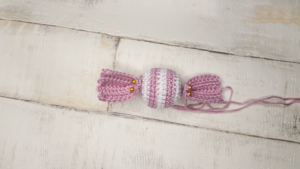
Wrapper: (make 2)
Use colour F
Chain 11
Rnd 1: starting from second chain from hook, sc in every st, chain 1 and turn (10)
Rnd 2-4: Using BLO hdc in every st, ch1 and turn (10) 3 rounds
Rnd 5: sc in every st (10)
Fasten off yarn, leaving a long tail.
Using a tapestry needle, pull the yarn through the stitches on the shorter side and pull the yarn tight. Using the same string, sew the two sides together at the bottom.
Sew the two wrappers to the two sides of the candy.

Assembling Ginger and Nutmeg, the Gingerbread Siblings:
1: Sew the arms to the body between row 25-25
2: Sew the legs to the body between row 38-39
3. Using pink yarn, embroider the nose over 2 sts between the eyes, between round 17-18
4. Sew the cheeks on the head between round 17-22
5. Sew the buttons on the body
6. For Ginger sew the hair on the had and the ponytails on the hair.
7. Sew the cherry on top of the head. For Nutmeg sew it where the cherry and the whipped cream meet


Congratulation, you finished Ginger and Nutmeg, the gingerbread siblings!

![]()
I would love to see your finished crochet gingerbread boy and girl. Please share it with me on Instagram. You can find me as @zitaandbunny or click on this icon. ![]()


