

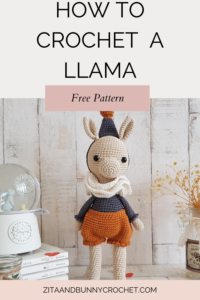
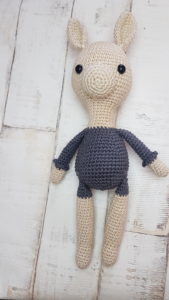
Are you looking for an easy crochet llama pattern? Then look no further as I have a great pattern that is not only easy, but quick and free too.
Pin it now, make it later!

I remember the first time I saw a real llama. It was in a zoo, and I couldn’t stop laughing. It wasn’t a bad laugh, but a good one. It was facing me and his face was so cute, I wanted to take him home. Although I was so scared of it spitting on me, so I quickly moved away from him.
In Peru, llama fleece has been shorn and used in textiles for an extremely long time. Llama wool is light, warm and water-repellent. As a crocheter all I can think of is yarn while looking at them and how I would like to crochet a toy with their yarn.
Since I learnt to crochet I always wanted to make a llama, and I am so happy finally I did it. This pattern is not as easy as most of my patterns, but just imagine how cute it would look in a nursery room.
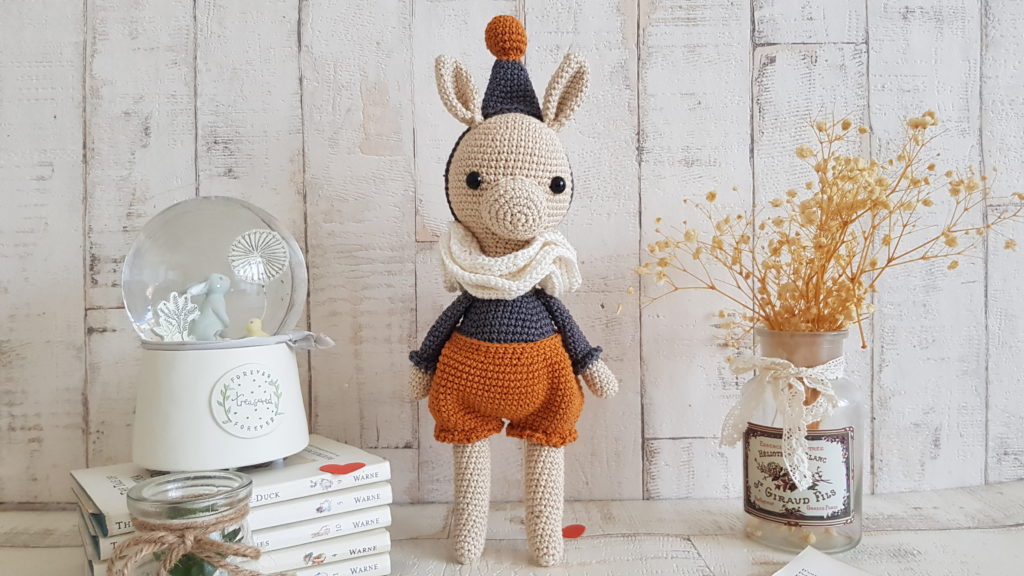
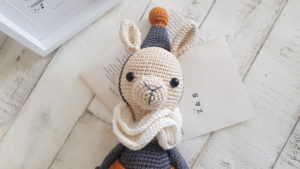
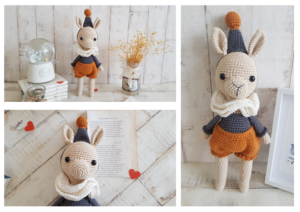
The story of Bruno, the Llama:
Bruno is the smallest in his family with 3 sisters and 2 brothers. Although he is the youngest out of his friends, he is definitely the tallest. He is very athletic and likes to perform circus acts. He can entertain his friends and family for hours, while dreaming about being on the big stage one day. His mum made him a hat and three scarves to wear when he is performing so he looks like a real star.

Caution!
Please be very cautious when you make toys for babies or children under the age of 3. If you sew parts on it, make sure they are secure and safe.
I recommend, to embroider the eyes, as the plastic safety eyes can be dangerous. My tutorial for embroidery eyes can be found here
|
All Zita and Bunny designs are original. Sales of the finished items are encouraged, but please give credit to the designer. Copyright © 2021 by Zita Renata Elek (Zita and Bunny). All rights reserved. This pattern is for personal use only. No part of it may be reproduced, resold, translated, published, altered, shared or posted in any way. |
**This blog contains affiliate links for products I use, believe in, or recommend. This means I will earn a small commission if you make a purchase from one of their links, and of course it is at no extra cost for you. It helps me to keep Zita and Bunny going and to keep publishing free patterns for you. You can check my full disclosure here. **


Level: intermediate
Size if the finished toy if using the same yarn and hook size: approximately 29cm
Abbreviations:
MR – magic ring
sc – single crochet: Insert hook into stitch, yarn over, pull up a loop (2 loops on hook). Yarn over, pull through both loops on hook. 1 single crochet completed.
inc – increase: put two stitches into the same stitch
dec – decrease: : Insert your hook into the front loop only of the next stitch (2 loops on your hook). Insert your hook into the front loop only of the following stitch (3 loops on your hook). Yarn over, pull through all 3 loops.
hdc – half double crochet: Yarn over, insert hook into next space, yarn over, pull up a loop (3 loops on hook). Yarn over pull through all 3 loops
ch – chain
st – stitch
sl st – slip stitch: insert hook into stitch, yarn over, pull up a loop, you will have 2 loops on your hook. Pull the first loop through the second loop
(…) – Repeat instructions for the amount of times given
Special Stitch:
Standing sc – standing single crochet
1: Start with a slip knot already on your hook.
2: Insert your hook into whichever stitch you wish to start in.
3: Yarn over, and pull up a loop.
4: Yarn over again and pull through both loops on your hook.

Materials you need for this crochet llama:
Affiliate links for the US:
1. Cotton yarn,
I used:
A – Scheepjes Catona – 404 English Tea
B – Scheepjes Catona – 501 Anthracite
C – Scheepjes Catona – 383 Ginger Gold
D- Scheepjes Catona – 501 Bridal White
3. Safety eyes, 10mm
5. Scissors
7. Pins
8. Stuffing
9. embroidery thread – I used a dark grey one (optional to embroider the nose)
10: 3 Buttons – 15mm
Affiliate links for the UK:
1. CottonYarn:
A – Scheepjes Catona – 404 English Tea
B – Scheepjes Catona – 501 Antracite
C – Scheepjes Catona – 383 Ginger Gold
D- Scheepjes Catona – 105 Bridal White
5. Scissors
7. Pins
8. Stuffing
9. Embroidery thread – I used a dark grey one
10. Button – 15mm


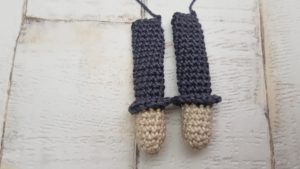
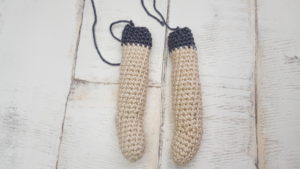
Arms: (make 2)
Use colour A
1: 5sc in a MR [5]
2: (inc) x5 [10]
3 – 7: sc in every st around, in the last stitch change to colour B [10]
8: sc in every st around [10]
9: Using BLO sc in every st around [10]
10 – 21: sc in every st around [10]
Fasten off yarn, leave a long tail to sew.
Holding arms upside down, connect yarn with a standing sc in the last FLO made in row 9.
22: (ch1, sc) x9, ch1, sl st to first sc.
Fasten off yarn, weave in the ends.


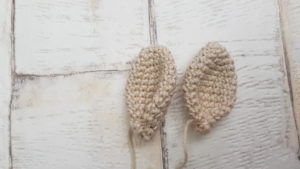
Ears: (make 2)
Use colour A
1: 6sc in a MR [6]
2: (sc, inc) x3 [9]
3: (2sc, inc) 3 [12]
4: (3sc, inc) x3 [15]
5: (4sc, inc) x3 [18]
6 – 10: sc in every st around [18]
11: (4sc, dec) x3 [15]
12: (3sc, dec) x3 [12]
13: (2sc, dec) x3 [9]
Fasten off yarn.
Fold ears in half and sew together the bottom part.

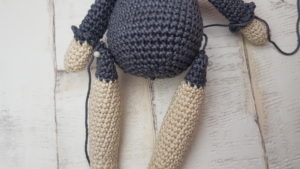
Legs: (make 2)
Use colour A
1: 6sc in a MR [6]
2: (sc, inc) x3 [9]
3: (2sc, inc) x3 [12]
4 – 7: sc in every st around [12]
8: sc in next 7sts, ch1, turn [7]
9: skip first 2 sts, sc in next 5 sts, ch1, turn [5]
10: skip first 2 sts, sc in next 3 sts
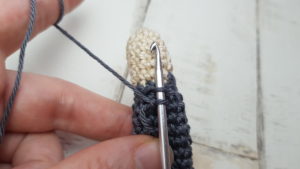
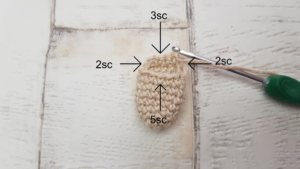
11: put 2 sc, on the side of the last 3 rows, sc in next 5sts, put 2 sc on the other side of the last 2 rows, and sc in last 3 sts [12] – see photo for clear instruction
12: (5sc, inc) x2 [14]
13 – 27: sc in every st around, in the last st change to colour B [14]
Stuff the legs up to this point, do not stuff the rest
28 – 30: sc in every st around [14]
31: (5sc, dec) x2 [12]
32: (4sc, dec) x2 [10]
Fasten off yarn, leaving a long tail to sew


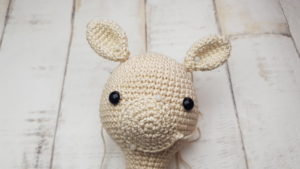
Muzzle:
Use colour A
1: 6sc in a MR [6]
2: (inc) x6 [12]
3: (sc, inc) x6 [18]
4: (2sc, inc) x6 [24]
5 – 7: sc in every st around [24]
Fasten off yarn, leave a long tail to sew.

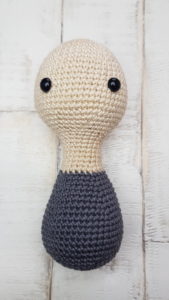
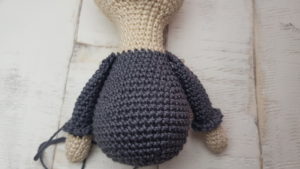
Head and Body:
Start with colour A
1: 6sc in a MR [6]
2: (inc) x6 [12]
3: (sc, inc) x6 [18]
4: (2sc, inc) x6 [24]
5: (3sc, inc) x6 [30]
6: (4sc, inc) x6 [36]
7: (5sc, inc) x6 [42]
8: (6sc, inc) x6 [48]
9 – 12: sc in every st around [48]
13: (7sc, inc) x6 [54]
14 – 19: sc in every st around [54]
20: (7sc, dec) x6 [48]
21: (6sc, dec) x6 [42]
22: (5sc, dec) x6 [36]
23: (4sc, dec) x6 [30]
Insert safety eyes between row 15 – 16, leaving 12 sts between them
34: (3sc, dec) x6 [24]
35: (4sc, dec) x4 [20]
36 – 41: sc in every st around [20]
42: (4sc, inc) x4 [24]
43: sc in every st around, in the last st change to colour B [24]
44: (5sc, inc) x4 [28]
45: sc in every st around [28]
46: (6sc, inc) x4 [32]
47: sc in every st around [32]
48: (7sc, inc) x4 [36]
49: sc in every st around [36]
50: (8sc, inc) x4 [40]
51: (9sc, inc) x4 [44]
52 – 58: sc in every st around [44]
59: (20sc, dec) x2 [42]
60: (5sc, dec) x6 [36]
61: (4sc, dec) x6 [30]
62: (3sc, dec) x6 [24]
63: (2sc, dec) x6 [18]
64: (sc, dec) x6 [12]
65: (dec) x6 [6]
Fasten off yarn, weave in the ends.

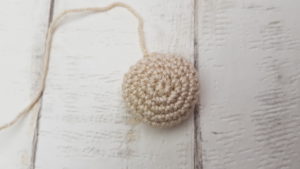
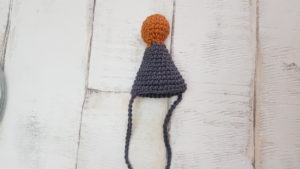
Hat:
Start with colour C
1: 6sc in a MR [6]
2: (inc) x6 [12]
3: (sc, inc) x6 [18]
4 – 6: sc in every st around [18]
7: (sc, dec) x6 [12]
8: (dec) x6 [6]
Stuff the hat up to this pint, do not stuff the rest
9: (inc) x6, in the last st change to colour B [12]
10: sc in every st around [12]
11: (3sc, inc) x3 [15]
12: sc in every st around [15]
13: (4sc, inc) x3 [18]
14: sc in every st around [18]
15: (5sc, inc) x3 [21]
16: sc in every st around [21]
17: (6sc, inc) x3 [24]
18: sc in every st around [24]
If you want to sew the hat to the head, than fasten off yarn and leave a long tail to sew.
If you want the hat to be removable, sl st to next st, ch 50, skip 11 sts, sl st to next st. Fasten off yarn, weave in the ends.

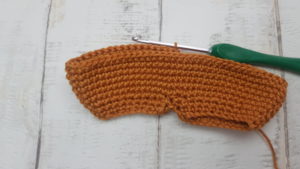
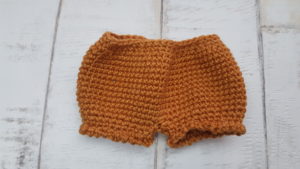
Trousers:
Use colour C
Leg1:
1: ch24, sl st to 1st st to form a ring [24]
2: ch1, (does not count as a st) sc in same st. sc in next 23 sts [24]
Do not sl st, start working in continuous rounds.
3: sc in every st around [24]
On 1st leg fasten off yarn, weave in the ends
Leg 2:
Repeat row 1- 3, but do not cut yarn off, continue with row 4
4: sc in the first stitch on first leg, inc in next, (sc, inc) x11, On second leg, (sc, inc) x12 [72]
5 – 15: sc in every st around [72]
16: (sc, dec) x24 [48]
19: (4sc, dec) x8 [40]
20: sc in every st around [40]
Fasten off yarn, weave in the ends.

Ruffle on trousers:
Working on the leg of the trousers, hold the trousers upside down, connect yarn into any unused loops on the foundation chain with a standing sc, ch1 (sc, ch1) x23, sl st to 1st sc, fasten off yarn, weave in the end.
Repeat it on the second leg.

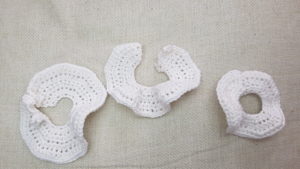
Scarves:
Use colour D
Tip: ch1 at the beginning of every round does not count as a stitch
scarf 1:
ch 31, starting from 8th stitch from hook,
1: (hdc, inc) x12, ch1, turn [36]
2: (2hdc, inc) x12, ch1, turn [48]
3: (3hdc, inc) x12 [60]
fasten off yarn, weave in the ends.
Scarf 2:
Repeat row 1 – 3 of scarf 1, but instead of cutting yarn, ch1 and turn
4: (4hdc, inc) x12 [72]
Fasten off yarn, weave in the ends.
Scarf 3:
Repeat row 1 – 4 of scarf 2, but instead of cutting yarn, ch1 and turn,
5: (5hdc, inc) x12 [84]
Fasten off yarn, weave in the ends.
Sew a button on all of the scarves.

Assembling Bruno, the Llama:
1: Sew the arms to the body between row 44 – 45
2: Sew the legs to the body between row 59 – 60
3: Sew the hat to the head if you wish. (optional)
4: Sew the ears on the head by rows 6-7 (if you did sew the hat on, it might be a bit lower.)
5: sew the muzzle on the head between the 2 eyes. the top of the muzzle should be between row 14-15
6: embroider the nose on the muzzle in a Y shape, if you wish. (optional)


Congratulation, you finished Bruno, the Llama!
![]()

I would love to see your finished crochet llama, Bruno. Please share it with me on Instagram. You can find me as @zitaandbunny or click on this icon. ![]()


