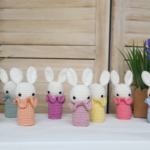
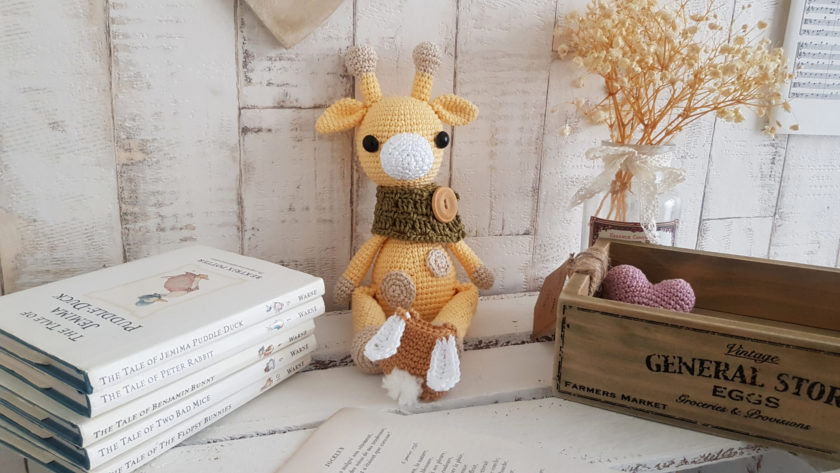
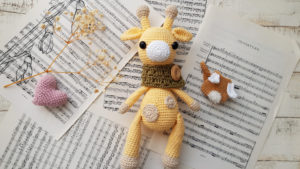
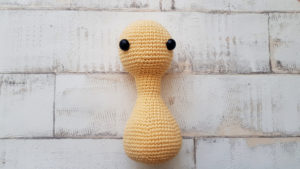
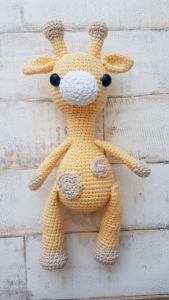
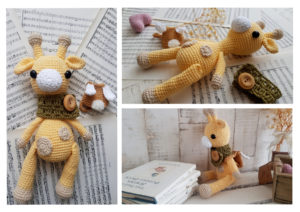
Enjoy the free pattern of Gingerbread, this super cute little giraffe. This easy pattern is completed with a scarf and a bunny backpack.
Pin it now, make it later!

Did you know, that giraffe’s neck is too short, to reach the ground? As a result, they have to awkwardly spread their front legs or kneel to reach the ground for a drink of water. It is just a fun fact, but to be honest, it makes them cuter than they are. If it is possible.
I love giraffes and they are second on my famous top 5 favourite animals list I always mention. So it was obvious for me to crochet a giraffe. Designing and making him was very quick, but I struggled with naming him. Until one day…..
It was the middle of December, and all the 4 of us were at home self isolating, as my darling son brought covid 19 home from school. We were all coughing and struggling.
Because it was just before Christmas, my daughter and me decided to bake some gingerbread to forget about our sickness. It was the exact same day, when I finished my cute little giraffe pattern. While I was looking at him, I sniffed in the sweet smell of the gingerbread. Lightbulb! I wish everything was that easy in life.
Gingerbread is a playful, cheeky little giraffe, who loves to eat. He collects leaves and put them in his bag, to munch on them later. He gets on very well with all the other animals, but his best friends are Tommy, the fox and Lulu, the frog who he can play with all day. They like to go on adventures, and explore new places. His long neck is always cold, so he has to wear his scarf, which was made by his mum.
Caution!
Please be very cautious when you make toys for babies or children under the age of 3. If you sew parts on it, make sure they are secure and safe.
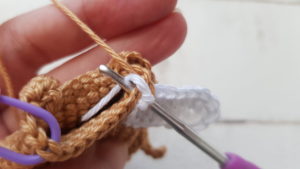
I recommend, to embroider the eyes, as the plastic safety eyes can be dangerous. My tutorial for embroidery eyes can be found here
|
All Zita and Bunny designs are original. Sales of the finished items are encouraged, but please give credit to the designer. Copyright © 2021 by Zita Renata Elek (Zita and Bunny).All rights reserved. This pattern is for personal use only. No part of it may be reproduced, resold, translated, published, altered, shared or posted in any way. |
**This blog contains affiliate links for products I use, believe in, or recommend. This means I will earn a small commission if you make a purchase from one of their links, and of course it is at no extra cost for you. It helps me to keep Zita and Bunny going and to keep publishing free patterns for you. You can check my full disclosure here. **
Abbreviations:
sc – single crochet
inc – increase
dec – decrease
hdc – half double crochet
dc – double crochet
sc-inc – 2sc in the same stitch
hdc-inc – 2hdc in the same stitch
ch – chain
st – stitch
sts – stitches
sl st – slip stitch
MR – magic ring
BLO – back loop only
(…) – repeat instruction for the amount of times given
Materials you need for this crochet giraffe:
Affiliate links for the US:
1. Cotton yarn,
I used:
A: Safran – 10 Yellow
B: Scheepjes Catona – 404 English Tea
C: Schachenmayr Catania – 106 Snow White
D: Scheepjes Catona – 395 Willow
E: Schachenmayr Catania – 179 Camel
F: any green yarn for the leaves
G: any white acrylic yarn for the tail on the bag
3. Safety eyes, 12mm
5. Scissors
7. Pins
8. Stuffing
9. Button – I used a 25mm one
10. Thread for sewing
11. Sewing needle
Affiliate links for the UK:
1. CottonYarn:
A: Safran – 10 Yellow
B: Scheepjes Catona – 404 English Tea
C: Schachenmayr Catania – 106 Snow White
D: Scheepjes Catona – 395 Willow
E: Schachenmayr Catania – 179 Camel
F: any green yarn for the leaves
G: any white acrylic yarn for the tail on the bag
5. Scissors
7. Pins
8. Stuffing
9. Button – I used a 25mm one
10. Thread for sewing
11. Sewing needle

Ears: (make 2)
Use colour A
1: 6sc in a MR [6]
2: (sc, inc) x3 [9]
3: sc in every st around [9]
4: (2sc, inc) x3 [12]
5: sc in every st around [12]
6: (3sc, inc) x3 [15]
7: (4sc, inc) x [18]
8 – 9: sc in every st around [18]
10: (sc, dec) x6 [12]
11: (2sc, dec) x3 [9]
Fasten off yarn, leaving a long tail to sew

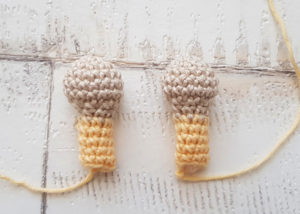
Horns: (make 2)
start with colour B
1: 6sc in a MR [6]
2: (inc) x6 [12]
3: (2sc, inc) x4 [16]
4 – 5: sc in every st around [16]
6: (dec) x8 [8]
stuff the horns a bit
7: sc in every st around, in last st change to colour A [8]
8 – 12: sc in every st around [8]
Stuff the rest of the horns, fasten off yarn, leaving a long tail to sew
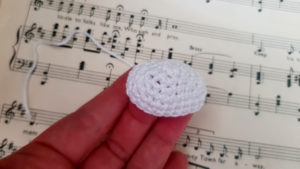
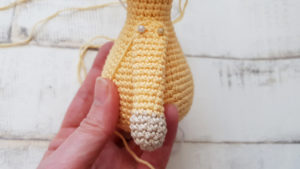
Muzzle:
Use colour C
1: 6sc in a MR [6]
2: sc-inc, hdc-inc, (sc-inc) x2, hdc-inc, sc-inc [8sc, 4hdc]
3: sc, sc-inc, hdc, hdc-inc, (sc, sc-inc) x2, hdc, hdc-inc, sc, sc-inc [12sc, 6hdc]
4: 2sc, sc-inc, 2hdc, hdc-inc, (2sc, sc-inc) x2, 2hdc, hdc-inc, 2sc, sc-inc [16sc, 8hdc]
5 – 6: sc in every st around [30]
fasten off yarn, leaving a long tail to sew. Stuff it a bit before sewing
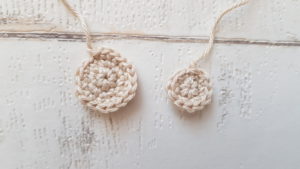
Spots:
Use colour B
Small:
1: 6sc in a MR [6]
2: (inc) x6 [12]
fasten off yarn, leaving a long tail to sew
Big:
1: 6sc in a MR [6]
2: (inc) x6 [12]
3: (sc, inc) x6 [18]
fasten off yarn, leaving a long tail to sew
Arms: (make2)
start with colour B
1: 5sc in a MR [5]
2: ( inc) x5 [10]
3 – 5: sc in every st around, in last st change to colour A [10]
stuff the arm up to this point, do not stuff the rest
6 – 20: sc in every st around [10]
fasten off yarn, leaving a long tail to sew.

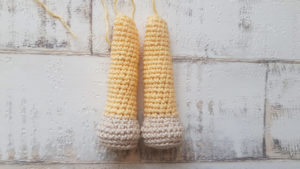
Legs: ( make 2)
start with colour B
1: 8sc in a MR [8]
2: (inc) x8 [16]
3: (sc, inc) x8 [24]
4: BLO sc in every st around [24]
5 – 6: sc in every st around [24]
7: (sc, dec) x8, in last st change to colour A [16]
You can start stuffing the legs
8: (6sc, dec) x2 [14]
9 – 22: sc in every st around [14]
stuff the legs up to this point, do not stuff the rest
23 – 28: sc in every st around [14]
fasten off yarn, leaving a long tail to sew
Head and Body:
use colour A
1: 8sc in a MR [8]
2: (inc) x8 [16]
3: (sc, inc) x8 [24]
4: (3sc, inc) x6 [30]
5: (4sc, inc) x6 [36]
6: (5sc, inc) x6 [42]
7 – 9: sc in every st around [42]
10: (6sc, inc) x6 [48]
11 – 14: sc in every st around [48]
15: (7sc, inc) x6 [54]
16 – 17: sc in every st around [54]
18: (7sc, dec) x6 [48]
19: (6sc, dec) x6 [42]
20: (5sc, dec) x6 [36]
21: (4sc, dec) x6 [30]
22: (3sc, dec) x6 [24]
Insert safety eyes between rows 13-14, leaving 12 sts between them, and stuff the head firm.
23: (2sc, dec) x6 [18]
24 – 30: sc in every st around [18]
31: (8sc, inc) x2 [20]
32: (4sc, inc) x4 [24]
33: sc in every st around [24]
34: (3sc, inc) x6 [30]
35: sc in every st around [30]
36: (4sc, inc) x6 [36]
37: sc in every st around [36]
38: (5sc, inc) x6 [42]
39: sc in every st around [42]
40: (6sc, inc) x6 [48]
41: (7sc, inc) x6 [54]
42 – 48: sc in every st around [54]
49: (7sc, dec) x6 [48]
50: (6sc, dec) x6 [42]
51: (6sc, dec) x6 [36]
52: (5sc, dec) x6 [30]
53: (4sc, dec) x6 [24]
54: (3sc, dec) x6 [18]
55: (2sc, dec) x6 [12]
56: (sc, dec) x6 [6]
fasten off yarn, close the hole.

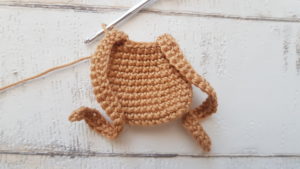
Assembling Gingerbread, the Giraffe:
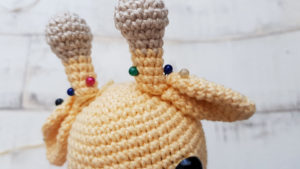
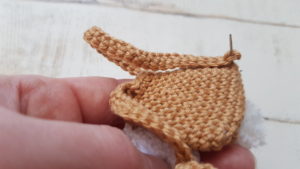
1: sew the horns to the head between rows 3 – 5
2: sew the ears to the head between rows 6 – 7
3: sew the muzzle to the head between the two eyes, between rows 15 – 20
4: sew the arms onto the body between rows 31 – 32
5: sew the legs to the body between rows 44 – 45
6: sew the spots to the body
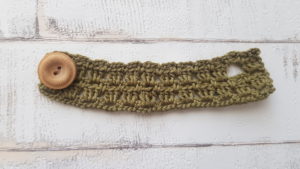
Scarf:
Use colour D
1: Ch 50, sc in 2nd ch from hook, (ch3, skip3, sc) x12
2: Ch3, (count as a dc), turn, 3dc in every ch3 space, dc in last st
3: Ch1, turn, sc on top of dc, (ch3, sc in between 2 set of 3dc) x11, ch3, sc in last st
4: Ch3 (count as a dc), turn, 3dc in ch space, ch3, skip next ch space, it will be the button hole, 3dc in every ch space, dc in last st
5: Ch1, turn, sc in 1st st, (ch3, sc in between 2 set of 3dc) x9, ch3, sc in button hole, ch3, sc in same space, ch3, sc in last st
Fasten off yarn, weave in the ends. Sew the button to the scarf
Bunny Ears for bag:
Use colour C
Ch 8, starting from 2nd chain from hook, sc in next 2 sts, hdc in next 3 sts, dc in next st, 5dc in last st, continue on the other side, dc in next st, hdc in next 3sts, sc in last 2 sts
fasten off yarn

Backpack:
Use colour E
1: Ch12, starting from 2nd ch from hook, sc in next 10 sts, 3sc in last st, continue on the other side, sc in next 9sts, 2 sc in last st [24]
2: 2sc in first 2 sts, sc in next 8sts, 2 sc in next 3sts, sc in next 10 sts, 2 sc in last st [30]
3 – 5: sc in every st around [30]
6: (4sc, dec) x5 [25]
7 – 8: sc in every st around [25]
9: (3sc, dec) x5 [20]
10 – 11: sc in every st around [20]
If you are using a stitch marker, take it off, as we do not count the rows anymore.
Sc in next 3 sts, ch31, starting from 2nd ch from hook, sc in next 30 sts, sc in next st on bag, sc in next 5 sts, ch31, sc in next 30 sts on strip, sc in next 3 sts on bag, place 1 ear front of the bag, and sc it together with the bag in the next 2 sts, sc in next 6 sts, sc 2nd ear together with the bag in the next 2 sts, sc in next 2 sts, sl st in last st.
Fasten off yarn, weave in the ends. Sew the straps to the bottom of the bag.
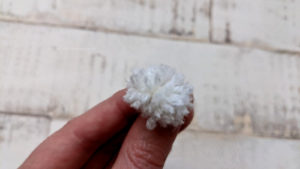
Pom Pom:
Use any soft yarn
1. Cut a long string and place it on the table.
2. Wrap the yarn around 2 of your fingers 15 times.
3. Remove the yarn from your fingers carefully and tight it securely with the string in the middle.
4. Cut the loops and trim the pom pom.
5. When it is ready place it on the middle of the bag, between rows 2-3
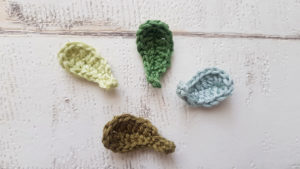
Leaves:
Use any green yarn
Ch 7, starting from 2nd chain from hook sc in first st, hdc in next 2 sts, dc in next 2 sts, 5dc in last st, continue on the other side, dc in next 2 sts, hdc in next 2 sts, sc in last st, Ch 4, starting from 2nd chain from hook, sc in next 3 sts, sl st to 1st sc on leaf.
Fasten off yarn, weave in the end.
Congratulation, you finished Gingerbread, the Giraffe!
I would love to see your finished crochet giraffe, Gingerbread. Please share it with me on Instagram. You can find me as @zitaandbunny or click on this icon. ![]()