

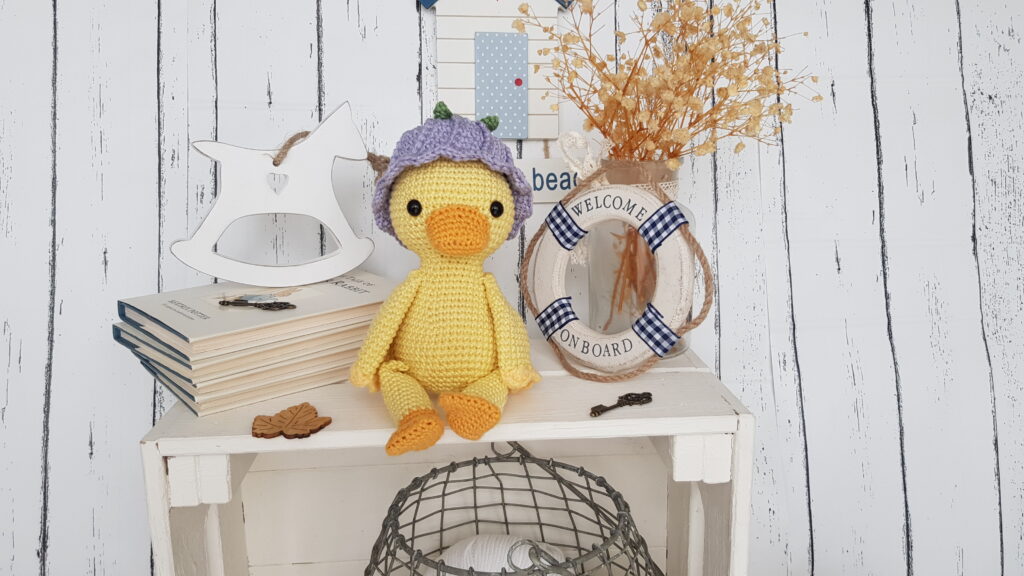
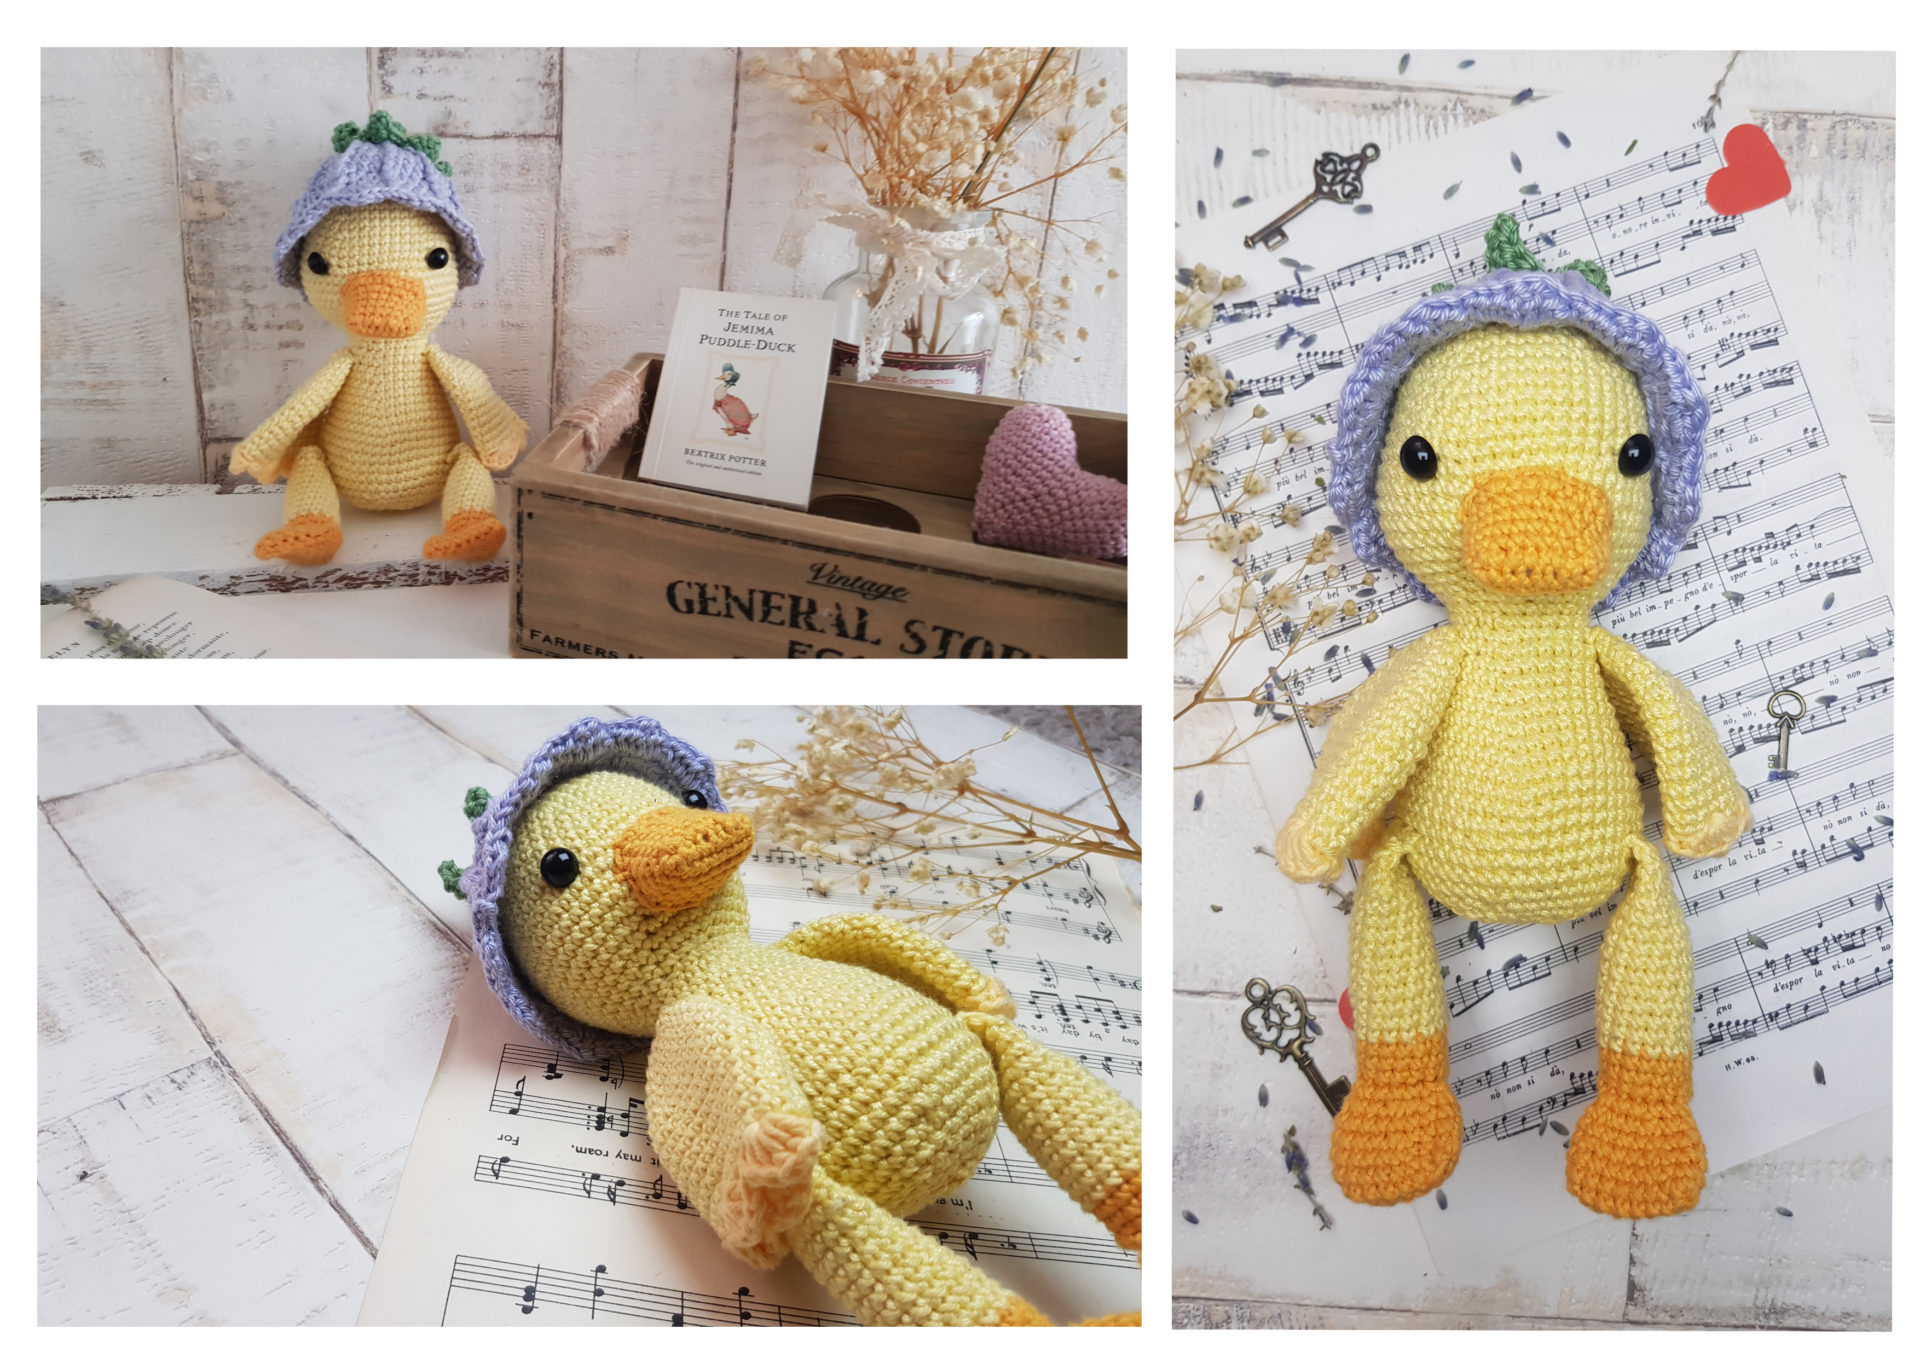
Enjoy the free pattern of Lemonade, a super cute crochet duck project. He is wearing a flower as a hat, to make him look more adorable. Using only a few colours, this project can be perfect for someone who already is on a beginner level and want to get to the next stage.
Pin it now, make it later!
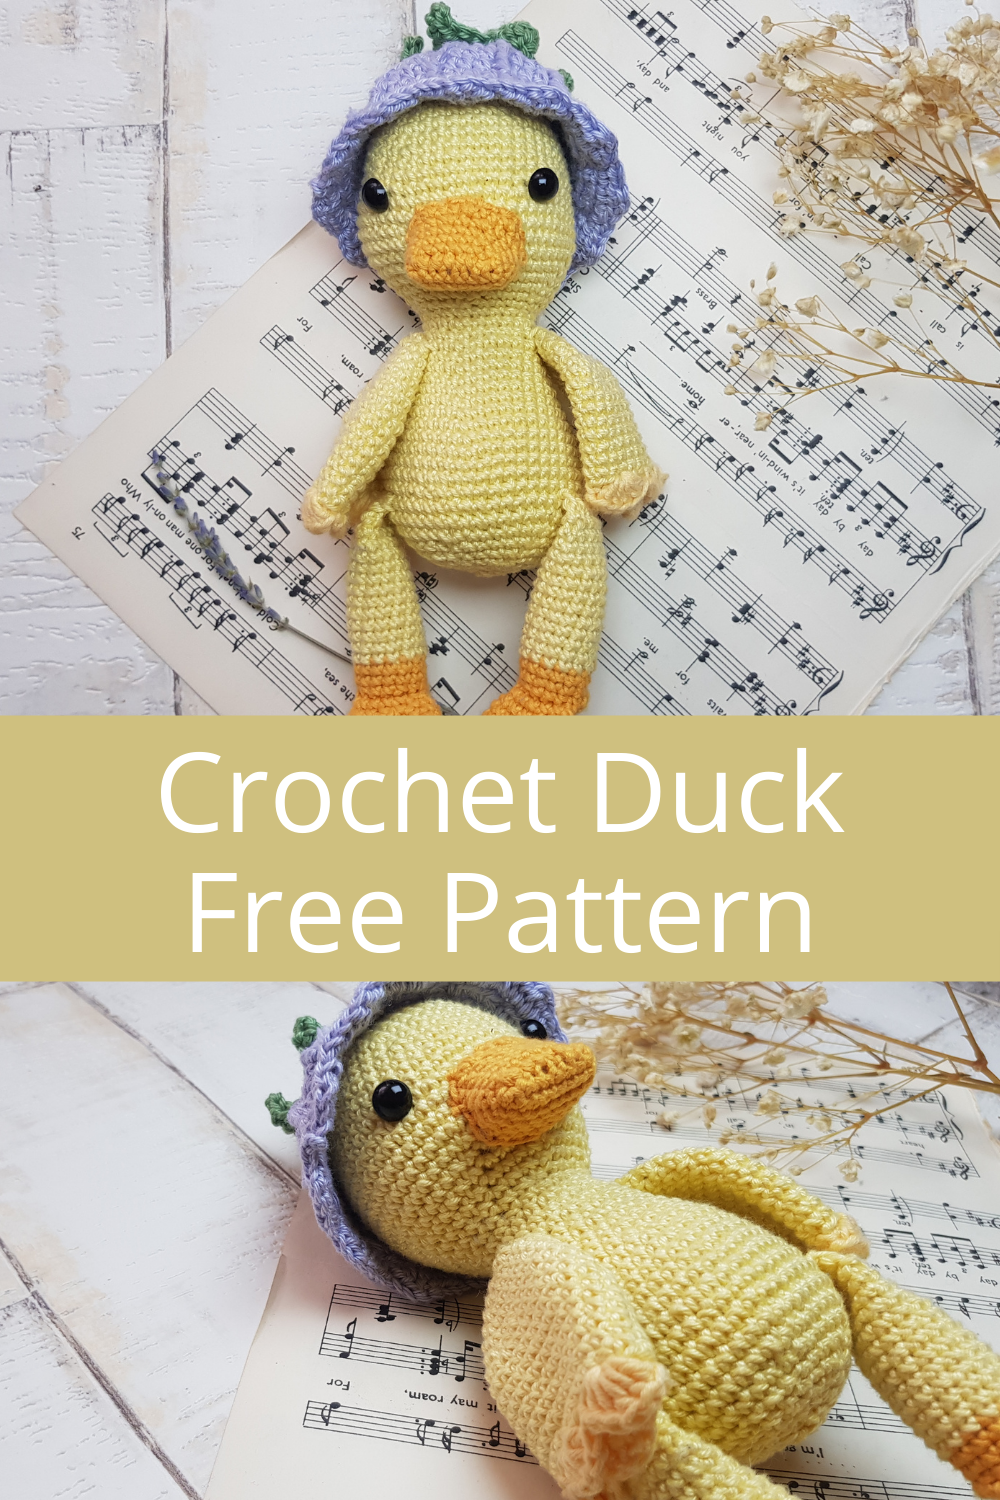


Lemonade, this little crochet duck was named by my son, who was reminded of a nice big glass of lemonade because of the colour.
Now that Spring is around the corner, what can be better, than a little duck right? Of course I know spring and Easter is more associated with chicks and bunnies, but this time I wanted to be a bit more original.
One day I ordered some yarns I haven’t before and I came across with the most beautiful shade of yellow ever. I desperately wanted to crochet something with it, and because I love baby ducks, the choice was easy.
The idea of Lemonade came to my head one night, when I couldn’t sleep. I planned it out, and the next day I just made her. I didn’t even write down the pattern, so it was a bit difficult to remember later on, but luckily I managed to.
Lemonade is a shy little duck, who lives by a nice small pond with her parents and siblings. She likes to go swimming, but only with a swimming ring, as her shyness makes her be scared of water. She also loves apple pie, so her mum has to bake one every day.
Her best friend is Bubbles, the little bear, who lives very close to her in the forest, so they can play and swim together a lot.
This crochet duck is very close to my heart, as she reminds me of myself as a child. (I am still shy)
I hope Lemonade will bring you as much joy, as it does for me. If you crochet this duck, please share it with me, as I would love to see her. You can find me on Instagram. ![]()


Caution!
Please be very cautious when you make toys for babies or children under the age of 3. If you sew parts on it, make sure they are secure and safe.
I recommend, to embroider the eyes, as the plastic safety eyes can be dangerous. My tutorial for embroidery eyes can be found here
|
All Zita and Bunny designs are original. Sales of the finished items are encouraged, but please give credit to the designer. Copyright © 2021 by Zita Renata Elek (Zita and Bunny).All rights reserved. This pattern is for personal use only. No part of it may be reproduced, resold, translated, published, altered, shared or posted in any way. |
**This blog contains affiliate links for products I use, believe in, or recommend. This means I will earn a small commission if you make a purchase from one of their links, and of course it is at no extra cost for you. It helps me to keep Zita and Bunny going and to keep publishing free patterns for you. You can check my full disclosure here. **


Abbreviations:
sc – single crochet
inc – increase
dec – decrease
hdc – half double crochet
dc – double crochet
ch – chain
st – stitch
sts – stitches
sl st – slip stitch
MR – magic ring
fpdc – front post double crochet
fphdc – front post half double crochet
hdc inc – half double crochet increase
(…) – repeat instruction for the amount of times given

Materials you need for this crochet duck:
Affiliate links for the US:
1. Cotton yarn,
I used:
A: Schachenmayr Catania – 403 Vanille
B: Safran – 10 Yellow
C: Safran – 11 Strong Yellow
D: Scheepjes Catona – 399 Lilac Mist
E: Scheepjes Catona – 212 Sage Green
3. Safety eyes, 9mm
5. Scissors
7. Pins
8. Stuffing
Affiliate links for the UK:
1. CottonYarn:
A: Schachenmayr Catania – 403 Vanille
B: Safran – 10 Yellow
C: Safran – 11 Strong Yellow
D: Scheepjes Catona – 399 Lilac Mist
E: Scheepjes Catona – 212 Sage Green
5. Scissors
7. Pins
8. Stuffing


Wings: (make 2)
Start with colour A. Leave a long tail when you make the magic ring, as we will use this tail to sew the wings to the body.
1: 6sc in a Mr [6]
2: (sc, inc) x3 [9]
3: (2sc, inc) x3 [12]
4: (3sc, inc) x3 [15]
5: (4sc, inc) x3 [18]
6: (5sc, inc) x3 [21]
With a needle, pull the tail of the MR to the other side, so we will be able to sew the wings to the body with it.
7: (6sc, inc) x3 [24]
8: (7sc, inc) x3 [27]
9: (8sc, inc) x3 [30]
10 – 17: sc in every st around [30]
In the last st change to colour B
18: (sc, skip 2sts, 5dc in next st, skip 2sts) x5, sl st to 1st sc
Fasten off yarn


Feet and Legs: (make 2)
Start the feet with colour C
1: ch 9, starting from 2nd ch from hook
2: (sc) x7, 3sc in last st, continue on the other side, (sc) x6, 2sc in the last st [18]
3 – 4: sc in every st around [18]
5: (sc) x2, dec, (sc) x7, dec, (sc) x5 [16]
6: sc in every st around [16]
7: (2sc, dec) x4 [12]
8: sc in next 7sts, ch1 and turn
9: sc in next 6 sts, ch1 and turn
10: sc in next 6sts, from now on we are crocheting in continuous rounds again.
11: sc in one ch on side, (mark this st as the 1st st), FLO sc in next 6sts, sc in one ch on the other side, BLO sc in next 6sts [14] – see photo
12 – 13: sc in every st around [14] In the last st change to colour A
14 – 22: sc in every st around [14]
Stuff the leg up to this point (not the feet), do not stuff the rest.
23 – 26: sc in every st around [14]
27: (5sc, dec) x2 [12]
38: sc in the next 1 st
Press both layers of legs together so that they lay flat on top of each other, aligning the stitches side by side. sc together the opposite stitches. I put 5sc. Fasten off yarn, leaving a long tail to sew.


Hair:
Use colour A. Leave a long tail when you make the magic tail as we will use that to connect the hair to the head.
Make a magic ring, sc, (ch7, starting from 2nd ch from hook, sc in next 6sts, sc into MR) x3
sl st to 1st ch, close MR, fasten off yarn, leaving a long tail. Use the 2 tails to connect it to the head.


Beak:
Use colour C
ch9, starting from 2nd ch from hook,
1: (sc) x7, 3sc in last st, continue on the other side , (sc) x6, 2sc in last st [18]
2 -3: sc in every st around [18]
4: (sc) x9, (sc, inc) x3, (sc) x3 [21]
5: (sc) x10, (2sc, inc) x3, (sc) x2 [24]
Fasten off yarn, leaving a long tail to sew.


Head and Body:
Use colour A
1: 6sc in a MR [6]
2: (inc) x6 [12]
3: (sc, inc) x6 [18]
4: (2sc, inc) x6 [24]
5: (3sc, inc) x6 [30]
6: (4sc, inc) x6 [36]
7: (5sc, inc) x6 [42]
8: sc in every st around [42]
9: (13sc, inc) x3 [45]
10: sc in every st around [45]
11: (14sc, inc) x3 [48]
12: sc in every st around [48]
13: (7sc, inc) x6 [54]
14 – 16: sc in every st around [54]
17: (7sc, dec) x6 [48]
18: (6sc, dec) x6 [42]
19: (5sc, dec) x6 [36]
20: (4sc, dec) x6 [30]
21: (3sc, dec) x6 [24]
Place the eyes between row 15-16, connect the hair to the top of the head, and stuff the head firm.
22: (4sc, dec) x4 [20]

23: (4sc, inc) x4 [24]
24: sc in every st around [24]
25: (5sc, inc) x4 [28]
26: sc in every st around [28]
27: (6sc, inc) x4 [32]
28: sc in every st around [32]
29: (7sc, inc) x4 [36]
30: sc in every st around [36]
31: (8sc, inc) x4 [40]
32: (9sc, inc) x4 [44]
33: (10sc, inc) x4 [48]
34 – 39: sc in every st [48]
40: (6sc, dec) x6 [42]
41: (5sc, dec) x6 [36]
42: (4sc, dec) x6 [30]
43: (3sc, dec) x6 [24]
44: (2sc, dec) x6 [18]
45: (sc, dec) x6 [12]
46: (dec) x6 [6]
Fasten off yarn, and close hole.


Assembling Lemonade:
Sew beak between row: 16-21 – stuff it a bit before.
Sew wings between row 27 -28
Sew legs between row 40-41


Hat:
Use colour D
ch3 count as a dc at the beginning of every row.
1: make a MR, ch3, 11dc into MR sl st to top of ch3 [12dc]
2: Ch3, Fpdc in same st, (dc, fpdc) x11, sl st [12dc, 12fpdc]


3: ch3, dc, fpdc, (2dc, fpdc) x11 , sl st [24dc, 12 fpdc]


4 : ch3, (dc) x2, fpdc, (3dc, fpdc) x11, sl st [36dc, 12fpdc]
From this round instead of dc we will do hdc.
5 – 10: Ch2, (hdc) x2, fphdc. (3hdc, fphdc) x11, sl st [36hdc, 12 fphdc]
11: ch2, hdc in same st, 2dc in next st, 2hdc in next st, sc in next, (hdc inc, dc inc, hdc inc, sc) x11, sc in last st, slst to ch2
Stem and leaves:
Use colour E
1: 6sc in a Mr [6]
2 -4: sc in every st around [6]
5: (inc) x6 [12]
6: (hdc inc) x12 [24 hdc]
7: (sc, ch6, starting from 2nd ch from hook, sc in next st, hdc in next 2 sts, dc in next 2 sts, skip 3hdc on main circle) x6, sl st to first sc


Sew the stem and leaves to the top of the hat.


Congratulation, you finished Lemonade the little duck.

I would like to see your finished crochet duck, Lemonade. Please share it with me on Instagram. You can find me as @zitaandbunny or click on this icon. ![]()


