
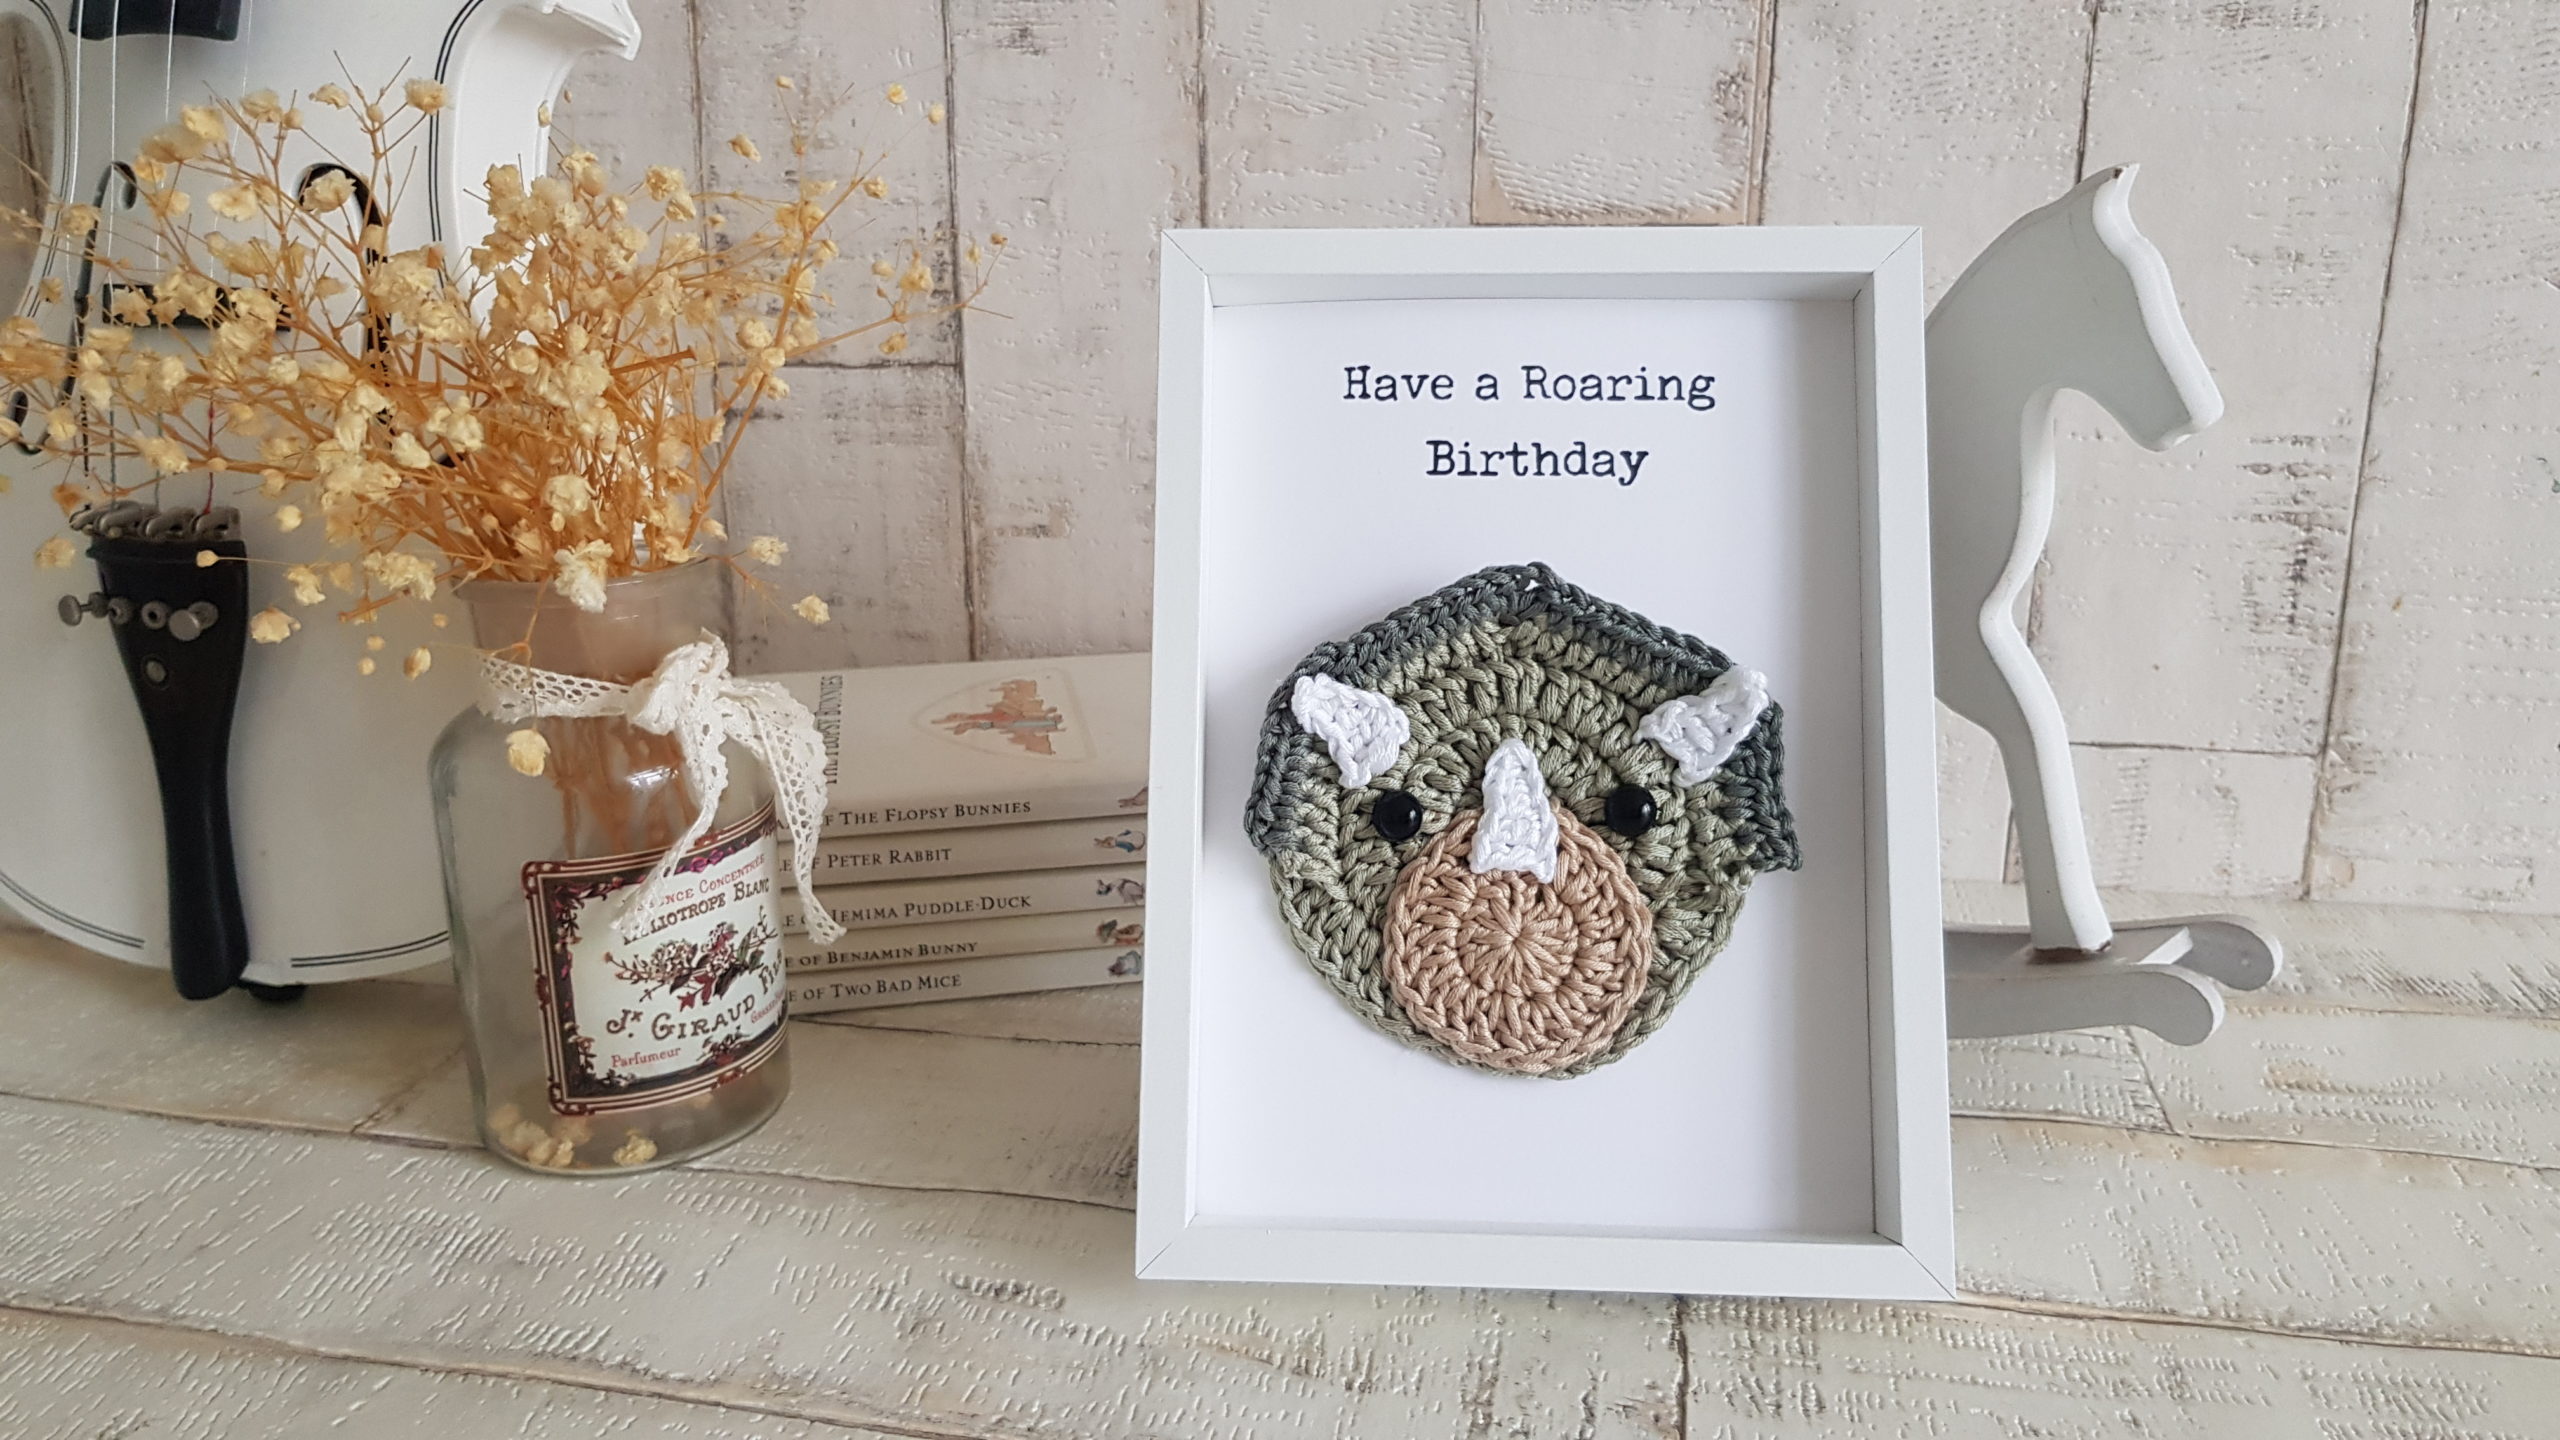
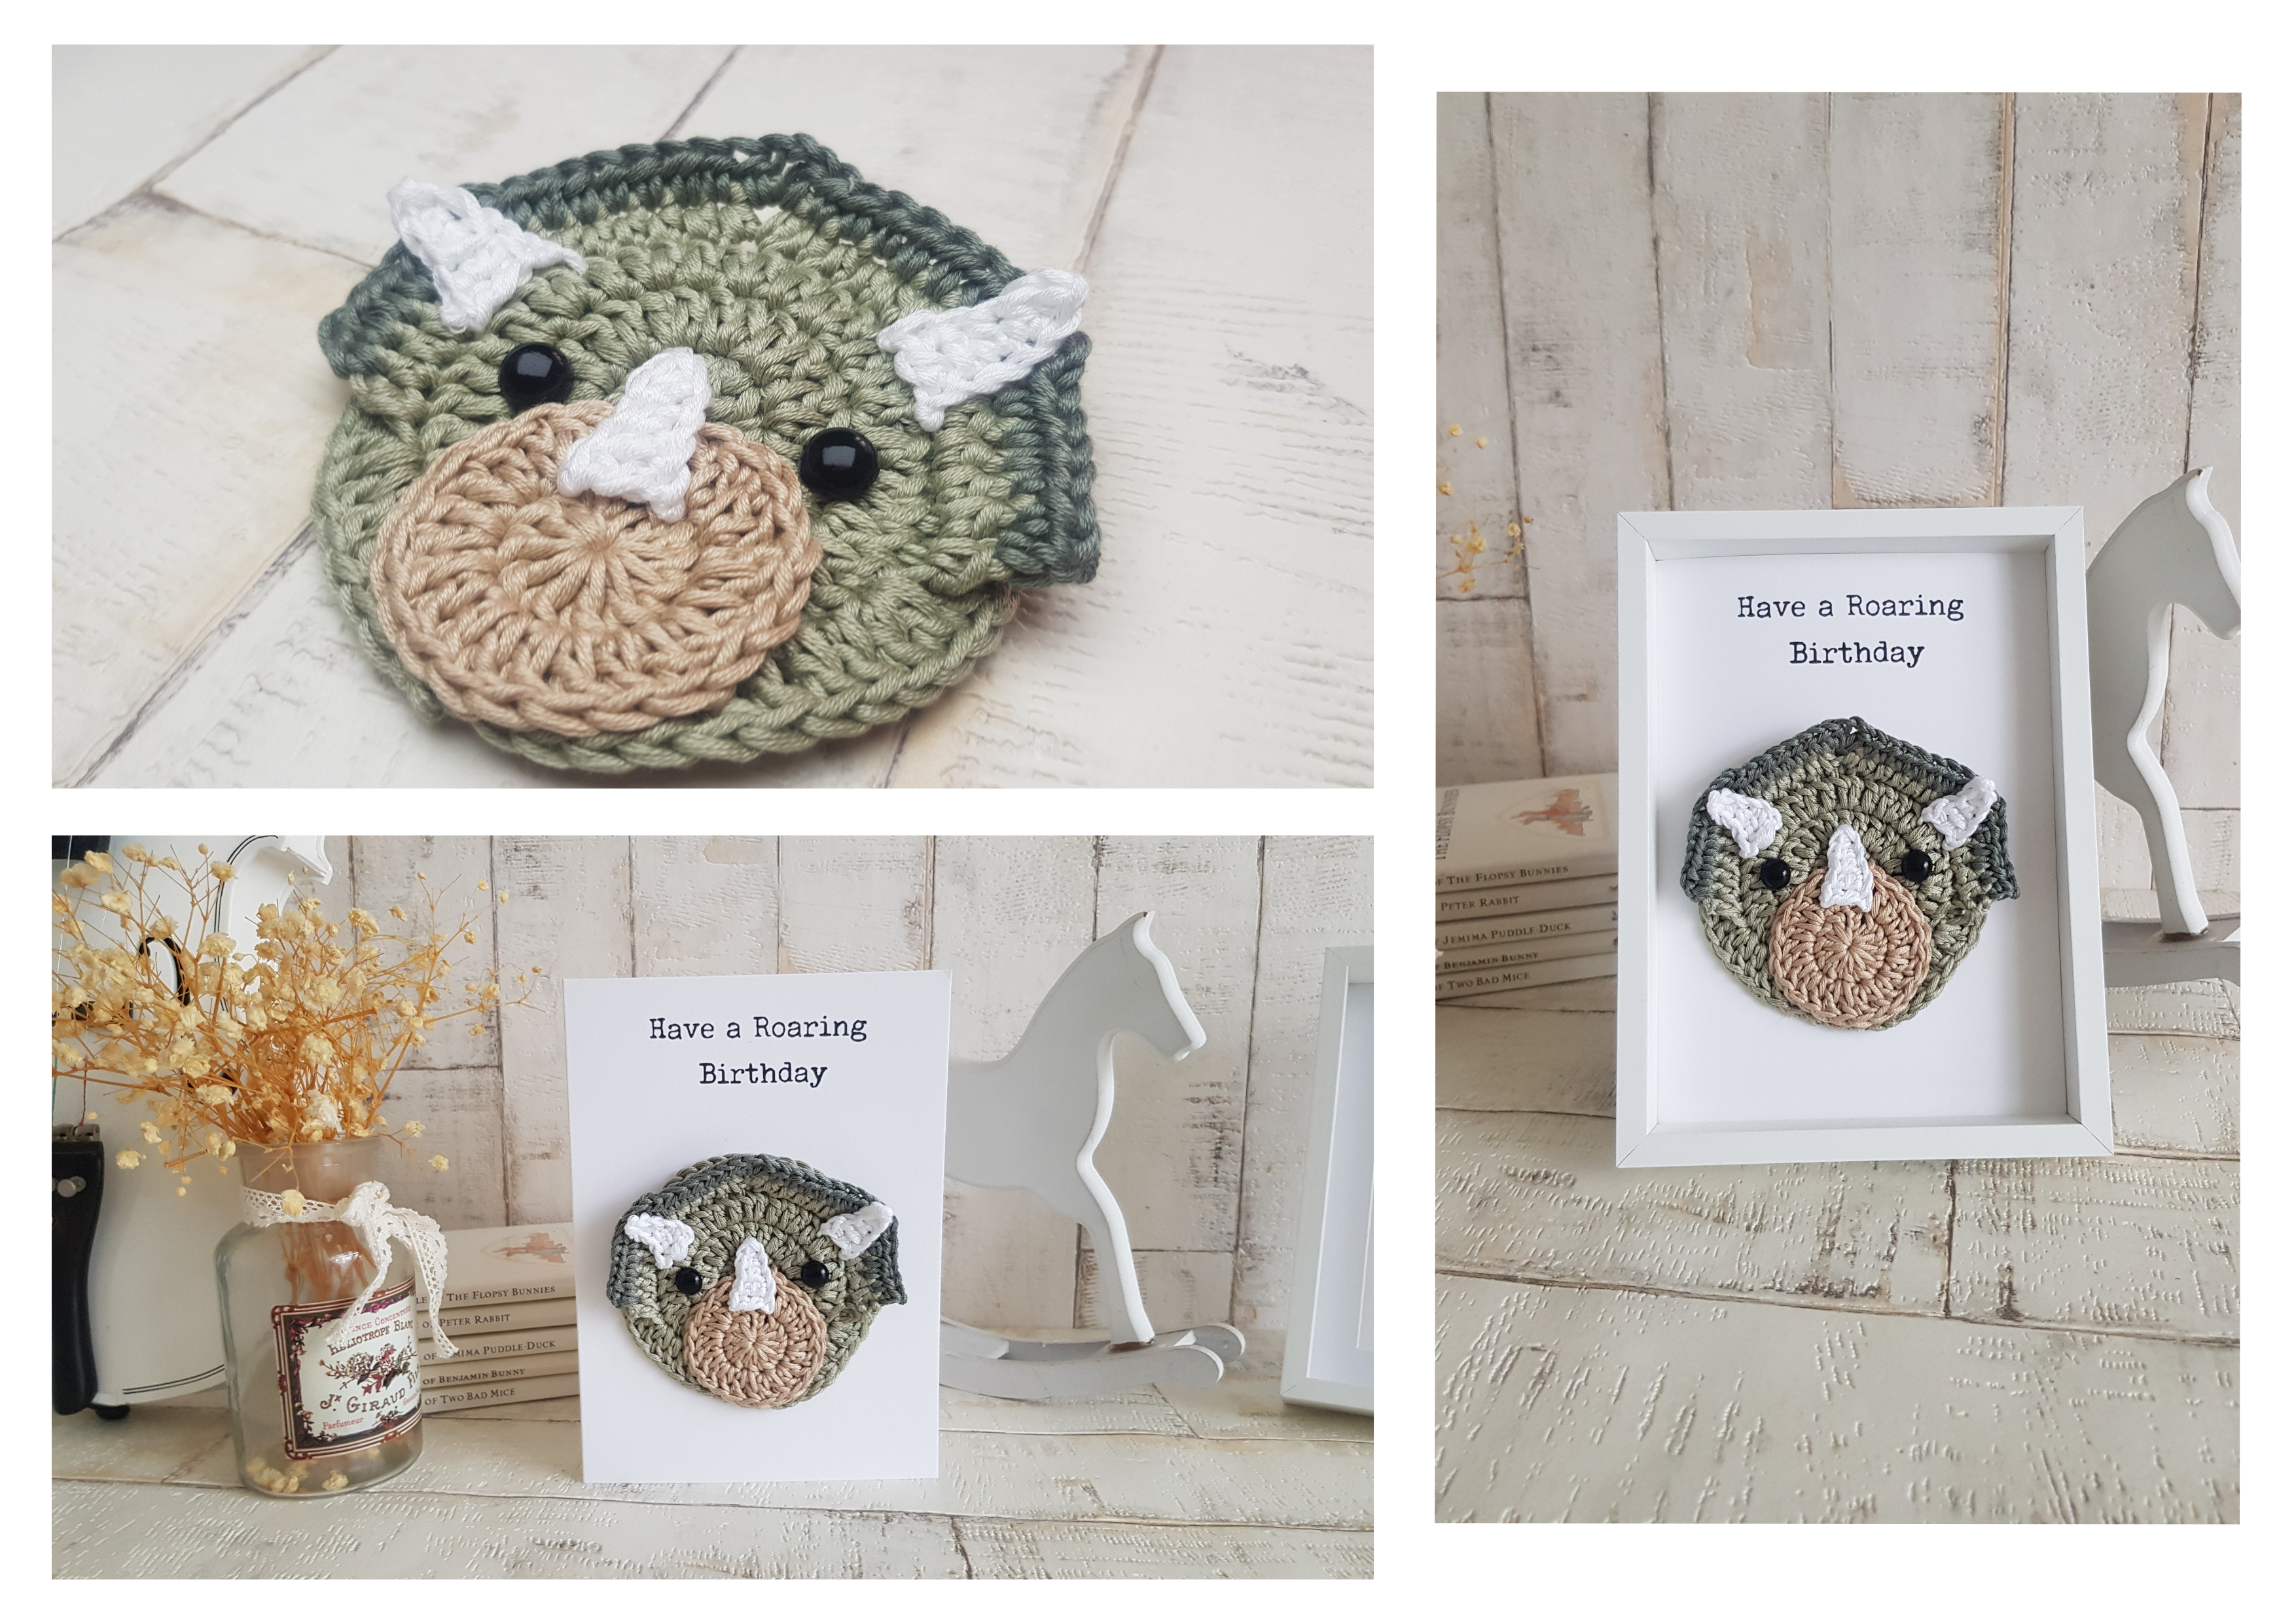
Learn how to crochet this dinosaur card. It is a quick and unique present to any dinosaur lovers. You can use any type yarn. I am working on a matching baby blanket and rattle pattern.
Pin it now, make it later!
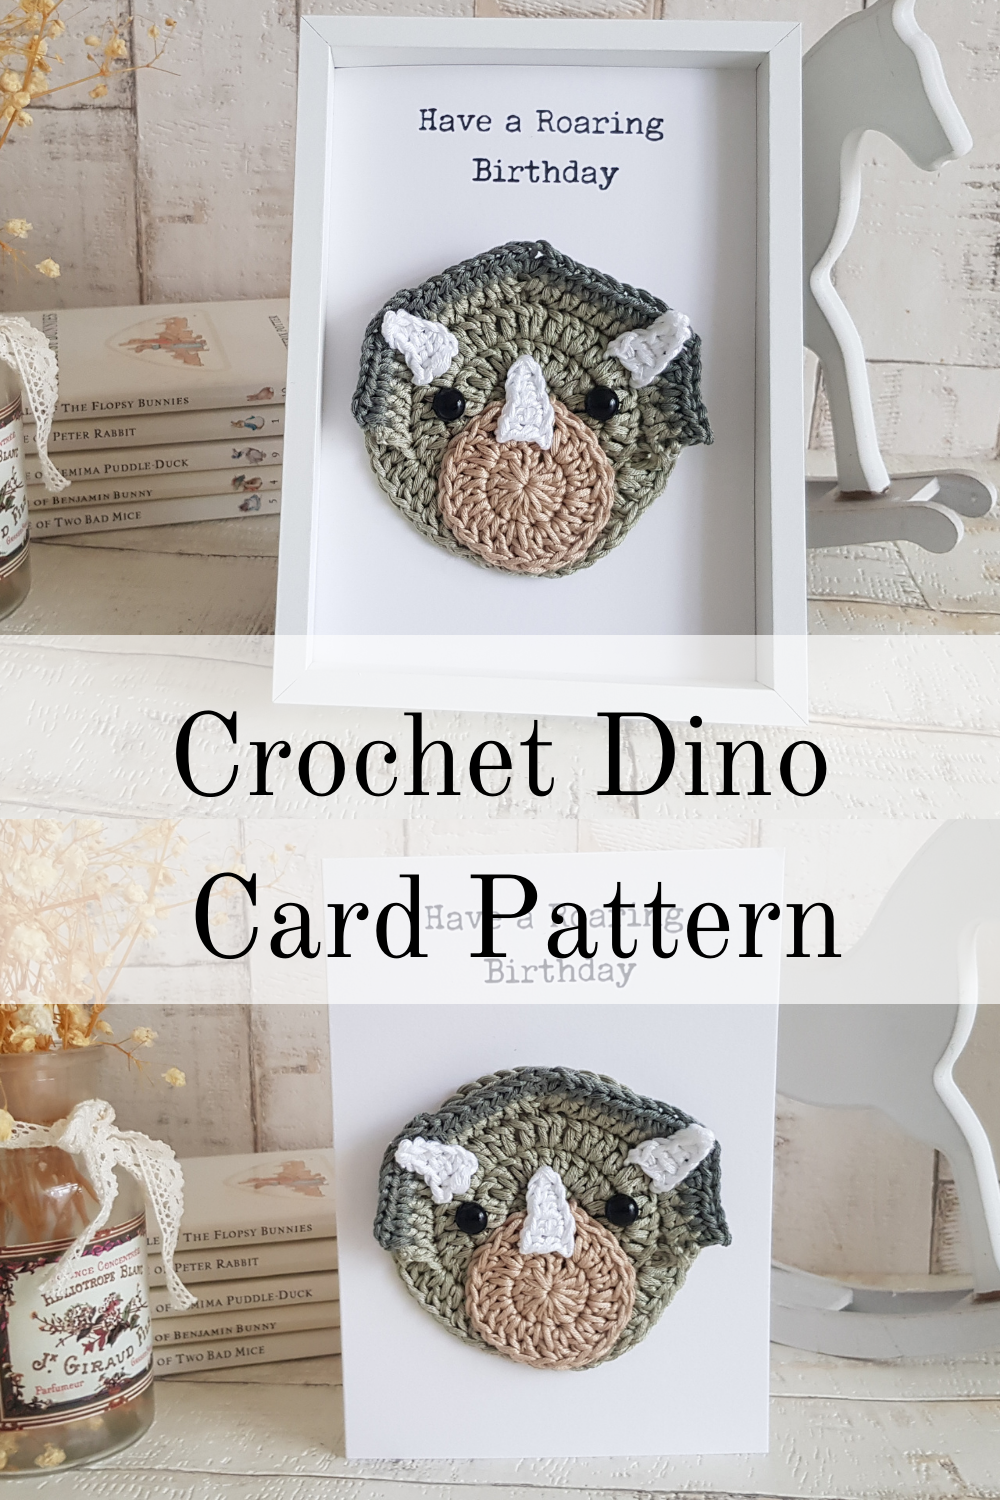
This dinosaur card is very easy to make and it is such a good and unique gift idea. If you have a good printer you can print anything on it, if you don’t, you still can use letter stamps. It will just make it more handmade looking and distinctive.
Cards are easy to find. You can buy them in any craft shops or even pound shops. I purchased mine from a specializes wholesale card shop because I wanted to have a good quality one, but it is absolutely not necessary.
You can frame these cards and keep them on the wall or hang them in a nursery room as a décor.
Caution!
Please be very cautious when you make toys for babies or children under the age of 3. If you sew parts on it, make sure they are secure and safe.
|
All Zita and Bunny designs are original. Sales of the finished items are encouraged, but please give credit to the designer. Copyright © 2021 by Zita Renata Elek (Zita and Bunny).All rights reserved. This pattern is for personal use only. No part of it may be reproduced, resold, translated, published, altered, shared or posted in any way. |
**This blog contains affiliate links for products I use, believe in, or recommend. This means I will earn a small commission if you make a purchase from one of their links, and of course it is at no extra cost for you. It helps me to keep Zita and Bunny going and to keep publishing free patterns for you. You can check my full disclosure here. **
Abbreviations:
dc – double crochet
hdc – half double crochet
inc – increase
dec – decrease
FLO – use the front loop only
BLO – use the back loop only
ch – chain
st – stitch
sl st – slip stitch
MR – magic ring
(…) – Repeat instructions for the amount of times given
*..-..-..* – Stitches made in the same stitch
Materials you need to make this dinosaur card
Affiliate links for the US:
1. any yarn
I used dk weight cotton yarn, because I am making a matching blanket and rattle set and I wanted them to look the same, but you can use whatever you have. I also like using sport weight yarn with these cards, as the end project can not be too big.
A – Drop Muscat – 88 Pistachio
B – Drop Muscat – 90 Moss Green
C – Drop Miscat – 23 Beige
D – Drop Muscat – 18 White
2. I also used a 3.5mm crochet hook, which is a bit small for a dk weight yarn, but I didn’t want my dinosaur to be too big. If you are using a sport weight yarn, use a 3mm hook.
3. Safety eyes, 9mm
5. Scissors
7. 5×7″ card
8. Glue gun
Affiliate links for the UK:
1. any yarn
I used dk weight cotton yarn, because I am making a matching blanket and rattle set and I wanted them to look the same, but you can use whatever you have. I also like using sport weight yarn with these cards, as the end project can not be too big.
A – Drop Muscat – 88 Pistachio
B – Drop Muscat – 90 Moss Green
C – Drop Miscat – 23 Beige
D – Drop Muscat – 18 White
2. I also used a 3.5mm crochet hook, which is a bit small for a dk weight yarn, but I didn’t want my dinosaur to be too big. If you are using a sport weight yarn, use a 3mm hook.
5. Scissors
7. 5×7″ Card
8. Glue Gun

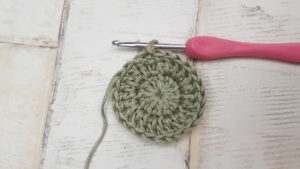
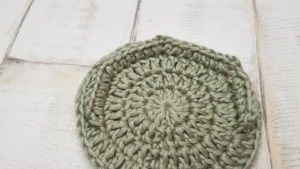
Head:
Use colour A
Tip: ch3 and ch2 at the beginning of every row count as a dc
1: start with a magic ring, ch3, 11dc in the ring. Close the ring, sl st to top of ch3 [12 dc]
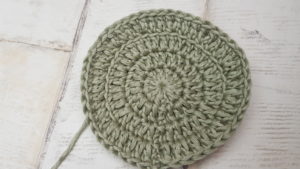
2: ch3, dc in same st, (2dc) x11, sl st to top of ch3 [24 dc]
3: ch3, (2dc, dc) x11, 2dc in last st, sl st to top of ch3 [36 dc]
4: ch3,using both loops, dc in next st, 2dc in next, (dc in next 2sts, 2dc in next st) x2, Using BLO (dc in next 2sts, 2dc in next st) x12, dc in next 2 sts, now using both loops again, 2dc in next stitch. dc in next 2sts, 2dc in last st, sl st to top of ch3 [42 hdc]
Fasten off yarn.
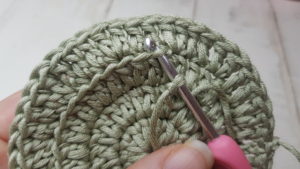
Frill:
Connect Colour A to the first FLO we made in row 4
1: ch2, hd in next 4sts, *hdc-ch2-hdc* in next stitch, hdc in next 5 sts, *hdc-ch2-hdc* in next st, hdc in next 5 sts, *hdc-ch2-hdc* in next st, hdc in next 4sts, fasten off yarn
2: Connect colour B in the last stitch we made, with the wrong side of the frill facing you. Ch2, hdc in next 5sts, *hdc-ch2-hdc* in next st, hdc in next 7sts, *hdc-ch2-hdc* in next st, hdc in next 7 sts, *hdc-ch2-hdc* in next st, hdc in last 6sts
Fasten off yarn, weave in the ends
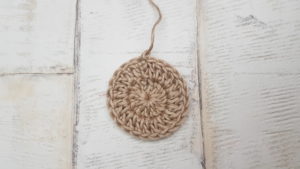
Snout:
Use colour C
1: start with a magic ring, ch3, 11dc in the ring. Close the ring, sl st to top of ch3 [12 dc]
2: ch3, dc in same st, (2dc) x11, sl st to top of ch3 [24 dc]
Fasten off yarn, leave a long tail to sew
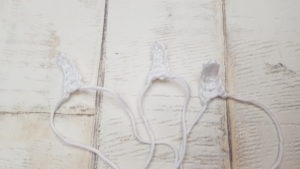
Horns: (make 3)
Use colour D
1: Ch 6, sc in second ch from hook, hdc in next 2sts, dc in last 2 sts
Fasten off yarn, leave a long tail to sew
Assembling the dinosaur card:
I choose to sew the parts together to assemble my dinosaur applique. You can choose to use a glue gun if you want. The glue holds up fine, but I encourage you to do your own research and try it yourself
1 Place the snout on the head with the bottom side touching the bottom of the head, sew it on.
2 Sew one horn on the snout and two on the head by the sides
3 Place the eyes between row 2-3
4 You can print something on the card or use the letter stamps for a more personalized look.
5 Heat up your glue gun and glue the head to to card

Congratulation, you finished your unique dinosaur card!
I would love to see your finished greeting card. Please share it with me on Instagram. You can find me as @zitaandbunny or click on this icon. ![]()