Learn how to crochet Hazel this beautiful, kind and sweet little deer.
Pin it now, make it later!
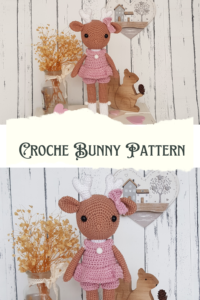

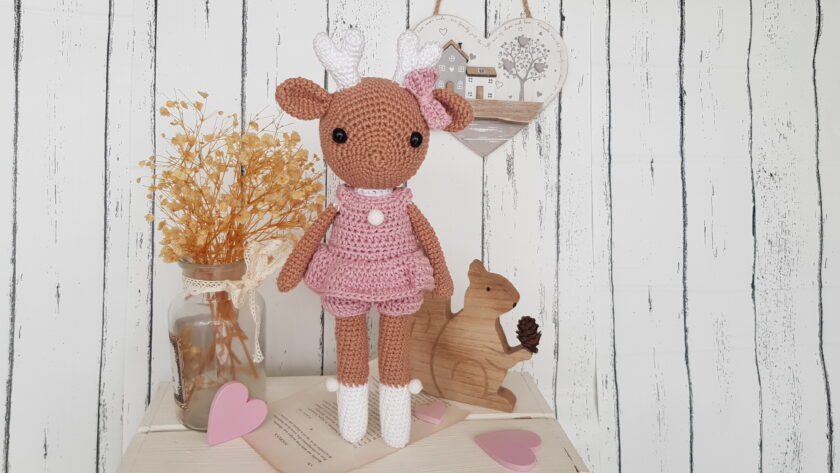
Let me introduce you to the new member of my family, Hazel the little deer. I know I already have 2 deer patterns, but I can not help it. I really love woodland animals, especially deer. In this pattern I am only using the basic stitches. It is relatively quick to make, but the dress is a bit complicated for a beginner crocheter. I fixed the three pom poms with a glue gun.
You can use the same pattern to make smaller or larger dolls, by using finer or bulkier yarn.
I used 100% cotton yarn and a 2.5mm crochet hook. When I crochet I use the yarn under technique which makes the stitches tighter, smaller and it creates an “X” shape. If you yarn over, your doll will be a bit bigger and you might need to use a size bigger safety eyes too, or alternatively you can use a size smaller hook to achieve the same size as me.
The story of Hazel:
Hazel the deer is the most beautiful creature in the small, colourful town called Granny Square. She is tall, slim and very elegant. Even though she is a proper lady, she likes nothing more than going on an adventure in the woods with her friends. There she can run, jump, get muddy and laugh as loud as she could. Of course after these busy days she can not wait to get home and eat her favourite peach pie.
Caution!
Please be very cautious when you make toys for babies or children under the age of 3. If you sew parts on it, make sure they are secure and safe.
I recommend, to embroider the eyes, as the plastic safety eyes can be dangerous. My tutorial for embroidery eyes can be found here
|
All Zita and Bunny designs are original. Sales of the finished items are encouraged, provided they are handmade by yourself in a limited number, but please give credit to the designer. No mass production. Copyright © 2021 by Zita Renata Elek (Zita and Bunny).All rights reserved. This pattern is for personal use only. No part of it may be reproduced, resold, translated, published, altered, shared or posted in any way. |
**This blog contains affiliate links for products I use, believe in, or recommend. This means I will earn a small commission if you make a purchase from one of their links, and of course it is at no extra cost for you. It helps me to keep Zita and Bunny going and to keep publishing free patterns for you. You can check my full disclosure here. **
Level: beginner friendly
Size of the finished toy if using the same yarn and hook size: approximately 29cm
Abbreviations:
sc – single crochet
inc – increase
dec – decrease
hdc – half double crochet
hdc – inc – half double crochet increase
FLO – use the front loops only
BLO – use the back loops only
ch – chain
st – stitch
sts – stitches
sl st – slip stitch
MR – magic ring
(…) – repeat instruction for the amount of times given
Materials you need for Hazel:
Affiliate links for the US:
1. Cotton yarn,
I used:
A: Schachenmayr Catania – 437 Sunkissed
B: Scheepjes Catona – 106 Snow White
C: Schachenmayr Catania – 423 Vintage
3. Safety eyes, 9mm
5. Scissors
7. Pins
8. Stuffing
9. Button – 12mm
10. 3 pom poms – 10mm
11. Needle and Thread to sew the button on
12. Glue Gun
Affiliate links for the UK:
1. CottonYarn:
A: Schachenmayr Catania – 437 Sunkissed
B: Scheepjes Catona – 106 Snow White
C: Schachenmayr Catania – 423 Vintage
5. Scissors
7. Pins
8. Stuffing
9. Button – 12mm
10. Thread and Needle to sew the button on
11. 3 pom pom – 10mm
12. Glue Gun
Arms: (make 2)
start with colour A
Rnd 1: 5sc in a MR (5)
Rnd 2: inc in every st (10)
Rnd 3-20: (18 rounds) sc in every st, in last st in round 20 change to colour B (10)
Rnd 21-22: (2 rounds) sc in every st around (10)
Press both layers of arms together so that they lay flat on top of each other, aligning the stitches side by side. Sc together the opposite stitches. I put 4sc. Fasten off yarn on both arms, leaving a long tail to sew.
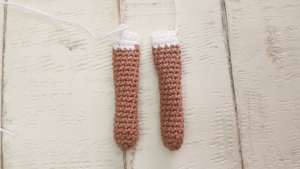
Legs: ( make 2)
start with colour B
Leg 1:
Rnd 1: 6sc in a MR (6)
Rnd 2: (sc in next st, inc in next) 3 times (9)
Rnd 3: (sc in next 2 sts, inc in next) 3 times (12)
Rnd 4: (sc in next 5 sts, inc in next) 2 times (14)
Rnd 5-15: (11 rounds) sc in every st, in last st in round 15 change to colour A (14)
Rnd 16-32: (17 rounds) sc in every st, in last st change to colour B (14)
Rnd 33-36: (4 rounds) sc in every st around (14)
Stuff the legs and on the 1st leg fasten off yarn.
Leg 2:
Repeat round 1-35 of leg 1.
Rnd 36: put sc in next 4 sts only.
On the second leg do not fasten off yarn, keep crocheting, we will connect the legs.
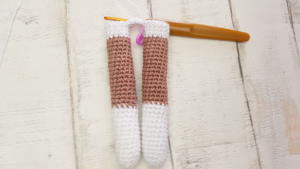
Body:
continue with colour B
Rnd 1: ch4, sc in first st on first leg and sc in next 13 sts on same leg. Working on ch4, sc in all 4 ch spaces. On second leg sc in every 14 sts. Sc in next 4 sts in unused loops on the other side of ch4. (36)
Rnd 2-8: (7 round) sc in every st around (36)
Rnd 9: (sc in next 7 sts, dec) 4 times (32)
Rnd 10-13: (4 rounds) sc in every st around (32)
Rnd 14: (sc in next 6 sts, dec) 4 times (28)
Rnd 15-16: ( 2 rounds) sc in every st around (28)
Rnd 17: (sc in next 5 sts, dec) 4 times (24)
Rnd 18: sc in every st around (24)
Rnd 19: (sc in next 2 sts, dec) 6 times (18)
Rnd 20: sc in every st around (18)
Stuff the body firm. Fasten off yarn, leave a long tail to sew the head to the body.
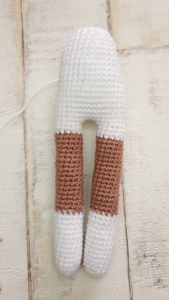
Head:
Use colour A
Rnd 1: 6sc in a MR (6)
Rnd 2: inc in every st (12)
Rnd 3: (sc in next 2 sts, inc in next) 4 times (16)
Rnd 4: (sc in next 3 sts, inc in next) 4 times (20)
Rnd 5: (sc in next 4 sts, inc in next) 4 times (24)
Rnd 6: sc in next 6 sts, (inc in next st, sc in next) 6 times, sc in last 6 sts (30)
Rnd 7: sc in next 6 sts, (sc in next 2 sts, inc in next) 6 times, sc in last 6 sts (36)
Rnd 8: (sc in next 5 sts, inc in next) 6 times (42)
Rnd 9: (sc in next 6 sts, inc in next) 6 times (48)
Rnd 10: (sc in next 7 sts, inc in next) 6 times (54)
Rnd 11: (sc in next 8 sts, inc in next) 6 times (60)
Rnd 12-22: (11 rounds) sc in every st around (60)
Insert safety eyes between round 8-9, leaving 18 sts between them
Rnd 23: (sc in next 8 sts, dec) 6 times (54)
Rnd 24: (sc in next 7 sts, dec) 6 times (48)
Rnd 25: (sc in next 6 sts, dec) 6 times (42)
Rnd 26: (sc in next 5 sts, dec) 6 times (36)
Rnd 27: (sc in next 4 sts, dec) 6 times (30)
Rnd 28: (sc in next 3 sts, dec) 6 times (24)
Stuff the head firm
Rnd 29: (sc in next 2 sts, dec) 6 times (18)
Rnd 30: (sc in next st, dec) 6 times (12)
Rnd 31: (dec) 6 times (6)
Fasten off yarn, close the hole, weave in the ends.
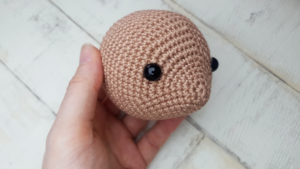
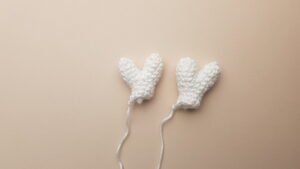
Antlers (make 2):
Use colour B
Tine 1:
Rnd 1: 6 sc in a MR (6)
Rnd 2: (sc in next 2 sts, inc in next) 2 times (8)
Rnd 3-4: (2 rounds) sc in every st around (8)
Fasten off yarn
Tine 2:
Repeat round 1-4 of tine 1, continue with round 5
Rnd 5: sc in every st around (8)
Do not fasten off yarn, connect the 2 tines together
Rnd 6: sc in 1st st made on tine 1, sc in next 7 sts on same tine, sc in all 8 sts on tine 2 (16)
Rnd 7: (sc in next 2 sts, dec) 4 times (12)
Rnd 8: (sc in next 4 sts, dec) 2 times (10)
Rnd 9-11: (3 rounds) sc in every st around (10)
Fasten off yarn, leaving a long tail to sew
Ears: (make 2)
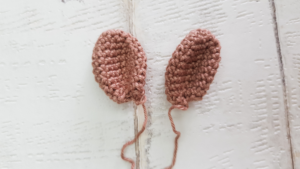
Use colour A
Rnd 1: 6sc in a MR (6)
Rnd 2: (sc in next st, inc in next) 3 times (9)
Rnd 3: (sc in next 2 sts, inc in next) 3 times (12)
Rnd 4: (sc in next 3 sts, inc in next) 3 times (15)
Rnd 5: (sc in next 4 sts, inc in next) 3 times (18)
Rnd 6-8: (3 rounds) sc in every st around (18)
Rnd 9: (sc in next 4 sts, dec) 3 times (15)
Rnd 10: (sc in next 3 sts, dec) 3 times (12)
Rnd 11: (sc in next 2 sts, dec) 3 times (9)
Fasten off yarn, leave a long tail to sew
Bow:
Use colour C
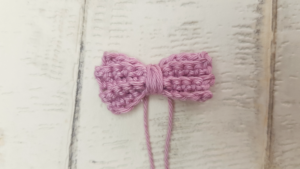
Rnd 1: ch 11, starting from second ch from hook, sc in all 10 sts (10)
Rnd 2-5: (4 rounds) ch1 turn, using BLO sc in all 10 sts
Fasten off yarn, weave in the ends. Get a long string. Place it in the middle of the bow, leaving a long tail.
Wrap it around the bow 8 times. Tie the 2 tails together tight and leave both strings long. We will use them to tie the bow to the hair.
Trousers:
Use colour C
TIP: ch1 at the beginning of the round does not count as a st
Rnd 1: ch 37, starting from 8th chain from hook, sc in all 30 sts (30)
The hook we created with that ch7 will be the button hole.
Rnd 2: ch1, turn (hdc in next 2 sts, hdc-inc in next) 10 times (40)
Rnd 3: ch1 turn, hdc in next 6 sts, ch5, skip 8 sts on dress, hdc in next 12 sts, ch5, skip 8 sts on dress, hdc in last 6 sts (34)
Rnd 4: ch1 turn, hdc in next 6 sts, 5 hdc in ch space, hdc in next 12 sts, 5 hdc in ch space, hdc in last 6 sts (34)
Rnd 5-6: (2 rounds) ch1 turn, hdc in every st (34)
Rnd 7: ch1 turn, (hdc in next 16 sts, hdc-inc in next) 2 times (36)
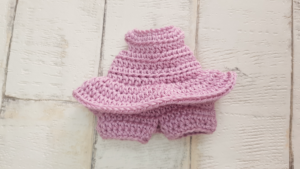
After last st made in round 7, sl st to first hdc, but only to the BLO. From now on we will work in continuous rounds.
Rnd 8: ch1, using BLO hdc in every st, sl st to first hdc (36)
Rnd 9: ch1, hdc in every st, sl st to first hdc (36)
Rnd 10: ch1 (hdc in next 8 sts, hdc-inc in next) 4 times, sl st to first hdc (40)
Rnd 11: ch1, (hdc in next 9 sts, hdc-inc in next) 4 times, sl st to first hdc (44)
Mark stitch 3, 24 and 25
Leg 1:
Rnd 1: ch1, hdc in next 2 sts, hdc in st 25 you marked, hdc in next 19 sts, sl st to first hdc (22)
Rnd 2: ch1, hdc in all 22 sts (22)
Rnd 3: ch1, (sc in next 9 sts, dec) 2 times (20)
Fasten off yarn. Weave in the ends,
Leg 2:
Rnd 1: Connect yarn in marked st 3, ch1, hdc in all 22 sts. (last st should be the marked st 24) sl st to first hdc (22)
Rnd 2: ch1, hdc in all 22 sts, sl st to first st (22)
Rnd 3: ch1, (sc in next 9 sts, dec) 2 times (20)
Fasten off yarn, weave in the ends
Sew the button on the back of the dress.
Skirt:
Connect colour C to the first FLO made in round 8.
Rnd 1: ch1, (hdc in next st, hdc-inc in next) 18 times, sl st to first hdc (54)
Rnd 2: ch 1, (hdc in next 2 sts, hdc-inc in next) 18 times, sl st to first hdc (72)
Rnd 3-4: (2 round) ch1, hdc in every st, sl st to first hdc (72)
Fasten off yarn, weave in the ends.
Assembling Hazel:
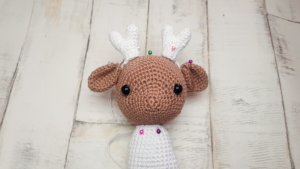
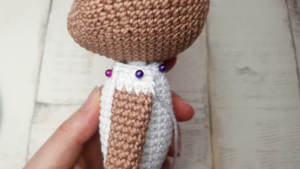
1. Sew the head to the body
2. Sew the ears to the head between round 14-16
3. Sew the antlers between the 2 ears
4. Sew the bow by one of the ears
5. Sew the arms to the body between rounds 18-19
6. Using a glue gun stick the 3 pom poms on. 1 on each side of the legs and 1 on the front of the dress
Congratulation you finished Hazel!
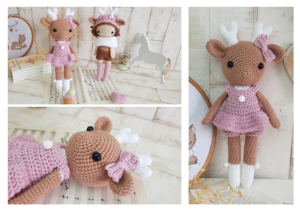
I would love to see your finished crochet deer, Hazel. Please share it with me on Instagram. You can find me as @zitaandbunny or click on this icon. ![]()
You can check out my other patterns:
Zita the Deer Girl
Honey the Cow
Bonnie the Clown
