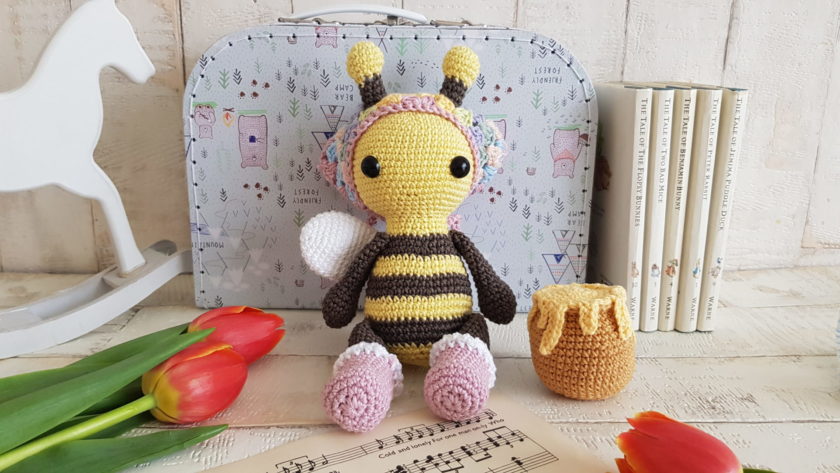
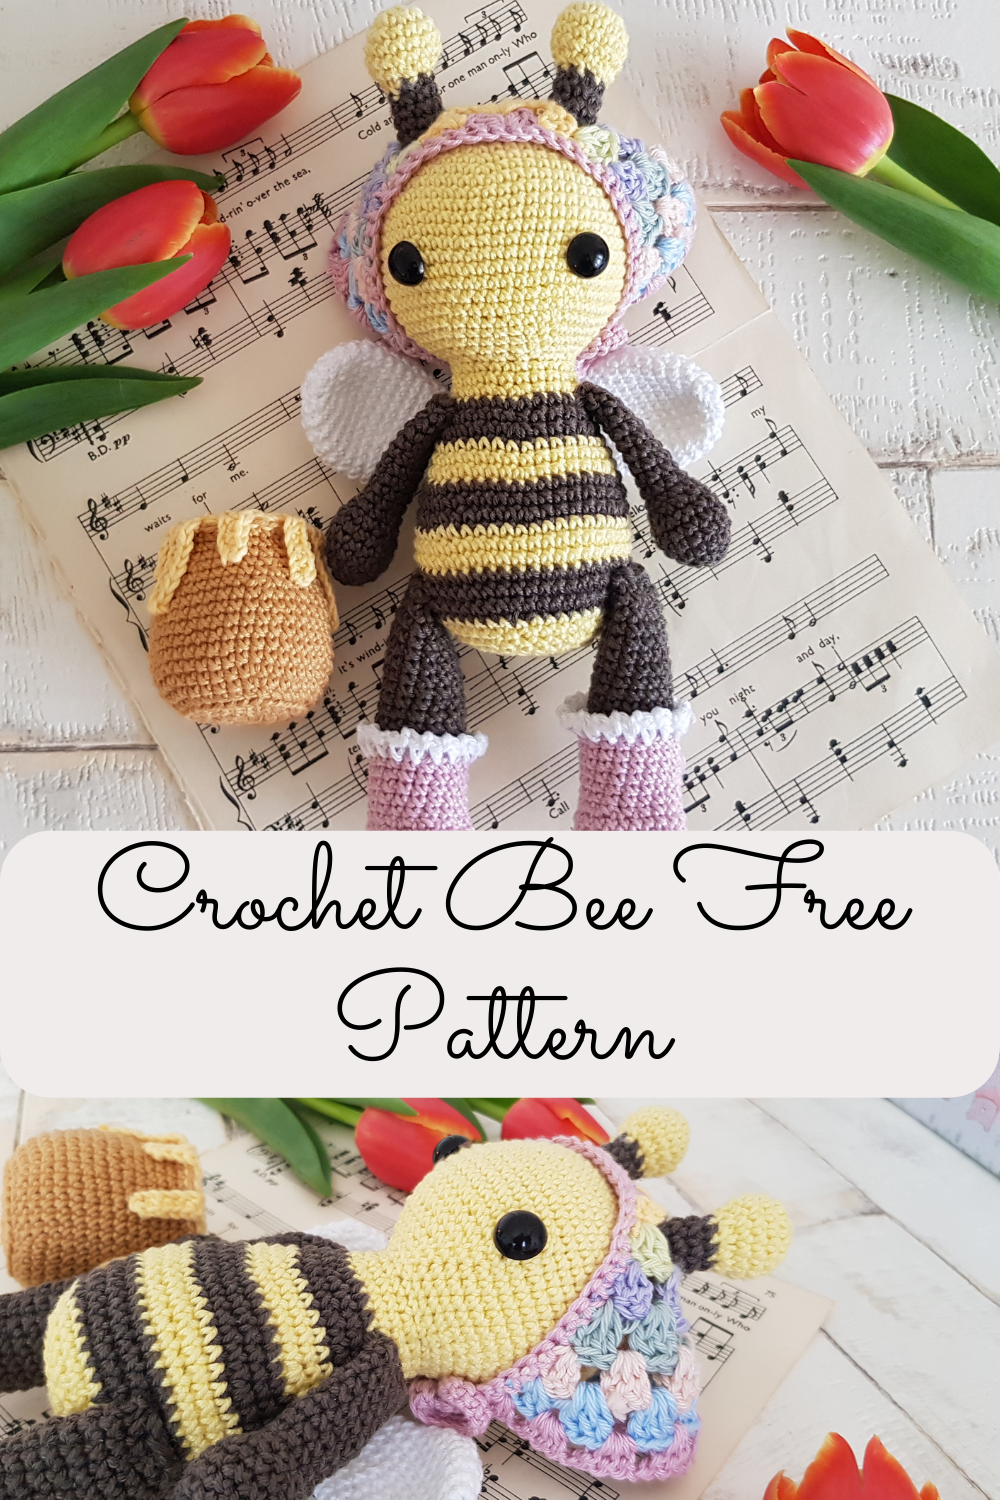
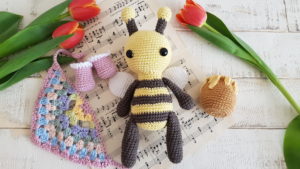
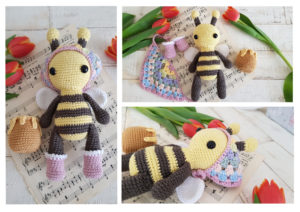
This colourful and cute crochet bee pattern in not only easy to make, but it also makes the perfect gift to any child or adult. Although you need quite a few ball of yarns to make it, the bandana makes Blossom look very unique and chick.
Pin it now, make it later!
Now, that spring is finally here, what else we should crochet, than a bee. Well May is here, but in the UK we are still freezing. I never experienced this cold this time of the year. As Spring is my favourite season, I really miss it. But luckily, we hookers can create, whatever we want. And I want spring, I want to smell the flowers, listen the birds, wear t-shirt and listen the buzzing of the bees. To be honest, when I decided I wanted to do something springy, and colourful, I didn’t have to think long what to make.
It was pretty obvious for me, that I had to crochet a bee, as my uncle is a bee keeper. All in my life I was listening how good honey is and how useful bees are. He reminds me of the old father in My Big Fat Greek Wedding, who used that spray for everything. My uncle uses honey for everything. You cough, eat honey. Your legs are hurting, eat honey. Whatever happens, just eat honey!
If one day I ran out of honey, he would get seriously upset with me. But luckily that is totally impossible.
The story of Blossom:
Blossom is a cute, chatty little bee, who likes to fly from flower to flower and collect pollen with her cousins. Sometimes her friend, Siri, the Ladybird goes with her. Those are Blossom’s favourite days, because she can talk to her friend all day and they can play while flying around.
She also like fashion, and her favourite piece is her bandana, what she got from Siri for her birthday. She wears it all the time.
Caution!
Please be very cautious when you make toys for babies or children under the age of 3. If you sew parts on it, make sure they are secure and safe.
I recommend, to embroider the eyes, as the plastic safety eyes can be dangerous. My tutorial for embroidery eyes can be found here
|
All Zita and Bunny designs are original. Sales of the finished items are encouraged, but please give credit to the designer. Copyright © 2021 by Zita Renata Elek (Zita and Bunny).All rights reserved. This pattern is for personal use only. No part of it may be reproduced, resold, translated, published, altered, shared or posted in any way. |
**This blog contains affiliate links for products I use, believe in, or recommend. This means I will earn a small commission if you make a purchase from one of their links, and of course it is at no extra cost for you. It helps me to keep Zita and Bunny going and to keep publishing free patterns for you. You can check my full disclosure here. **
Abbreviations:
sc – single crochet
inc – increase
dec – decrease
dc – double crochet
BLO – use the back loop only
ch – chain
st – stitch
sts – stitches
sl st – slip stitch
MR – magic ring
(…) – repeat instruction for the amount of times given
Materials you need for this crochet bee:
Affiliate links for the US:
1. Cotton yarn,
I used:
A: Schachenmayr Catania – 403 Vanille
B: Scheepjes Catona – 387 Dark Olive
C: Scheepjes Catona – 106 Snow White
D: Schachenmayr Catania – 423 Vintage
E: Scheepjes Catona – 173 Bluebell
F: Scheepjes Catona – 392 Lime Juice
G: Scheepjes Catona – 399 Lilac Mist
H: Scheepjes Catona – 402 Silvergreen
I: Safran – 10 Yellow
J: Scheepjes Catona – 263 Petal Peach
K: Schachenmayr Catania – 179 Camel
3. Safety eyes, 12mm
5. Scissors
7. Pins
8. Stuffing
Affiliate links for the UK:
1. CottonYarn:
A: Schachenmayr Catania – 403 Vanille
B: Scheepjes Catona – 387 Dark Olive
C: Scheepjes Catona – 106 Snow White
D: Schachenmayr Catania – 423 Vintage
E: Scheepjes Catona – 173 Bluebell
F: Scheepjes Catona – 392 Lime Juice
G: Scheepjes Catona – 399 Lilac Mist
H: Scheepjes Catona – 402 Silvergreen
I: Safran – 10 Yellow
J: Scheepjes Catona – 263 Petal Peach
K: Schachenmayr Catania – 179 Camel
5. Scissors
7. Pins
8. Stuffing

Tip: A dear follower told me this tip and now I pass it on. You can put a small magnet in the hands and 2 small magnets inside the pot, by the side and than the bee will be able to hold the pot. I haven’t tried it myself, but planning to. If you try it before me, let me know how it worked out.
Arms: (make 2)
Use colour B
1: 5sc in a MR [5]
2: (inc) x5 [10]
3: (sc, inc) x5 [15]
4 – 6: sc in every st around [15]
7: (sc, dec) x5 [10]
stuff the arms up to this point, do not stuff the rest
8 – 18: sc in every st around [10]
Fasten off yarn, leaving a long tail to sew
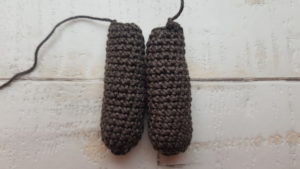
Legs: (make 2)
Use colour B
1: 7sc in a MR [7]
2: (inc) x7 [14]
3 – 15: sc in every st around [14]
stuff the leg up to this point, do not stuff the rest
16 – 19: sc in every st around [14]
20: (sc, dec) x4, 2sc [10]
Fasten off yarn, leaving a long tail to sew
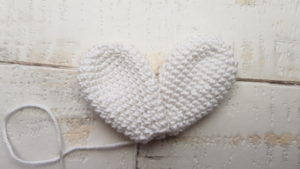
Wings: (make 2)
Use colour C
1: 6sc in a MR [6]
2: (inc) x6 [12]
3: (sc, inc) x6 [18]
4: (2sc, inc) x6 [24]
5 – 8: sc in every st around [24]
9: (6sc, dec) x3 [21]
10: sc in every st around [21]
11: (5sc, dec) x3 [18]
12: sc in every st around [18]
13: (4sc, dec) x3 [15]
14: sc in every st around [15]
15: (3sc, dec) x3 [12]
16: sc in every st around [12]
17: (2sc, dec) x3 [9]
Fasten off yarn, leaving a long tail to sew
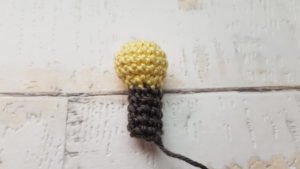
Antenna: (make 2)
Start with colour A
1: 8sc in a MR [8]
2: (inc) x8 [16]
3 – 5: sc in every st around [16]
6: (dec) x8, in last st change to colour B [8]
Start stuffing the antennas
7 – 11: sc in every st around [8]
fasten off yarn, leaving a long tail to sew, stuff the rest of the antenna.
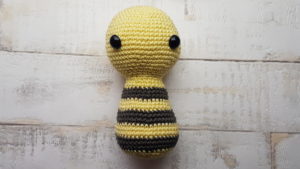
Head and Body:
start with colour A
1: 8sc in a MR [8]
2: (inc) x8 [16]
3: (sc, inc) x8 [24]
4: (3sc, inc) x6 [30]
5: (4sc, inc) x6 [36]
6: (5sc, inc) x6 [42]
7: (6sc, inc) x6 [48]
8: (7sc, inc) x6 [54]
9 – 13: sc in every st around [54]
14: (8sc, inc) x6 [60]
15 – 17: sc in every st around [60]
18: (8sc, dec) x6 [54]
19: (7sc, dec) x6 [48]
20: (6sc, dec) x6 [42]
21: (5sc, dec) x6 [36]
22: (4sc, dec) x6 [30]
23: (3sc, dec) x6 [24]
Insert the eyes between rows 14 – 15, leaving 14sts between them, and stuff the head firm
24: (2sc, dec) x6 [18]
25: (2sc, inc) x6 [24]
26: sc in every st around [24]
27: (3sc, inc) x6, in last st change to colour B [30]
28 – 29:sc in every st around [30]
30: (4sc, inc) x6, in last st change to colour A [36]
31 – 32: sc in every st around [36]
33: (5sc, inc) x6, in last st change to colour B [42]
34 – 35: sc in every st around [42]
36: (6sc, inc) x6, in last st change to colour A [48]
37 – 39: sc in every st around, in last st change to colour B [48]
40 – 42: sc in every sta round, in last st change to colour A [48]
start stuffing the body
43: (6sc, dec) x6 [42]
44: (5sc, dec) x6 [36]
45: (4sc, dec) x6 [30]
46: (3sc, dec) x6 [24]
Stuff the body firm
47: (2sc, dec) x6 [18]
48: (sc, dec) x6 [12]
49: (dec) x6 [6]
Fasten off yarn, close the hole by weaving through the front loops only, then pull the the yarn tight, weave in the end.

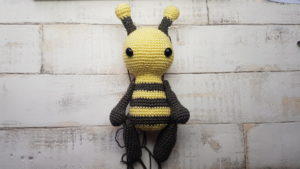
Assembling Blossom, the Bee:
1: sew legs onto the body to row 40
2: sew arms onto the body to row 28
3: sew the wings to the back of the bee between rows 31 – 33
4: sew the antennas on the head between rows 4 -6. The other way to do it is to finish the bandana first, put it on the head and then sew the antennas on where the holes of the bandana are.
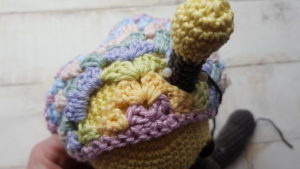
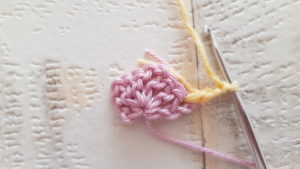
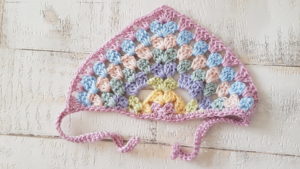
Bandana:
Tip: The edge of the bandana might not be straight, just like mine, but don’t worry about it, as in row 9 we put an extra sc edge to it and it will make it look better.
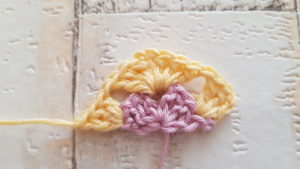
Start with colour D
1: Start with a Mr, ch3, 2dc, ch2, 3dc. Close ring, fasten off yarn
2: Turn your work around and connect colour I to the last st of previous round.
Ch3, 2dc in same st, ch1, 3dc-ch2-3dc in ch2 space from previous round, ch1, 3dc in last st. Fasten off yarn
3: Turn your work, connect colour F to the last st of previous round.
Ch3, 2dc in same st, ch6, skip ch1 space, 3dc-ch2-3dc, in ch2 space, ch6, skip ch1 space, 3dc in last st. Fasten off yarn
4: Turn your work, connect colour G to the last st of previous round.
Ch3, 2 dc in same st, ch1, 3dc in ch6 space, ch1 3dc in same space, ch1, 3dc-ch2-3dc in ch2 space, ch1, 3dc in ch6 space, ch1, 3dc in same space, ch1, 3dc in last st. Fasten off yarn
5: Turn your work, connect colour H to the last st of previous round.
Ch3, 2dc in same space, (ch1, 3dc in ch1 space) x3, ch1, 3dc-ch2-3dc in ch2 space, (ch1, 3dc in ch1 space) x3, ch1, 3dc in last st. Fasten off yarn
6: Turn your work, connect colour J to the last st of previous round.
Ch3, 2dc in same space, (ch1, 3dc in ch1 space) x4, ch1, 3dc-ch2-3dc in ch2 space, (ch1, 3dc in ch1 space) x4, ch1, 3dc in last st. Fasten off yarn
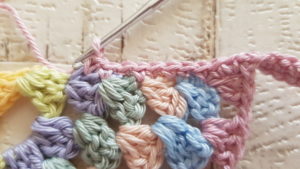
7: Turn your work, connect colour E to the last st of previous round.
Ch3, 2dc in same space, (ch1, 3dc in ch1 space) x5, ch1, 3dc-ch2-3dc in ch2 space, (ch1, 3dc in ch1 space) x5, ch1, 3dc in last st. Fasten off yarn
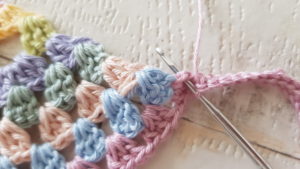
8: Turn your work, connect colour D to the last st of previous round.
Ch3, 2dc in same space, (ch1, 3dc in ch1 space) x6, ch1, 3dc-ch2-3dc in ch2 space, (ch1, 3dc in ch1 space) x6, ch1, 3dc in last st. Continue with the same colour
9: Ch31, starting from 2nd ch from hook, sc in next 30 sts, put sc evenly to the front of the bandana until you get to the other side. I put 2sc in every dc, 3sc in the middle and where the edge was not straigt. All together I put 36sc. You can put more or less, it is up to you, as it does not make any difference. Ch31, starting from 2nd ch from hook, sc in next 30sts. Sl st to the side of the bandana
Fasten off yarn, weave in the ends.
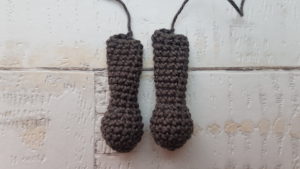
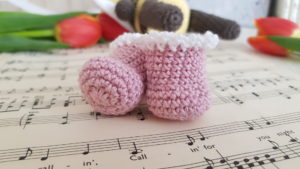
Boots: (make 2)
Start with colour D
1: 8sc in a MR [8]
2: (inc) x8 [16]
3: (sc, inc) x8 [24]
4 – 6: sc in every st around [24]
7: 3sc, dec, 2sc, 4dec, 3sc, dec, 4sc [18]
8 – 13: sc in every st around, in last st change to colour C [18]
14: (sc, ch2) x18, sl st to 1st sc [18sc, 18 ch2]
Fasten off yarn, weave in the end.
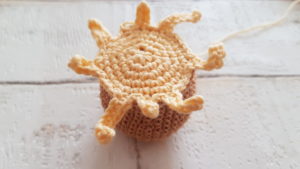
Honey Pot:
Use colour K
1: 6sc in a MR [6]
2: (inc) x6 [12]
3: (sc, inc) x6 [18]
4: (2sc, inc) x6 [24]
5: BLO (3sc, inc) x6 [30]
6: (4sc, inc) x6 [36]
7 – 12: sc in every st around [36]
13: (4sc, dec) x6 [30]
14 – 17: (sc in every st around [30]
Fasten off yarn, stuff the pot.

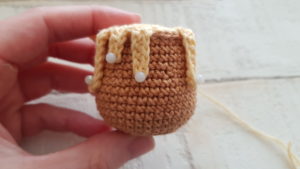
Honey:
Use colour I
After chain, always start in 2nd chain from hook
1: 6sc in a MR [6]
2: (inc) x6 [12]
3: (sc, inc) x6 [18]
4: (2sc, inc) x6 [24]
5: (3sc, inc) x6 [30]
Place it on top of the pot. When you need to slip stitch, do it through both the stitches of the honey and the pot.
7: Sl st in next 2 sts, ch7, starting from 2nd ch from hook, sc in next 6sts, sl st in next 3 sts on pot, ch5, sc in next 4sts, sl st in next 5 sts on pot, ch8, sc in next 7sts, sl st in next 2 sts on pot, ch4, sc in next 3sts, sl st in next 2 sts on pot, ch6, sc in next 5sts, sl st in next 5 sts on pot, ch7, sc in next 6sts, sl st in next 6 sts on pot, ch7, sc in next 6sts, sl st in next 2sts on pot, ch4, sc in next 3sts, sl st in next 3 sts on pot.
8: pin down the honey and sew the end to the pot.
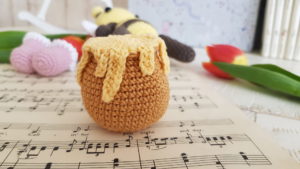
Congratulation, you finished Blossom!
I would love to see your finished crochet bee, Blossom. Please share it with me on Instagram. You can find me as @zitaandbunny or click on this icon. ![]()