I am fond of forest animals, and I always wanted to crochet a deer. When I design toys, I like to base characters on people, and animals from my life, especially from my childhood. I based one on my son, one on my daughter, and at the moment I am working on one about my mum, Olgi, the kitchen fairy. The pattern is coming soon, but because it is based on my mum, it has to be perfect, so it takes longer than usual. Anyway, this little deer, is based on myself.
I was a very shy little girl, who was very quiet in nursery, but very loud at home. In spite of my shyness, I always knew what I wanted and I always got it. I am not that shy now, but sometimes I still block down.
I love stripy outfits, especially pyjamas. When I was small, unlike most of the children, I did not sleep with soft toys, but with a muslin square. I named it Peta, which is a short way to say nappy in Hungarian. I loved it so much, I had to take it with me everywhere, even to nursery. It gave me comfort and helped with my shyness. It became part of our everyday life, my mum even embroidered something on it for me. By the time I was 7, it was washed into pieces, and my mum put it in the bin. Of course with my permission, but I still remember the day. I remember I was looking at it being in the bin. Sad day. My daughter is so upset why we didn’t keep it.
By the way, Zizi is my nickname, since the day I was born. Not many people call me that now, but my closest family members still do.
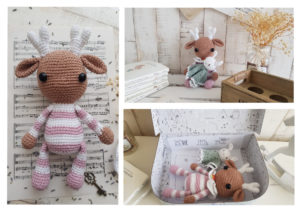
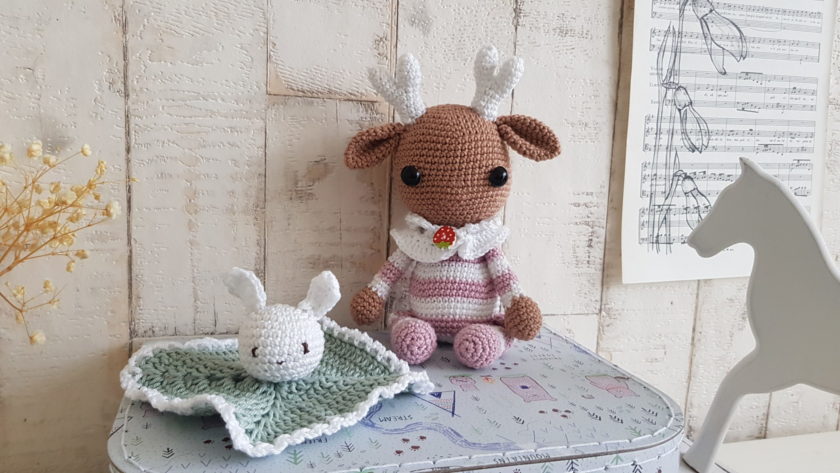
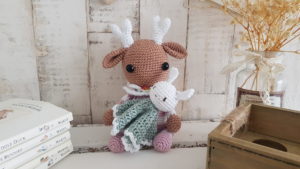
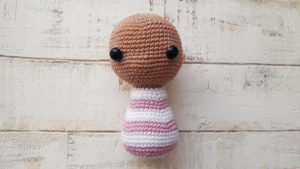
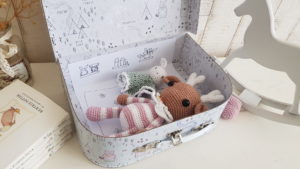
When I finished this crochet deer, Zizi, wearing her favourite pj, something was missing. I couldn’t figure it out. I tried to make her a little toy, slippers, a blanket, and many other things, but nothing worked. Then I remembered my little muslin square, Peta and here we are. She is just a little perfection with her comfort blanket.
The story of Zizi:
Zizi is a shy little deer, who is very close to her family. In nursery, she can cry through a whole day missing her parents and her brother. She is spoiled a lot, but still down to earth, and she doesn’t like no, as an answer, but deals with it well. She loves her stripy pyjama and her bunny comforter. What she likes the most is, to play with her brother, who pretends, she is a motorbike. He holds her two ears, and they run up and down in the house while he makes the sound of a motorbike. (yeah that was my life! But instead of holding my ears, my brother used to hold my two ponytails.)
Caution!
Please be very cautious when you make toys for babies or children under the age of 3. If you sew parts on it, make sure they are secure and safe.
I recommend, to embroider the eyes, as the plastic safety eyes can be dangerous. My tutorial for embroidery eyes can be found here
|
All Zita and Bunny designs are original. Sales of the finished items are encouraged, but please give credit to the designer. Copyright © 2021 by Zita Renata Elek (Zita and Bunny).All rights reserved. This pattern is for personal use only. No part of it may be reproduced, resold, translated, published, altered, shared or posted in any way. |
**This blog contains affiliate links for products I use, believe in, or recommend. This means I will earn a small commission if you make a purchase from one of their links, and of course it is at no extra cost for you. It helps me to keep Zita and Bunny going and to keep publishing free patterns for you. You can check my full disclosure here. **
Abbreviations:
sc – single crochet
inc – increase
dec – decrease
dc – double crochet
ch – chain
st – stitch
sts – stitches
sl st – slip stitch
MR – magic ring
(…) – repeat instruction for the amount of times given
Materials you need for this crochet deer:
Affiliate links for the US:
1. Cotton yarn,
I used:
A: Schachenmayr Catania – 437 Sunkissed
B: Schachenmayr Catania – 106 White
C: Schachenmayr Catania – 423 Vintage
D: Scheepjes Catona – 402 Silver Green
2. crochet hook, 3mm and 2.5mm
3. Safety eyes, 12mm
5. Scissors
7. Pins
8. Stuffing
9. Button – I used a 12mm one
10. Thread for the loveys eyes
11. Sewing needle
Affiliate links for the UK:
1. CottonYarn:
A: Schachenmayr Catania – 437 Sunkissed
B: Schachenmayr Catania – 106 White
C: Schachenmayr Catania – 423 Vintage
D: Scheepjes Catona – 402 Silver Green
2. crochet hook, 3mm and 2.5mm
5. Scissors
7. Pins
8. Stuffing
9. Button – I used a 12mm one
10. Thread for the loveys eyes
11. Sewing needle

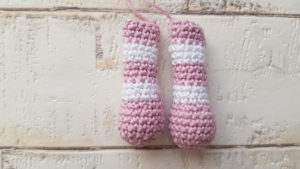
Legs: (make 2)
Start with colour C ( always change colour in the last stitch of previous round)
2.75mm hook
1: 6sc in MR [6]
2: (inc) x6 [12]
3: (sc, inc) x6 [18]
4 – 7: sc in every st around [18]
8: (sc, dec) x6 , in last st change to colour B [12]
9 – 11: sc in every st around, in last st change to colour C [12]
12 – 14: sc in every st around, in last st change to colour B [12]
Stuff the leg up to this point, do not stuff the rest
15 – 17: sc in every st around, in the last st change to colour C [12]
18 – 20: sc in every st around [12]
Fasten off yarn on both legs, and leave a long tail to sew.
Arms: (make 2)
Start with colour A (always change colour in last stitch of previous rounds)
2.75mm hook
1: 5sc in a MR [5]
2: (inc) x5 [10]
3: (sc, inc) x5 [15]
4 – 6: sc in every st around [15]
7: (sc, dec) x5, in last st change to colour B [10]
Stuff the arms up to this point, do not stuff the rest
8 – 10: sc in every st around, in last st change to colour C [10]
11 – 13: sc in every st around, in last st change to colour B [10]
14 – 16: sc in every st around, in last st change to colour C [10]
17 – 19: sc in every st around, in last st change to colour B [10]
20 – 21: sc in every st around [10]
fasten off yarn on both arms and leave a long tail to sew

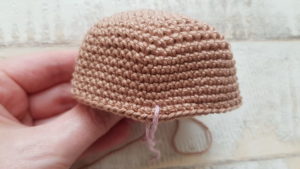
Head and Body:
start with colour A and 2.75mm hook
1: 6sc in a MR [6]
2: (inc) x6 [12]
3: (sc, inc) x6 [18]
4: (2sc, inc) x6 [24]
5: (3sc, inc) x6 [30]
6: (4sc, inc) x6 [36]
7: (5sc, inc) x6 [42]
8: (6sc, inc) x6 [48]
9: (7sc, inc) x6 [54]
10 – 15: sc in every st around [54]
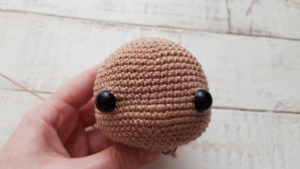
Mark st 27, it will be the middle st between the 2 eyes
16: 12sc, inc, 12sc, 3inc, 12sc, inc, 12sc, inc [60]
17 – 18: sc in every st around [60]
19: 17sc, dec, 7sc, 3dec, 7sc, dec, 17sc, dec [54]
20: (7sc, dec) x6 [48]
21: (6sc, dec) x6 [42]
22: (5sc, dec) x6 [36]
23: (4sc, dec) x6 [30]
24: (3sc, dec) x6 [24]
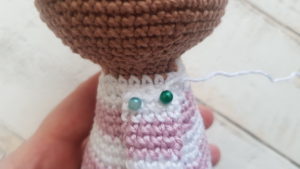
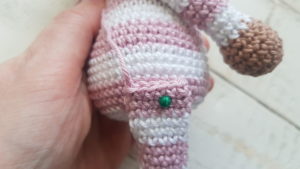
Insert the eyes in row 15, leaving 13 sts between them. The st we marked, is the middle between the 2 eyes. Stuff the head firm.
25: (4sc, dec) x4 [20]
26: sc in every st around, in last st change to colour B [20]
27: (4sc, inc) x4 [24]
28: sc in every st around [24]
29: (5sc, inc) x4, in last st change to colour C [28]
30: sc in every st around [28]
31: (6sc, inc) x4 [32]
32: sc in every st around, in last st change to colour B [32]
33: (7sc, inc) x4 [36]
34: sc in every st around [36]
35: (8sc, inc) x4, in last st change to colour C [40]
36: (9sc, inc) x4 [44]
37: (10sc, inc) x4 [48]
38: sc in every st around, in the last st change to colour B [48]
39 – 41: sc in every st around, in last st change to colour C [48]
42 – 43: sc in every st around [48]
44: (6sc, dec) x6, in the last st change to colour B [42]
45: (5sc, dec) x6 [36]
46: (4sc, dec) x6 [30]
47: (3sc, dec) x6 [24]
Stuff the body firm.
48: (2sc, dec) x6 [18]
49: (sc, dec) x6 [12]
50: (dec) x6 [6]
fasten off yarn, close the hole, weave in the end.
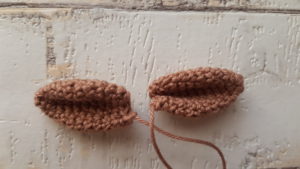
Ears: (make 2)
Use colour A and 2.75mm hook
1: 6sc in a MR [6]
2: (sc, inc) x3 [9]
3: (2sc, inc) x3 [12]
4: (3sc, inc) x3 [15]
5: (4sc, inc) x3 [18]
6 – 8: sc in every st around [18]
9: (4sc, dec) x3 [15]
10: (3sc, dec) x3 [12]
11: (2sc, dec) x3 [9]
fasten off yarn, leaving a long tail to sew
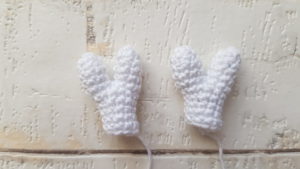
Antlers: (make 2)
Use colour B and a 2.5mm hook
Stuff the antlers a bit as you go.
Tine 1:
1: 6sc, in a MR [6]
2: (2sc, inc) x2 [8]
3 – 4: sc in every st around [8]
fasten off yarn
Tine 2:
1: 6sc in a MR [6]
2: (2sc, inc) x2 [8]
3 – 5: sc in every st around [8]
do not fasten off yarn, we will connect the 2 tines.
6: sc in last st made on 1st tine, sc in next 7sts, on 2nd tine sc in every 8sts [16]
7: (2sc, dec) x4 [12]
8: (4sc, dec) x2 [10]
9 – 11: sc in every st around
Fasten off yarn
Assembling Zizi, the deer:
1: Sew the arms to onto the body to row 28
2: Sew the legs onto the body to row 42
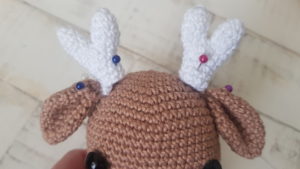
3: sew the antlers between rows 4-7
4: sew the ears to row 8
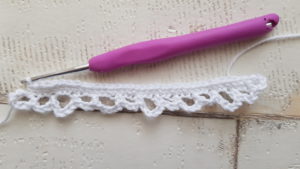
Scarf:
Use colour B and 2.75mm hook
1: Ch 42, starting form 8th chain from hook, (sc, ch3, skip 2 sts, sc, ch5, skip 2sts) x5, sc, ch3, skip 2sts, sc in next st, put 3 sc in last st, continue on the other side, sc in next 34 sts
The hook we created with the ch 7, will be the button hole.
2: Ch1, turn, 2dc in next 34sts, 2sc in next 3sts, sc in next st, (sc in ch3 space, sc-hdc-2dc-hdc-sc in ch5 space) x5, sc in last ch space
fasten off yarn, weave in the ends, sew a button on.
BUNNY LOVEY:
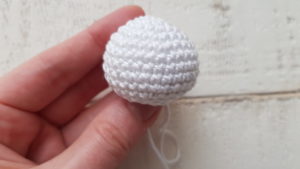
Head:
use colour B and 2.75mm hook
1: 6sc in a MR [6]
2: (inc) x6 [12]
3: (sc, inc) x6 [18]
4: (2sc, inc) x6 [24]
5: (3sc, inc) x6 [30]
6 – 9: sc in every st around [30]
10: (3sc, dec) x6 [24]
11: (2sc, dec) x6 [18]
12: (sc, dec) x6 [12]
13: (dec) x6 [6]
close the hole, weave in the end
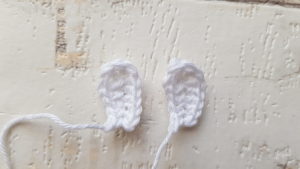
Bunny Ears: (make 2)
Use colour B and 2.75mm hook
1: Ch7, starting from 2nd ch from hook, sc in next 2sts, hdc in next 2 sts, dc in next st, in last st put 3dc, on the other side of the chain, dc in next st, hdc in next 2sts, sc in next 2sts
Fasten off yarn
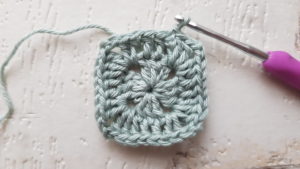
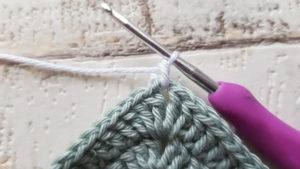
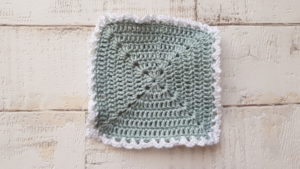
Blanket:
Use colour D and 2.75mm hook
1: Start with a MR ch3, 2dc, ch2, (3dc, ch2) x3, sl st to ch3
2: Ch3, dc in next 2sts, 2dc-ch2-2dc in ch space, (dc in next 3sts, 2dc-ch2-2dc in ch space) x3, sl st to ch3
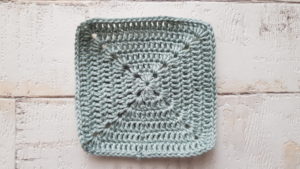
3: Ch3, dc in next 4sts, 2dc-ch2-2dc in ch space, (dc in next 7sts, 2dc-ch2-2dc in ch space) x3, dc in last 2sts, sl st to ch3
4: Ch3, dc in next 6sts, 2dc-ch2-2dc, (dc in next 11sts, 2dc-ch2-2dc) x3, dc in last 4sts, sl st to ch3
5: Ch3, dc in next 8sts, 2dc-ch2-2dc, (dc in next 15 sts, 2dc-ch2-2dc) x3, dc in last 6sts, sl st to ch3
6: Ch3, dc in next 10sts, 2dc-ch2-2dc in ch space, (dc in next 19sts, 2dc-ch2-2dc) x3, dc in last 8sts, sl st to ch3
Fasten off yarn
7: Connect colour B in any ch space, with a standing sc, ch3, sc in same space,((Ch3, skip next st, sc in next st) x11, ch3, sc in ch space, ch3, sc in same space) – Repeat it on every side, sl st to sc
Fasten off yarn
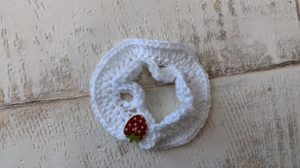
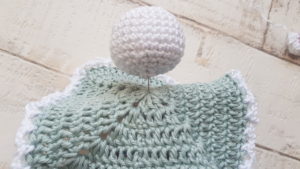
Assembling the lovey:
1: sew the head to the blanket
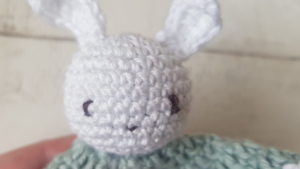
2: sew the ears to the head between rows 3-4
3: embroider the eyes to row 8, leaving 6 sts between them, and the nose between rows 9-10, over 1 sts. Make sure the nose is between the eyes
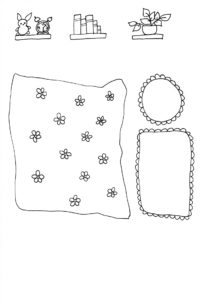
To make the play with this little toy more fun, you can download the bedroom background here.
You can place it in a box and use it as a bedroom for the toys.
Congratulation, you finished Zizi!