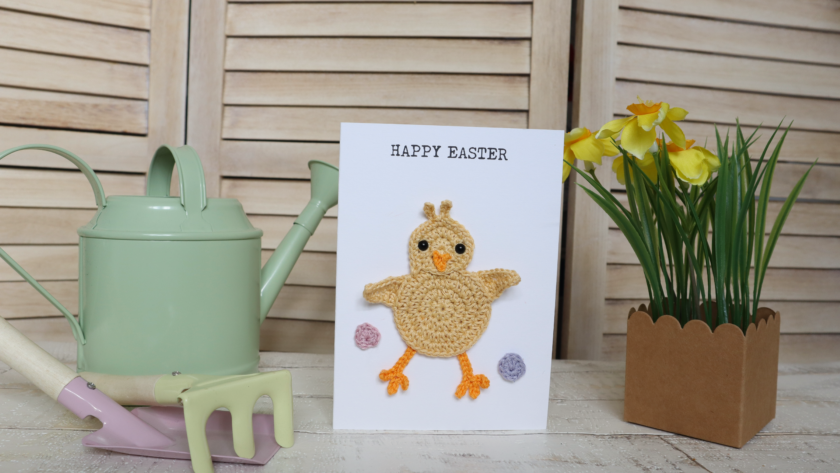
Learn how to make a quick, easy and unique crochet Easter card with a chick applique, which will definitely stand out.
Pin it now, make it later!
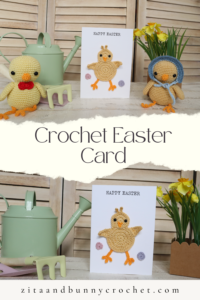
I am always in the look out for unique presents for loved ones and with Easter around the corner I had to come up with something. I used to make crochet cards and sold them before. They were quite popular so I decided to make one for my spring collection. This card is very quick and easy to make and uses very little amount of yarn. I sew the parts together, but if you are not a big fan of sewing you can just glue them together.

Caution!
Please be very cautious when you make toys for babies or children under the age of 3. If you sew parts on it, make sure they are secure and safe.
I recommend, to embroider the eyes, as the plastic safety eyes can be dangerous. My tutorial for embroidery eyes can be found here.
|
All Zita and Bunny designs are original. Sales of the finished items are encouraged, provided they are handmade by yourself in a limited number, but please give credit to the designer. No mass production. Copyright © 2021 by Zita Renata Elek (Zita and Bunny).All rights reserved. This pattern is for personal use only. No part of it may be reproduced, resold, translated, published, altered, shared or posted in any way. |
**This blog contains affiliate links for products I use, believe in, or recommend. This means I will earn a small commission if you make a purchase from one of their links, and of course it is at no extra cost for you. It helps me to keep Zita and Bunny going and to keep publishing free patterns for you. You can check my full disclosure here. **
Level: Beginner
Size of the finished doll if using the same yarn and hook size: 12cm
Please keep in mind, that I am using the yarn under technique. With this, the stitches are smaller and tighter, making the finished product smaller in size. If you yarn over, your finished product will be bigger. If you would like to achieve the same size as me and you yarn over, consider using a size smaller hook.
You can watch the video here:
Abbreviations:
sc – single crochet
hdc – half double crochet
inc – increase
hdc-inc: 2 hdc in the same stitch
dec – decrease
ch – chain
st – stitch
sl st – slip stitch
MR – magic ring
sts – stitches
(…) – Repeat instructions for the amount of times given
Materials you need for these crochet chicks:
Affiliate links for the US:
1. Cotton yarn:
A: – Schachenmayr Catania – 206 Honig
B: – Scheepjes Catona – 411 Sweet Orange
C: – Scheepjes Catona – 399 Lilac Mist
D: – Schachenmayr Catania – 423 Vintage
3. Safety eyes – 6mm, or yarn to embroider the eyes
5. Scissors
7. Glue Gun
8. Wire cutter (optional)
Affiliate links for the UK:
1. Cotton yarn:
A: – Schachenmayr Catania – 206 Honig
B: – Scheepjes Catona – 411 Sweet Orange
C: – Scheepjes Catona – 399 Lilac Mist
D: – Schachenmayr Catania – 423 Vintage
3. Safety eye – 6mm, or yarn to embroider the eyes
4. Tapestry Needle
5. Scissors
7. Glue Gun
8. Wire cutter (optional)

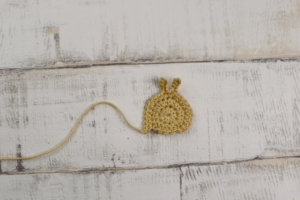
Head:
Use colour A
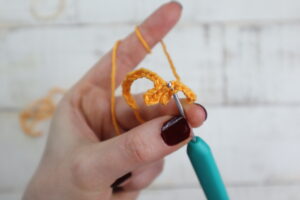
Rnd 1: 10hdc in a MR, sl st to first hdc [10]
Rnd 2: ch1, (hdc-inc) x10 sl st [20]
Rnd 3: ch1, 3sc, inc, 3sc, sc in next st, ch5, starting from second chain from hook, sc in first st, sl st in next 3 sts, now sc in the same st on the head you did your last st, ch5 again, starting from second chain from hook, sc in first st, and sl st in next 3sts, now (sc in next 3sts on head, inc) x2 [20]
We don’t crochet in the last 4 sts
Fasten off yarn, leaving a long tail to sew.
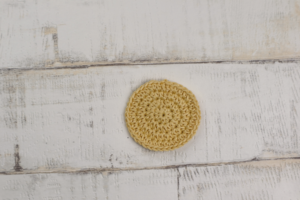
Body:
Use colour A
Rnd 1: 10hdc in a MR, sl st to first hdc [10]
Rnd 2: (hdc-inc) x10, sl st [20]
Rnd 3: (hdc, hdc-inc) x10 [30]
Rnd 4: (2hdc, hdc-inc) x10 [40]
Fasten off yarn, weave in the ends.
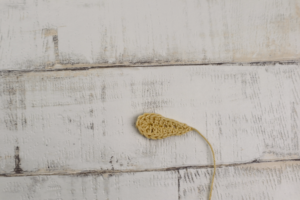
Wings: (make 2)
Use colour A
ch9, starting from second chain from hook, sl st in first st, sc in next 2 sts, hdc in next 2 sts, dc in next 2 sts, in last st put 6dc. Now continue working on the other side of the chain, dc in next 2 sts, hdc in next 2 sts, sc in next 2 sts, and sl st in last st.
You need to sl st into the turning chain.
Fasten off yarn, leaving a long tail to sew.
Beak:
Use colour B
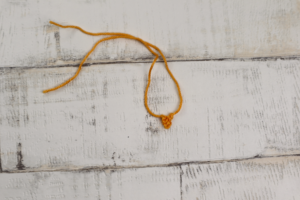
tip: before you make the slip knot, make sure you have a long tail.
Ch3
sl st in first st, sc in second st
Fasten off yarn, leaving a long tail to sew.
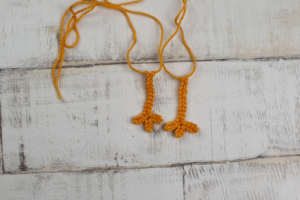
Legs: (make 2)
Use colour B
Tip: before you make the slip knot make sure you have a long tail
ch 14
starting from second chain from hook, sc in first st, sl st to next 2 sts
(ch4, starting from second chain from hook, sc in first st, sl st to next 2 sts) x2
sl st to top of the middle toe, and sl st all the way up on the leg.
Fasten off yarn, leaving along tail to sew.
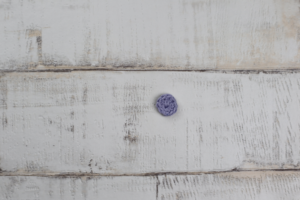
Eggs: (make as many as you wish)
I used colour C and D
Start with a Mr, put 2sc, 2hdc, 2 dc, 2hdc and 2 sc in the ring,
close the ring, fasten off yarn, and weave in the ends.
Assembling the Chick applique:
1. Sew the head to the body with a few sts
2. sew the wings to the body
3. Sew the legs to the body
4. Sew the beak on the head
5. Insert safety eyes and cut the back of the eyes, or alternatively embroider them.
6. Glue the chick and the eggs to the card
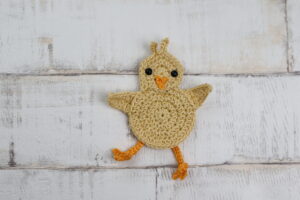
Congratulation, you finished the Easter Chicken card!
I would love to see your finished Greeting Card. Please share it with me on Instagram. You can find me as @zitaandbunny or click on this icon. ![]()

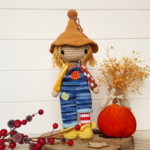
Check out some of my other Easter related patterns:
Crochet chicks, Emma, Bernie and Ruby
Duck lovey