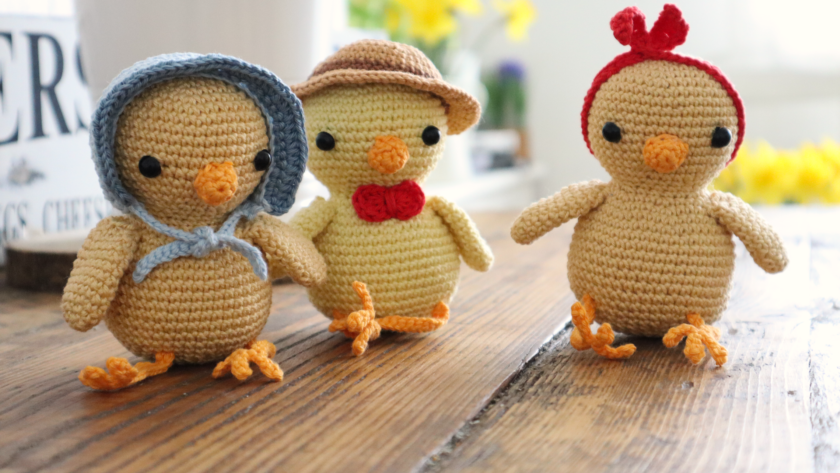
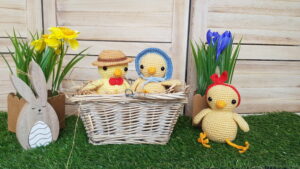
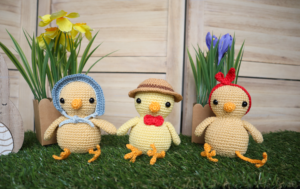
Are you looking for a fun Easter amigurumi crochet pattern to make quickly? Than let me introduce you to Emma, Ruby and Bernie, these adorable chick siblings.
Pin it now, make it later!
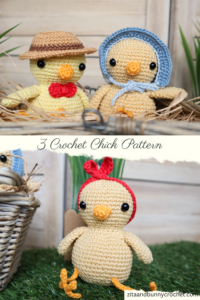
My daughter’s favourite animals were always chickens. Every Easter we went shop by shop to buy all the chick toys we could find, as this is the only time of the year when these cuties are for sale. When I was thinking about my new Easter range, I knew I had to make some chickens for her. When I showed her the three finished dolls, she had so much love in her eyes.
Although she is all grown up now and she doesn’t play anymore, she was still totally out of breath because of the cuteness.
Caution!
Please be very cautious when you make toys for babies or children under the age of 3. If you sew parts on it, make sure they are secure and safe.
I recommend, to embroider the eyes, as the plastic safety eyes can be dangerous. My tutorial for embroidery eyes can be found here.
|
All Zita and Bunny designs are original. Sales of the finished items are encouraged, provided they are handmade by yourself in a limited number, but please give credit to the designer. No mass production. Copyright © 2021 by Zita Renata Elek (Zita and Bunny).All rights reserved. This pattern is for personal use only. No part of it may be reproduced, resold, translated, published, altered, shared or posted in any way. |
**This blog contains affiliate links for products I use, believe in, or recommend. This means I will earn a small commission if you make a purchase from one of their links, and of course it is at no extra cost for you. It helps me to keep Zita and Bunny going and to keep publishing free patterns for you. You can check my full disclosure here. **
You can watch my video here:
Level: Beginner friendly
Size of the finished doll if using the same yarn and hook size: 11cm (not including the legs)
Please keep in mind, that I am using the yarn under technique. With this, the stitches are smaller and tighter, making the finished product smaller in size. If you yarn over, your finished product will be bigger. If you would like to achieve the same size as me and you yarn over, consider using a size smaller hook.
Abbreviations:
sc – single crochet
hdc – half double crochet
dc – double crochet
tr – treble crochet
inc – increase
hdc-inc: 2 hdc in the same stitch
dec – decrease
FLO – use the front loops only
BLO – use the back loops only
ch – chain
st – stitch
sl st – slip stitch
MR – magic ring
sts – stitches
(…) – Repeat instructions for the amount of times given
Materials you need for these crochet chicks:
Affiliate links for the US:
1. Cotton yarn:
A: – Schachenmayr Catania – 206 Honig
OR – Schachenmayr Catania – 403 Vanille
B: – Scheepjes Catona – 411 Sweet Orange
C: – Scheepjes Catona – 173 Bluebell
D: – Schachenmayr Catania – 421 Denim
E: – Scheepjes Catona – 115 Hot Red
F: – Schachenmayr Catania – 179 Camel
G: – Scheepjes Catona – 157 Root Beer
3. Safety eyes – 8mm
5. Scissors
7. Pins
8. Stuffing
Affiliate links for the UK:
1. Cotton yarn:
A: – Schachenmayr Catania – 206 Honig
OR – Schachenmayr Catania – 403 Vanille
B: – Scheepjes Catona – 411 Sweet Orange
C: – Scheepjes Catona – 173 Bluebell
D: – Schachenmayr Catania – 421 Denim
E: – Scheepjes Catona – 115 Hot Red
F: – Schachenmayr Catania – 179 Camel
G: – Scheepjes Catona – 157 Root Beer
3. Safety eyes – 8mm
4. Tapestry Needle
5. Scissors
7. Pins
8. Stuffing

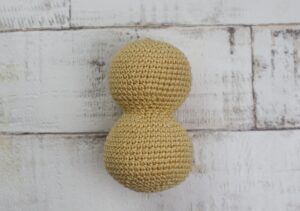
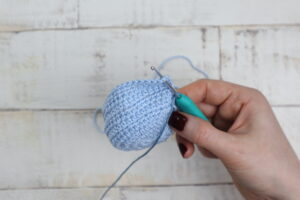
Head and Body:
Use colour A
Rnd 1: 6sc in a MR [6]
Rnd 2: (inc) x6 [12]
Rnd 3: (sc, inc) x6 [18]
Rnd 4: (2sc, inc) x6 [24]
Rnd 5: (3sc, inc) x6 [30]
Rnd 6: (4sc, inc) x6 [36]
Rnd 7: (5sc, inc) x6 [42]
Rnd 8 – 15: sc in every st [42]
Rnd 16: (5sc, dec) x6 [36]
Rnd 17: (4sc, dec) x6 [30]
Rnd 18: (3sc, dec) x6 [24]
Insert safety eyes between round 12-13, leaving 10 sts between. Stuff the head
Rnd 19: (4sc, dec) x4 [20]
Rnd 20: (4sc, inc) x4 [24]
Rnd 21: (2sc, inc) x8 [32]
Rnd 22: (3sc, inc) x8 [40]
Rnd 23: (4sc, inc) x8 [48]
Rnd 24 – 32: sc in every st [48]
start stuffing the body
Rnd 33: (6sc, dec) x6 [42]
Rnd 34: (5sc, dec) x6 [36]
Rnd 35: (4sc, dec) x6 [30]
Rnd 36: (3sc, dec) x6 [24]
Rnd 37: (2sc, dec) x6 [18]
Stuff the body firm
Rnd 38: (sc, dec) x6 [12]
Rnd 39: (dec) x6 [6]
Fasten off yarn, close the hole, weave in the ends.
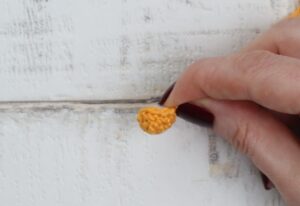
Beak:
Use colour B
Rnd 1: 6sc in a MR [6]
Rnd 2: (2sc, inc) x2 [8]
Rnd 3: sc in every st [8]
Fasten off yarn, leaving a long tail to sew
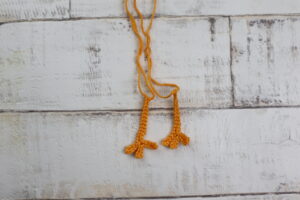
Legs:
Use colour B
Tip: Leave a long tail before you make your slip knot
Make a slip knot.
Rnd 1: ch18, starting from 2nd chain from hook, sc in next st, and sl st to next 3 sts
(chain 5, starting from second chain from hook, sc in first st, and sl st to next 3 sts) x2
sl st to top of the middle toe and sl st to the next st on the leg. slip stitch in next 12 sts on leg.
Fasten off yarn, leaving a long tail to sew.
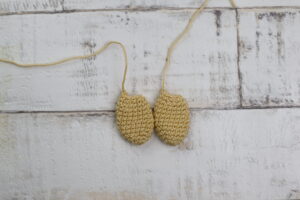
Wings: (make 2)
Use colour A
Rnd 1: 6sc in a MR [6]
Rnd 2: (sc, inc) x3 [9]
Rnd 3: (2sc, inc) x3 [12]
Rnd 4: (3sc, inc) x3 [15]
Rnd 5 – 10: sc in every st [15]
Rnd 11: (3sc, dec) x3 [12]
Rnd 12: (2sc, dec) x3 [9]
Fasten off yarn, leaving a long tail to sew
Assembling the chicks:
1. Sew the beak to the head between the two eyes
2. sew the wing to the body between round 21-22
3. sew the legs to the body between round 32-33
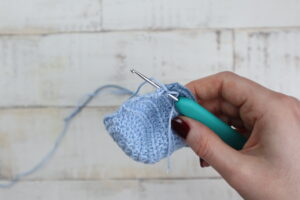
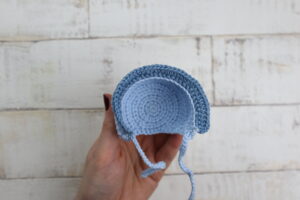
Hat for Emma:
Start with colour C
Tip: ch1 at the beginning of the round does not count as a stitch
Rnd 1: 10 hdc in a MR [10]
Rnd 2: (hdc-inc) x10 [20]
Rnd 3: (hdc, hdc-inc) x10 [30]
Rnd 4: (2hdc, hdc-inc) x8 [32]
Rnd 5-9: ch1 turn,hdc in every st [32]
Rnd 10: ch1 turn, sc in every st, fasten off yarn [32]
Hold the hat with the right side facing you, connect colour D in first sc.
Rnd 11: sc in first 4 sts, (sc in next 3 sts, inc) x6, sc in last 4 sts [38]
Rnd 12: ch1 turn, hdc in first 3sts, (hdc in next 3 sts, hdc-inc) x8, hdc in last 3sts [46]
Fasten off yarn, weave in the ends
connect colour C (refer to picture)
ch 23, starting from second chain from hook, sl st in next 22 sts, sc all around the back of the the hat, until you reach the other side. ch23, starting from second chain from hook, sl st in next 22 sts. Sl st to the hat, fasten off yarn, weave in the ends.

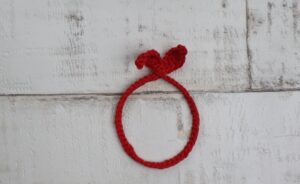
Headband for Ruby:
Use colour E
Make a slip knot,
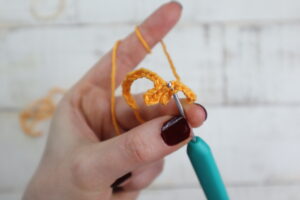
Ch 71, starting from second chain from hook, sl st, sc, hdc, dc, tr, dc, hdc, sc. sl st in next 54sts, then sc, hdc, dc, tr, dc, hdc, sc, sl st in last 8 sts
Fasten off yarn, leaving a long tail.
Weave in the short tail. Use the long tail to sew the two sides of the headband together.
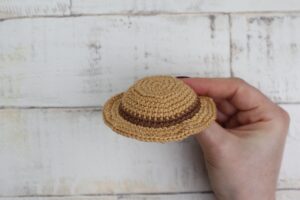
Hat for Jack:
Start with colour F
Rnd 1: 8sc in a MR [8]
Rnd 2: (inc) x8 [16]
Rnd 3: (sc, inc) x8 [24]
Rnd 4: (2sc, inc) x8 [32]
Rnd 5: Using BLO (7sc, inc) x4 [36]
Rnd 6: (8sc, inc) x4 [40]
Rnd 7 – 8: sc in every st, in last st in round 8 change to colour G [40]
Rnd 9-10: sc in every st, in last st in round 10 change back to colour F [40]
Rnd 11: Using FLO (sc, inc) x20 [60]
Rnd 12: (2sc, inc) x20 [80]
Rnd 13: sc in every st [80]
Fasten off yarn, weave in the ends.
Congratulation, you finished the chick dolls!
I would love to see your finished chicken dolls. Please share it with me on Instagram. You can find me as @zitaandbunny or click on this icon. ![]()

Check out some of my other Easter related patterns:
Bunny in carrot
Duck lovey