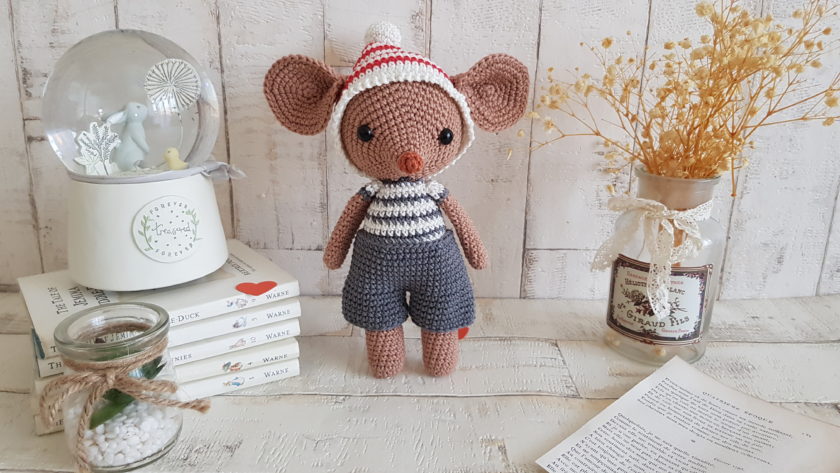
Are you looking for an easy crochet mouse pattern? Then look no further as I have a great pattern that is not only easy, but quick and free too.
Pin it now, make it later!
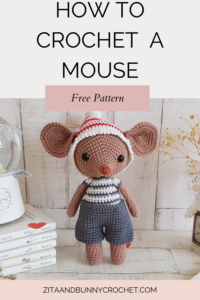
As this crochet mouse pattern only uses basic crochet stitches, this is an easy and quick beginner friendly crochet project for you.
Let’s be honest here. People generally don’t like mice. No one pops into my head who ever told me they are fond of mice, or anyone who don’t get shivering from them. I am sure there is at least one person out there who now jumps up and screams ‘I like mice’, but it is very unusual.
On the other hand, crochet mice are pretty cool and cute. I am sure most people like them and most crocheter already crocheted at least one mouse. It is the same with books. Mice are overused characters and they appear in every famous children’s books.
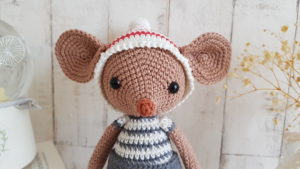
I personally like to crochet mice because of their big ears. I think they are so cute I can not handle the cuteness.
The story of Milo, the Mouse:
Milo is the sixth child out of nine of Mr and Mrs Cheesy. The Mice family is best friends with the Bunny family. They visit each others houses very often. These visits always end up as noisy, headless gatherings. Mrs Mice and Mrs Bunny share their famous recipes, they talk about their recent crochet projects and laugh loud about mother related things. Mr Mice and Mr Bunny talk about big, important questions about the world, and life, such as the weather, the crops and of course about which team scored the day before and which didn’t. But these four are not the source of the noise. Oh no. They are the ones, who try to ignore the noise by sipping their teas from their beautiful china cups. The real sources are the nine mice children and the ten bunny children. When they come together, they run up and down on the stairs, they jump on every bed in the house, they sing and shout and they play on the piano. They do everything you can imagine and even beyond. These nineteen young ones make so much noise, that even the Duck family can hear them who lives at the end of Bunny Lane by the lake. These gatherings are Milo’s favourite things ever. He loves to play with his best friends and eat delicious cakes all day.
Caution!
Please be very cautious when you make toys for babies or children under the age of 3. If you sew parts on it, make sure they are secure and safe.
I recommend, to embroider the eyes, as the plastic safety eyes can be dangerous. My tutorial for embroidery eyes can be found here
|
All Zita and Bunny designs are original. Sales of the finished items are encouraged, but please give credit to the designer. Copyright © 2021 by Zita Renata Elek (Zita and Bunny).All rights reserved. This pattern is for personal use only. No part of it may be reproduced, resold, translated, published, altered, shared or posted in any way. |
**This blog contains affiliate links for products I use, believe in, or recommend. This means I will earn a small commission if you make a purchase from one of their links, and of course it is at no extra cost for you. It helps me to keep Zita and Bunny going and to keep publishing free patterns for you. You can check my full disclosure here. **
Level: Easy
Size of the finished toy if using the same yarn and hook size: approximately 25cm
Abbreviations:
MR – magic ring
sc – single crochet: Insert hook into stitch, yarn over, pull up a loop (2 loops on hook). Yarn over, pull through both loops on hook.
inc – increase: put two single crochet in the same stitch
dec – decrease: : Insert your hook into the front loop only of the next stitch (2 loops on your hook). Insert your hook into the front loop only of the following stitch (3 loops on your hook). Yarn over, pull through all 3 loops.
ch – chain
st – stitch
sl st – slip stitch: insert hook into stitch, yarn over, pull up a loop, you will have 2 loops on your hook. Pull the first loop through the second loop
(…) – Repeat instructions for the amount of times given
Materials you need for this crochet mouse:
Affiliate links for the US:
1. Cotton yarn,
I used:
A – Schachenmayr Catania – 437 Sunkissed
B- Scheepjes Catona – 105 Bridal White
C – Scheepjes Catona – 501 Anthracite
D – Scheepjes Catona – 115 Hot Red
E – Scheepjes Catona – 383 Ginger Gold
3. Safety eyes, 10mm
5. Scissors
7. Pins
8. Stuffing
Affiliate links for the UK:
1. CottonYarn:
A – Schachenmayr Catania – 437 Sunkissed
B- Scheepjes Catona – 105 Bridal White
C – Scheepjes Catona – 501 Antracite
D – Scheepjes Catona – 115 Hot Red
E – Scheepjes Catona – 383 Ginger Gold
5. Scissors
7. Pins
8. Stuffing

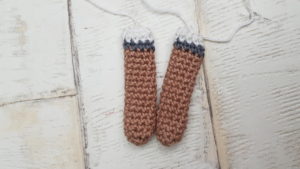
Arms: (make 2)
Use colour A
1: 5sc in a MR [5]
2: (inc) x5 [10]
3 – 16: sc in every st around, in the last stitch change to colour C [10]
17: sc in every st around, in the last stitch change to colour B [10]
18-19: sc in every st around [10]
Fasten off yarn, leave a long tail to sew.
Inner ears: (make 2)
Use colour A
1: 6sc in a MR [6]
2: (inc) x6 [12]
3: (sc, inc) x6 [18]
4: (2sc, inc) x6 [24]
5: (3sc, inc) x6 [30]
6: (4sc, inc) x6 [36]
Fasten off yarn.
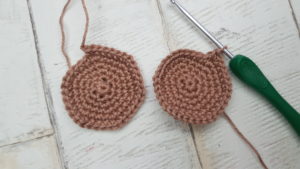
Outer Ears: (make 2)
Use colour A
1 -6: repeat rounds 1-6 of inner ears. DO NOT FASTEN OFF YARN
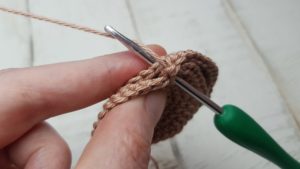
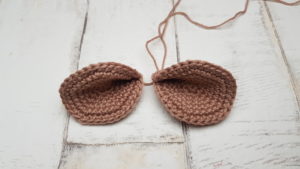
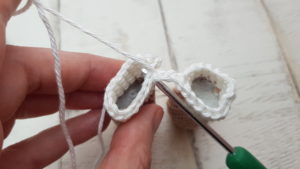
Holding outer ear and inner ear together with right side facing you (wrong sides together), working through both sides and matching stitches sc in each stitch around.
Fasten off yarn, leaving a long tail to sew. Do not stuff the ears.
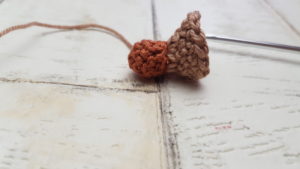
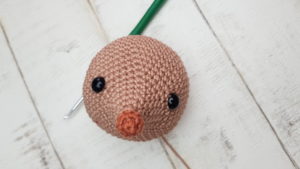
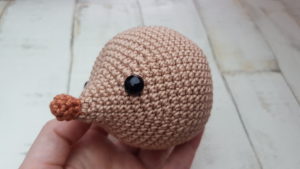
Head:
Start with colour E
1: 4sc in a MR [4]
2: (inc) x4 [8]
3: sc in every st around [8]
4: (dec) x4, in the last stitch change to colour A [4]
Stuff the nose
5: (inc) x4 [8]
6: 4sc, inc, 3sc [9]
7: (2sc, inc) x3 [12]
8: (3sc, inc) x3 [15]
9: (4sc, inc) x3 [18]
10: (5sc, inc) x3 [21]
11: (6sc, inc) x3 [24]
12: (3sc, inc) x6 [30]
13: (4sc, inc) x6 [36]
14: (5sc, inc) x6 [42]
Insert safety eyes between row 8-9, leaving 15 stitches between them
15: (6sc, inc) x6 [48]
16: (7sc, inc) x6 [54]
17-25: sc in every st around [54]
26: (7sc, dec) x6 [48]
27: (6sc, dec) x6 [42]
28: (5sc, dec) x6 [36]
29: (4sc, dec) x6 [30]
30: (3sc, dec) x6 [24]
31: (2sc, dec) x6 [18]
stuff the head firm
32: (sc, dec) x6 [12]
33: (dec) x6 [6]
Fasten off yarn, weave in the ends.
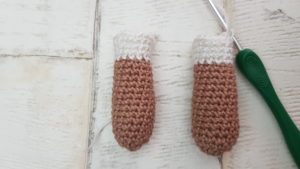
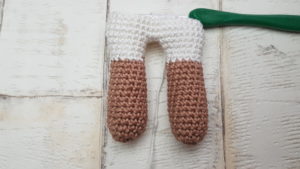
Legs: (make 2)
Use colour A
1: 7 sc in a MR [7]
2: (inc) x7 [14]
3 – 15: sc in every st around, in last stitch change to colour B [14]
16 – 17: sc in every st around [14]
18: (6sc, inc) x2 [16]
19: (7sc, inc) x2 [18]
Stuff the legs, and on the 1st one fasten off yarn.
On the 2nd leg, do not fasten off yarn, keep crocheting, we will connect the legs and continue on the body
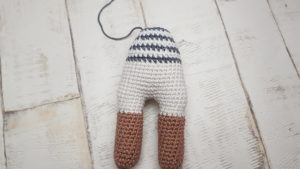
Body:
Continue with colour A
1: ch2, sc in the first stitch on first leg, sc in next 17 sts on leg, working on ch2, sc in all ch spaces, on second leg, sc in every 18 st, sc in the next 2 sts in unused loops on the other side of ch2. [40]
2-4: sc in every st around [40]
5: (8sc, dec) x4 [36]
6-9: sc in every st around [36]
10: (7sc, dec) x4, in the last stitch change to colour C [32]
11: sc in every st around, in the last stitch change to colour B [32]
12-13: sc in every st around, in the last st change to colour C [32]
14: (6sc, dec) x4, in the last st change to colour B [28]
15-16: sc in every st around, in the last st change to colour C [28]
17: (5sc, dec) x4, in the last st change to colour B [24]
18: sc in every st around [24]
19: (4sc, dec) x4, in the last st change to colour C [20]
20: sc in every st around [20]
Stuff the body firm. Fasten off yarn, leaving a long tail to sew the head to the
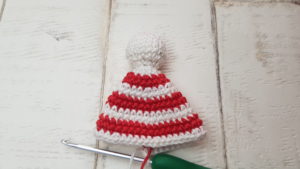
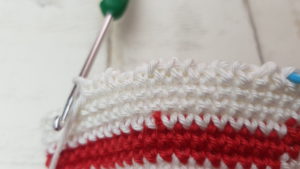
Hat:
Start with colour B
1: 6sc in a MR [6]
2: (inc) x6 [12]
3: (sc, inc) x6 [18]
4 – 6: sc in every st around [18]
7: (sc, dec) x6 [12]
8: (dec) x6 [6]
Stuff the hat up to this pint, do not stuff the rest
9: (inc) x6 [12]
10: sc in every st around, in last stitch change to colour D [12]
11: (sc, inc) x6 [18]
12: sc in every st around, in the last st change to colour B [18]
13: (2sc, inc) x6 [24]
14: sc in every st around, in the last st change to colour D [24]
15: (3sc, inc) x6 [30]
16: sc in every st around, in the last st change to colour B [30]
17: sc in every st around [30]
18: (4sc, inc) x6, in the last st change to colour D [36]
19 – 20: sc in every st around, in the last st change to colour B [36]
21: (5sc, inc) x6 [42]
22: sc in every st around, in the last st change to colour D [42]
23: sc in every st around [42]
24: (6sc, inc) x6, in the last st change to colour B [48]
25 – 26: sc in every st around, in the last st change to colour D [48]
27: sc in every st around [48]
28: (7sc, inc) x6, in the last st change to colour B [54]
29 – 30: sc in every st around, in the last st change to colour D [54]
31 – 32: sc in every st around, in the last st change to colour B [54]
33 – 35: sc in every st around [54]
36: Sl st to 1st sc, ch1, sc in same st. (ch1,sc) x53, ch1 sl st to 1st sc.
Fasten off yarn, leaving a long tail to sew

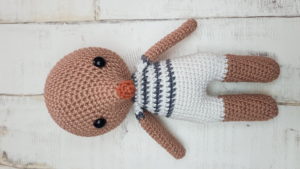
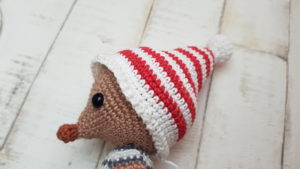
Assembling Milo, the Mouse:
1: Sew the head to the body
2: Sew the arms to the body by row 19
3: Sew the hat to the head
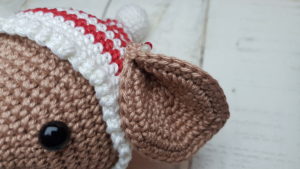
4: Sew the ears on the hat. It depends on how you put the hat on. I sewed it on a bit higher than the eyes to the second white row.
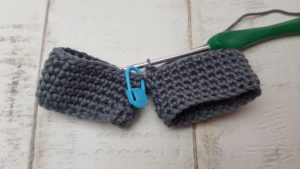
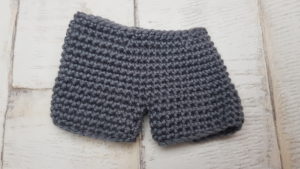
Trousers:
Use colour C
Leg1:
1: ch25, sl st to 1st st to form a ring [25]
2: ch1, 9does not count as a st, sc in same st. sc in next 24 sts [25]
Do not sl st, start working in continuous rounds.
3 – 6: sc in every st around [25]
On 1st leg fasten off yarn, weave in the ends
Leg 2:
Repeat row 1- 6, but do not cut yarn off, continue with row 7
7: sc in the first stitch on first leg, sc in next 24 sts. On second leg, sc in every 25 sts [50]
8 – 17: sc in every st around [50]
18: (23sc, dec) x2 [48]
19: (6sc, dec) x6 [42]
Fasten off yarn, weave in the ends.
Congratulation, you finished Milo, the Mouse!
![]()
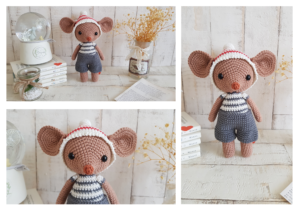
I would love to see your finished crochet mouse, Milo. Please share it with me on Instagram. You can find me as @zitaandbunny or click on this icon. ![]()