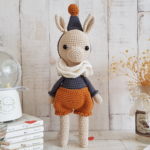
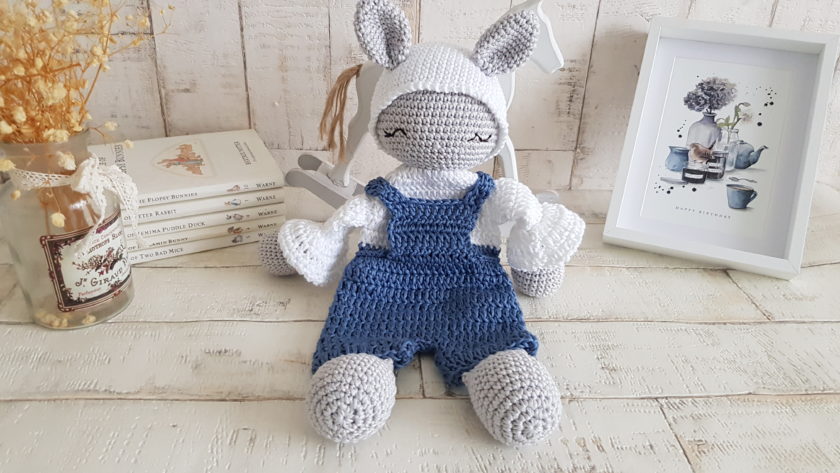
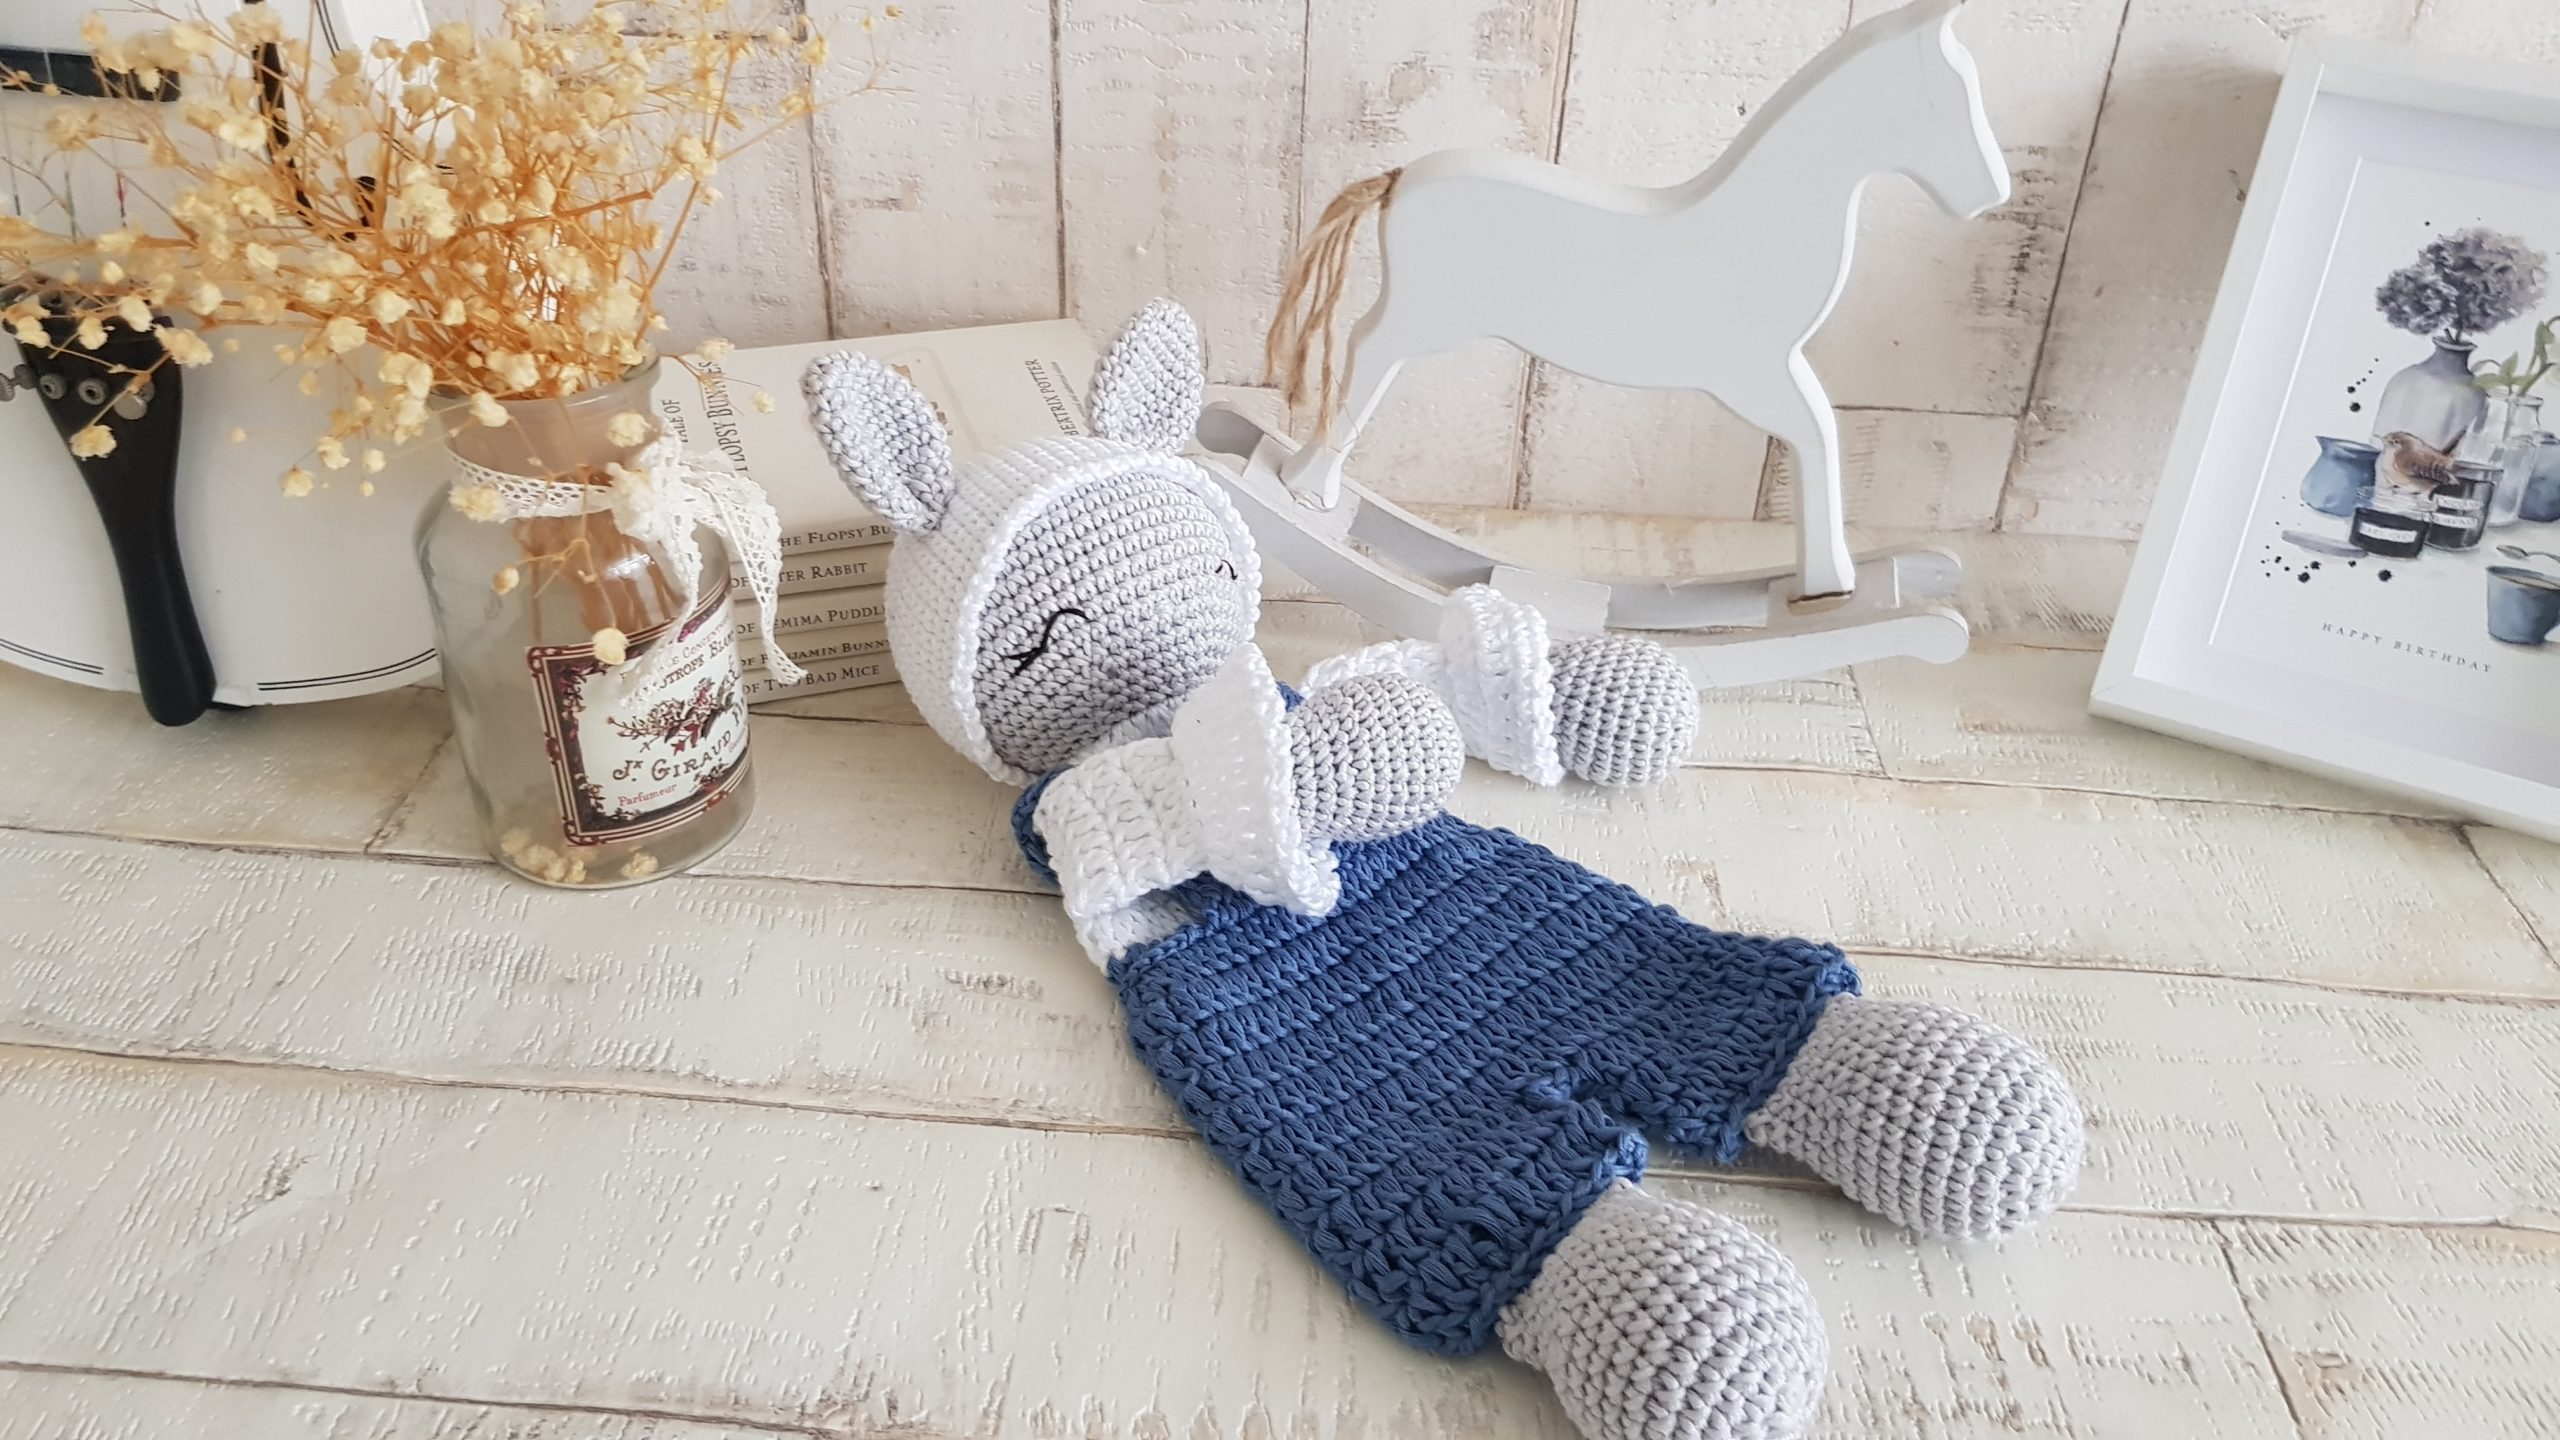
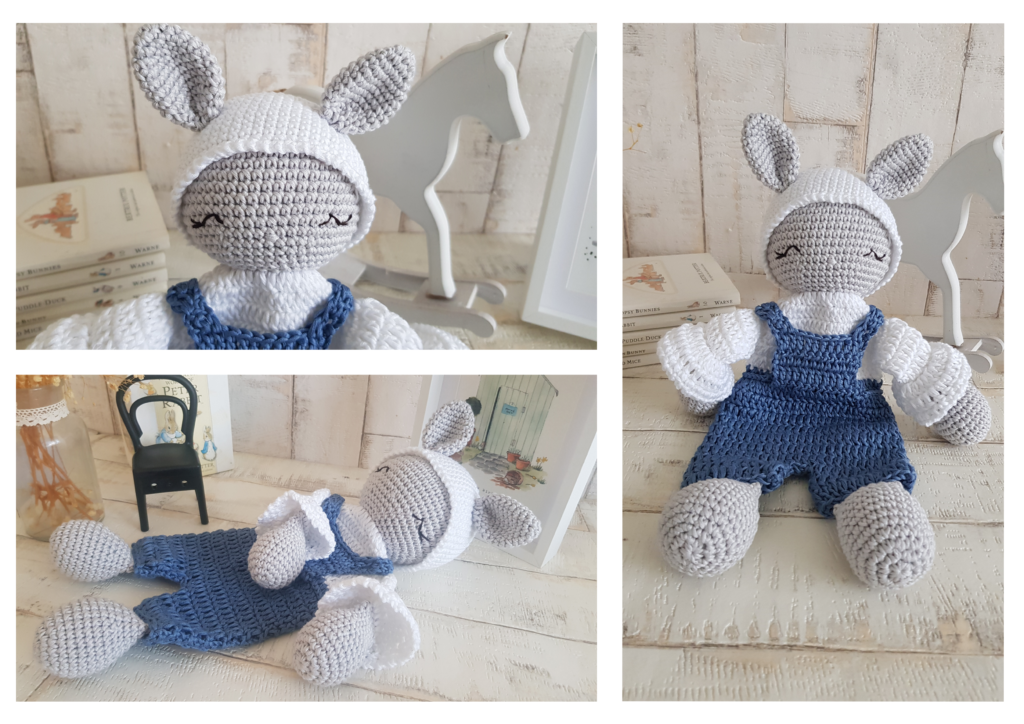
What could be more excited than to make this crochet bunny ragdoll to a new baby? It is soft and cuddly, and can be made with any colour.
Pin it now, make it later!
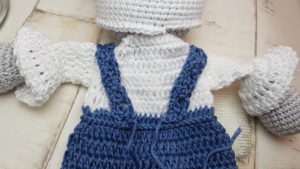
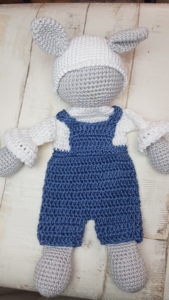
When there is a new baby in our family, somehow we always want to gift something unique and pretty. This crochet bunny ragdoll lovey can be the answer to that. It is easy and fun to make and it can be the best friend to any babies, toddlers or even older children. The head, the arms and the legs are stuffed, but the body is flat, which makes it huggable for smaller hands. Simply put crochet bunnies are the best.
My connection with toys:
My toy obsession started before I could remember my life. I know every children like toys, but my case was different. I loved and respected toys. All I wanted was to work with toys and live with toys. When I was around 4 years old I had a boyfriend, the son of my parent’s friends, who with we always imagined our future. Together. We had a dream of getting married and buying a toy shop. All I wanted was working in a toyshop by the till.
I was very lucky, because on the opposite side of the house we lived in, there was a toyshop. Every day when we walked home from nursery, we walked by the window and I could spend a few minutes looking at the toys. Once a week we also went inside and I could walk around. It was a small shop full of toys. I just loved it. I believe I still remember the smell of the shop, but maybe I just imagine it. The point is , that I love to be surrounded by toys, and I feel very lucky to be able to design them. Although I don’t own a toyshop, I feel like my childhood dream is somehow fulfilled.
The story of Morty:
Morty the little crochet baby bunny feels the best when he is with his human baby friend. He loves to be cuddled and carried around. Morty and his best friend have this special bond, which make them unrepeatable. They sleep together, they eat together, they watch tv together, they go to the shops together. His human friend even takes him to nursery whenever it is possible. Morty is the happiest when he can feel the love from his best friend.
Caution!
Please be very cautious when you make toys for babies or children under the age of 3. If you sew parts on it, make sure they are secure and safe.
I recommend, to embroider the eyes, as the plastic safety eyes can be dangerous. My tutorial for embroidery eyes can be found here
|
All Zita and Bunny designs are original. Sales of the finished items are encouraged, but please give credit to the designer. Copyright © 2021 by Zita Renata Elek (Zita and Bunny).All rights reserved. This pattern is for personal use only. No part of it may be reproduced, resold, translated, published, altered, shared or posted in any way. |
**This blog contains affiliate links for products I use, believe in, or recommend. This means I will earn a small commission if you make a purchase from one of their links, and of course it is at no extra cost for you. It helps me to keep Zita and Bunny going and to keep publishing free patterns for you. You can check my full disclosure here. **
Abbreviations:
MR – magic ring
sc – single crochet
inc – increase
dec – decrease
dc – double crochet
BLO – Use the back loops only
FLO – Use the front loops only
ch – chain
st – stitch
sl st – slip stitch
MR – magic ring
(…) – Repeat instructions for the amount of times given
Materials you need for this crochet bunny:
Affiliate links for the US:
1. Dk cotton yarn,
I used:
A – Drops Muskat – 19 Light Grey
B- Drops Muskat – 18 – White
C – Drops Muskat – 36 Denim Blue
4. Scissors
6. Pins
7. Stuffing
Affiliate links for the UK:
1. Dk cotton yarn,
I used:
A – Drops Muskat – 19 Light Grey
B- Drops Muskat – 18 – White
C – Drops Muskat – 36 Denim Blue
4. Scissors
6. Pins
7. Stuffing

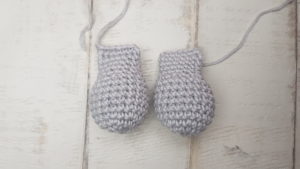
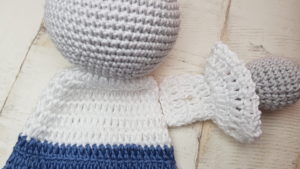
Arms: (make 2)
Start with colour A
1: 7sc in a MR [7]
2: (inc) x7 [14]
3: (sc, inc) x7 [21]
4 – 9: sc in every st around [21]
10: (sc, dec) x7 [14]
11 – 14: sc in every st around [14]
Stuff the arms.
Press both layers of arms together so that they lay flat on top of each other, aligning the stitches side by side. sc together the opposite stitches. You need to have 6sc. Fasten off yarn.
Connect colour B into FLO in the first stitch
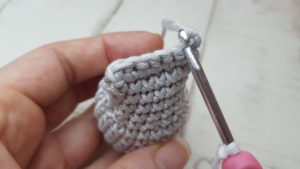
15: ch3 (count as a dc) dc in next 5 stitches, Continue on the other side, dc in next 6 stitches. sl st to top of ch3 [12]
16: using BLO ch3 (count as a dc), dc in next 4 stitches, 2dc in next stitch dc in next 5sts, 2 dc in last stitch. sl st to top of ch3 [14]
17 – 18: dc in every st around [14]
Press both layers of arms together so that they lay flat on top of each other, aligning the stitches side by side. sc together the opposite stitches. I put 6sc. Fasten off yarn, leaving a long tail to sew.
Connect colour B to FLO made in row 16.
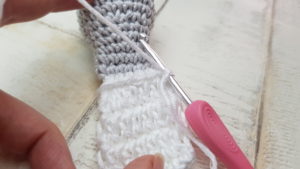
1: ch3(count as a dc), dc in same st, 2dc in next 11 stitches, sl st to top of ch3 [24]
2: ch3 (count as a dc) dc in next 23 sts stitches, sl st to top of ch3 [24]
3: ch1, sc in first stitch, (ch1, sc) x23, ch1, sl st to 1st sc [24]
Fasten off yarn, weave in the ends.
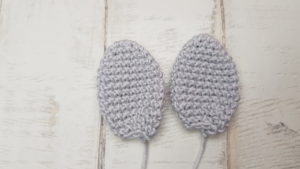
Legs: (make 2)
Use colour A and
1: 6 sc in a MR [6]
2: (inc) x6 [12]
3: (sc, inc) x6 [18]
4:(2sc, inc) x6 [24]
5-10. sc in every st around [24]
11: (2sc, dec) x6 [18]
12 – 15: sc in every st around [18]
Stuff the legs
16: Press both layers of arms together so that they lay flat on top of each other, aligning the stitches side by side. sc together the opposite stitches. I put 8sc.
17 – 18: ch1, turn, sc x8 [8]
fasten off yarn, weave in the ends.
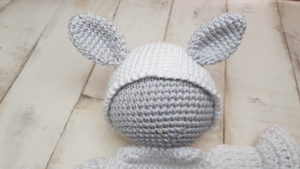
Ears: (make 2)
Use colour A
1: 6sc in a MR [6]
2: (sc, inc) x3 [9]
3: (2sc, inc) x3 [12]
4: (3sc, inc) x3 [15]
5: (4sc, inc) x3 [18]
6-11: sc in every st around [18]
12: (4sc, dec) x3 [15]
13: (3sc, dec) x3 [12]
14: (2sc, dec) x3 [9]
Fasten off yarn, leaving a long tail to sew.
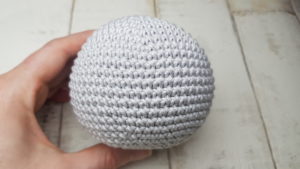
Head:
Use colour A
1: 6sc in a MR [6]
2: (inc) x6 [12]
3: (sc, inc) x6 [18]
4: (2sc, inc) x6 [24]
5: (3sc, inc) x6 [30]
6: (4sc, inc) x6 [36]
7: (5sc, inc) x6 [42]
8: (6sc, inc) x6 [48]
9: (7sc, inc) x6 [54]
10-18: sc in every st around [54]
19: (7sc, dec) x6 [48]
20: (6sc, dec) x6 [42]
21: (5sc, dec) x6 [36]
22: (4sc, dec) x6 [30]
23: (3sc, dec) x6 [24]
24: (2sc, dec) x6 [18]
Stuff the head firm
25: using BLO (sc, dec) x6 [12]
26: (dec)x6 [6]
Close the hole, fasten off yarn.
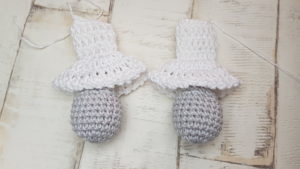
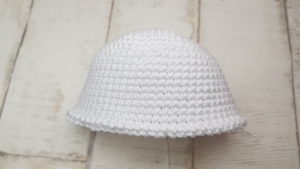
Hat:
Use colour B
1. 6sc in a MR [6]
2. (inc) x6 [12]
3. (sc, inc) x6 [18]
4. (2sc, inc) x6 [24]
5. (3sc, inc) x6 [30]
6. (4sc, inc) x6 [36]
7. (5sc, inc) x6 [42]
8. (6sc, inc) x6 [48]
9. (7sc, inc) x6 [54]
10-20. sc in every st around [54]
21. sl st to 1st st, ch1, sc in same stitch, (ch1, sc) x53, ch1, sl st to 1st sc [54]
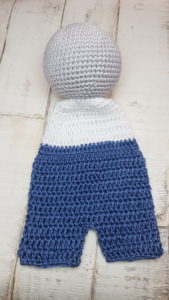
Body:
Tip: ch3 at the beginning of every row count as a dc
Connect colour B to the 1st FLO made in row 25

1: ch3, dc in same stitch, 2dc in next 17sts, sl st to top of ch3 [36]
2: ch3, dc in same stitch, 1dc in next 17sts, 2dc in next stitch, 1 dc in last 17 stitches, sl st to top of ch3 [38]
3: ch3, dc in same stitch, 1dc in next 18sts, 2dc in next stitch, 1 dc in last 18 stitches, sl st to top of ch3 [40]
4: ch3, dc in same stitch, 1dc in next 19sts, 2dc in next stitch, 1 dc in last 19 stitches, sl st to top of ch3 [42]
5: ch3, dc in same stitch, 1dc in next 20sts, 2dc in next stitch, 1 dc in last 20 stitches, sl st to top of ch3 [44]
6: ch3, dc in same stitch, 1dc in next 10sts, (2dc in next stitch, 1 dc in next 10 stitches) x3, sl st to top of ch3, fasten off yarn [48]
Connect yarn C in the first dc made in row 6,
7: ch3, dc in same stitch, 1dc in next 23sts, 2dc in next stitch, 1 dc in last 23 stitches, sl st to the BLO of top of ch3 [50]
8: Using BLO ch3, dc in same stitch, 1dc in next 24sts, 2dc in next stitch, 1 dc in last 24 stitches, sl st to top of ch3 [52]
9 – 10: dc in every st around [52]
Stitch mark stitch 12, 15, 38 and 41
11: ch3, dc in next 11 stitches (the last stitch will be your marked stitch 12), dc in marked stitch 41 on the other side, dc in next 11 stitches. sl st to top of ch3 [24]
12 – 13: ch3, dc in next 23 stitches, sl st to top of ch3 [24]
Fasten off yarn, weave in the ends.
14: connect colour C in marked stitch 15, ch3, dc in next 23 stitches (the last stitch should be marked stitch 38, sl st to top of ch3 [24]
15 – 16: ch3, dc in next 23 stitches, sl st to top of ch3 [24]
fasten off yarn, weave in the ends
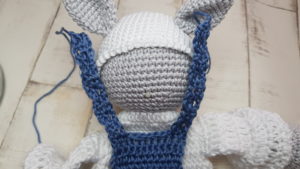
Assembling Morty the Crochet Bunny:
1. sew the arms to the body to row 3-4
2: sew the hat on the head
3: sew the ears on the hat
4: sew the legs to he trousers. Get a long yarn, same colour as the trousers. Insert the leg between the trousers and sew them together. Make sure your needle goes through both the trousers and the legs too.
5: close the hole between the two legs of the trousers with the same yarn you sewed the legs with.
6: embroider the eyes to row 18, leaving 9 sts between them. You can find the tutorial here
7: embroider the nose 1 row below the 2 eyes over 1 stitch. Embroider the nose twice horizontally
8: sew the straps to the back of the trousers.

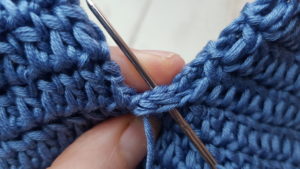
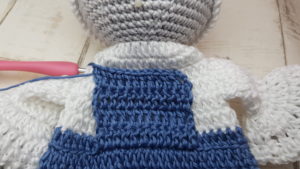
Bib of the Trousers and Straps:
Find the middle of the front of your trousers. You will need 12 stitches to make the bib of the trousers.
I connected my yarn C into the FLO, stitch 43 made in row 8, but you can choose another side of the body. It really depends on where you embroidered the eyes. The middle should be in line with the nose.
1: ch3, dc in next 11 stitches [12]
2 – 4: ch3, turn, dc in next 11 sts [12]
5: ch3, turn, dc in next 2 stitches [3]
6 – 14: ch3, turn, dc in next 2 sts [3]
fasten off yarn
Connect colour C on the 1st stitch on the other side if the trousers, and repeat row 1 – 14.
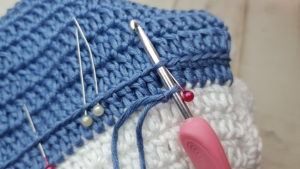
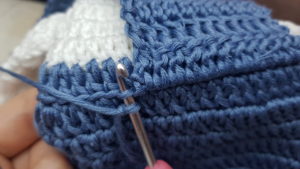
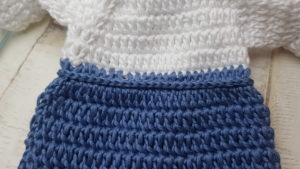
Shirt Edge:
connect colour C to the first FLO stitch made in row 8, next to the bib. sl st in every stitche around. sl st to 1st sl st, fasten off yarn, weave in the end.
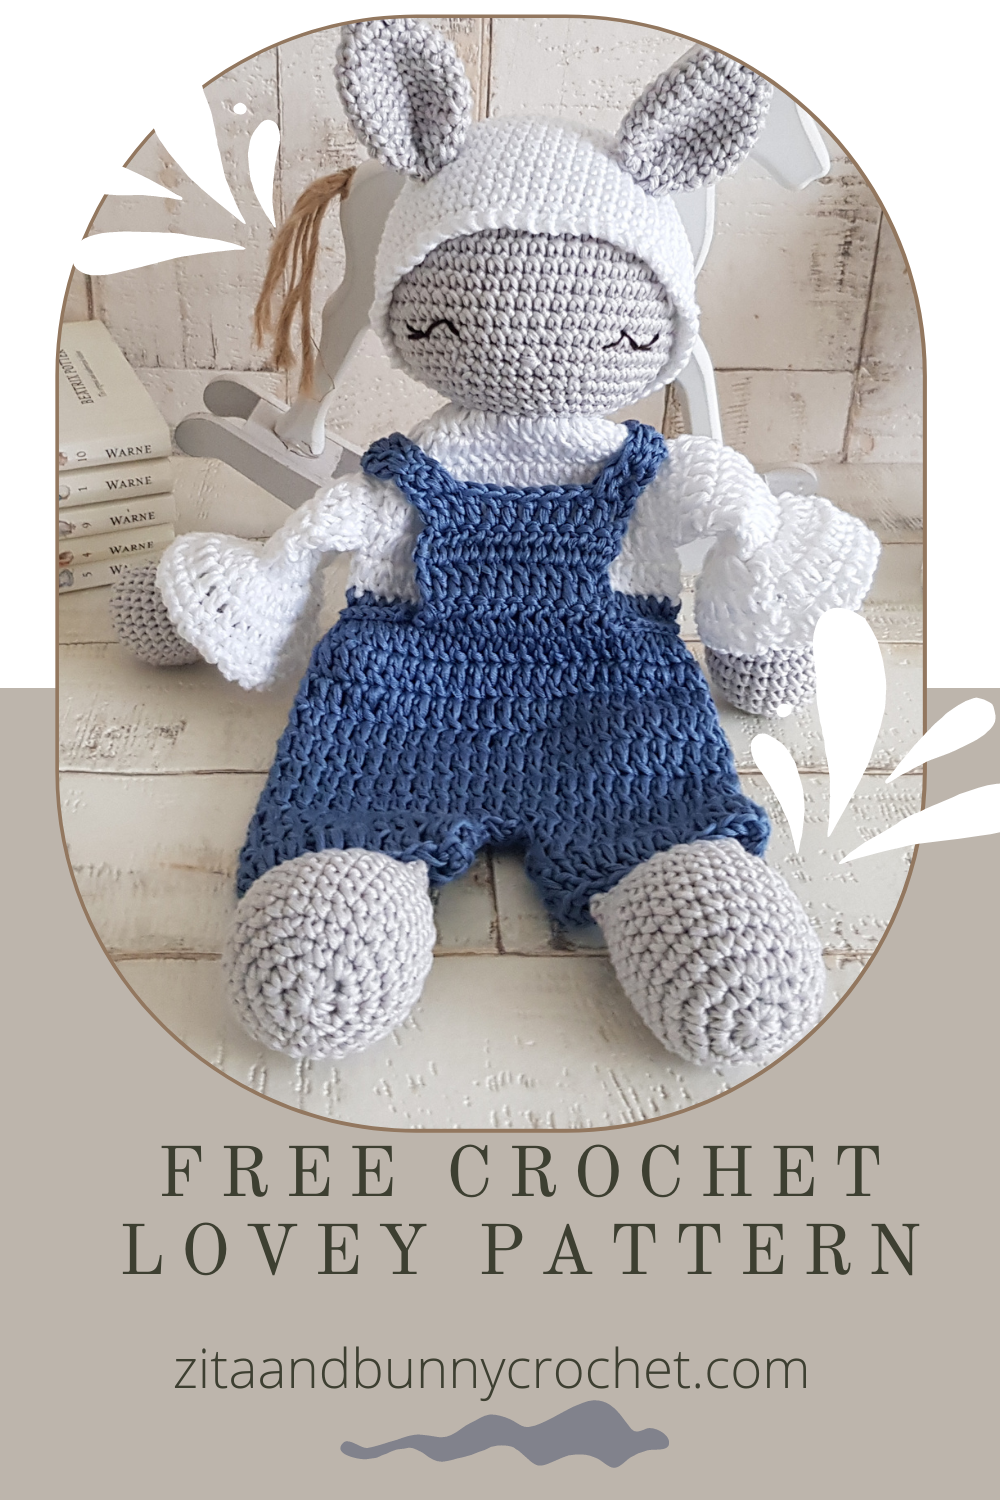
Congratulations you finished Morty, the crochet Bunny! He is ready to be a best friend for a little one.
I would love to see your finished crochet bunny, Morty. Please share it with me on Instagram. You can find me as @zitaandbunny or click on this icon. ![]()

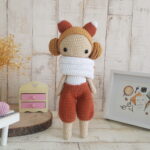
Check out my other bunny patterns:
Barry
Snowball
Zara